Crochet Hexagon Baby Blanket Guide

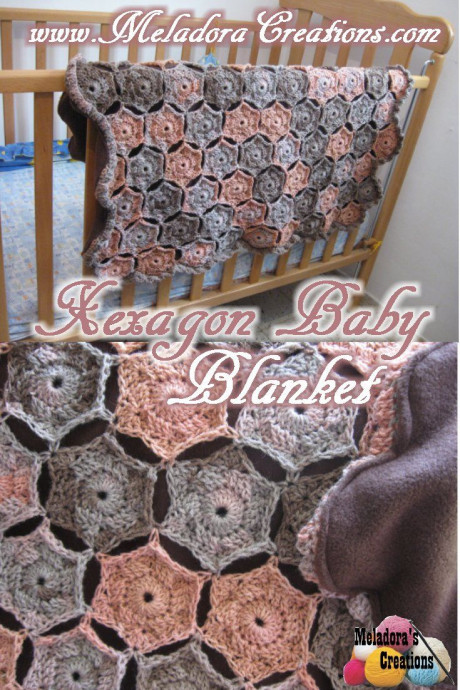
The Crochet Hexagon Baby Blanket is a delightful project that is both practical and charming for little ones. Each hexagon is carefully crafted with soft and cozy yarn, making it perfect for snuggling up your precious bundle of joy. The intricate hexagon design adds a touch of beauty and uniqueness to the blanket, showcasing the love and effort put into every stitch. Whether you're a seasoned crocheter or a beginner, this project is a wonderful way to create a handmade heirloom that will be treasured for years to come. So grab your crochet hook, pick out some pastel hues, and get ready to bring a touch of handmade warmth to your little one's nursery!
Required Materials
For this project, you will need:
- HOOK: 5 mm hook or size H hook for the US
- YARN: 3 skeins of worsted weight yarn, 4 ply US, 10 ply AU 100 grams / 3.5 oz – 240 meters / 262 yards
- Tapestry Needle to hide your tails
- And optional, fleece or some kind of material to sew onto the back of the blanket, making it very warm.
Abbreviations
- ch = Chain
- sl st = Slip Stitch
- st = Stitch
- sk = Skip
- YO = Yarn Over
- SC = Single Crochet
- DC = Double Crochet
Getting Started
Initial Steps
Ch 4, sl st to make a ring.
Round 1
Ch 2 (ch 2 does not count as a stitch) and dc 18 into ring, sl st into beginning st to join. (18 sts)
Round 2
Ch 1, dc using back loop only into the next three stitches.
Then dc into the front stitches of the same three dc’s you just did.
Repeat for whole round, sl st into beginning stitch to join. (36 sts)
I have made a beginner tutorial for the Double Crochet Crossover Stitch if you need it.
Round 3
Ch 2, this counts as first dc, dc 4 more into the same stitch. * Skip 2 sts, sc into next stitch, skip 2 sts and dc 5 into next stitch * Repeat for rest of round. Sl st to top of ch 2 to end round, leaving a bit of tail to cut yarn. (6 shells)
Connecting the Hexagons
To connect the pieces, you will have to stop short of 6 shells to do your connections as we go. This is how:
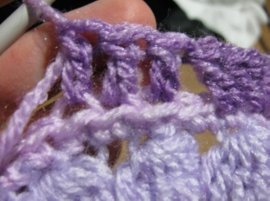
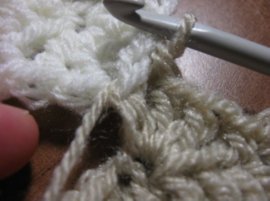
To make your first connection, you want to stop on your 5th shell and do only 2 full dc’s. On your third dc, go through the first two loops as usual, but before you finish the dc slip your hook through the point of one of the points of the previous hexagon that you did.
Then YO and pull through all loops.
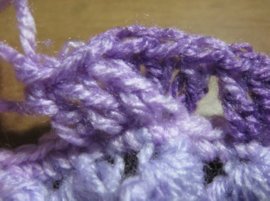
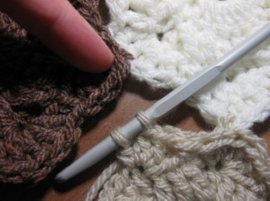
Then finish the last two dc’s of your shell as normal.
Continue to make your hexagon until you reach your next point and repeat the connection method.
Now you have two connected at two points. Finish your shell again and the rest of the round, sl st into beginning ch and leave a tail to be worked in later, cut your yarn.
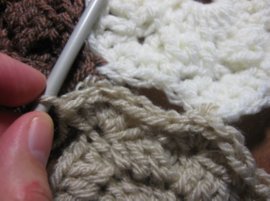
To make a center connection, you do the same as above, only you start your connect on your 4th shell instead of your 5th.
And the second connection you make will be in the center stitch where you made your connects with the last two hexagons.
Then finish your shell and continue.
Continue to connect your hexagons this way until you have 3 rows connected: a 9 hexagon row, a 10 hexagon row, and a 9 hexagon row like shown below.
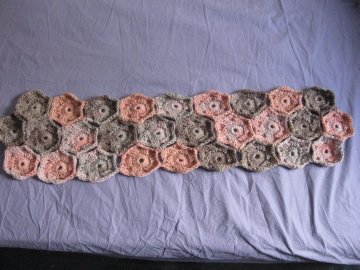
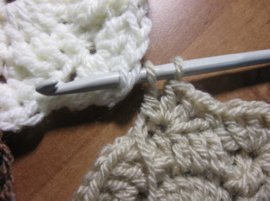
When you're ready to start connecting your fourth row, it’s easiest to connect the hexagons as shown in the pictures below.
Then continue as usual for a total of 9 rows or until it’s as big as you like.
Making the Ruffle Border
Making the ruffle border is very easy. All you do is start in one corner of the afghan and single crochet all the way around. Sl st into beginning stitch. To make the ruffles, you do the same as in the hexagon for round 3, doing your double crochet crossover stitch all the way around. Then you're done!