Crochet Tiny Amigurumi Gnome

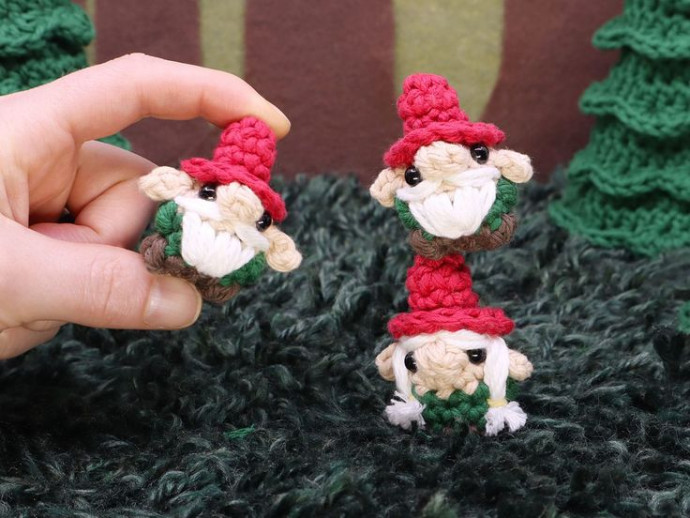
Crocheting a tiny Amigurumi gnome is such a whimsical and delightful craft project! These pint-sized creatures are adorable with their small stature and charming details. From their pointy hats to tiny beards, each little gnome has its own personality that brings a smile to your face. Whether you're a beginner or seasoned crocheter, creating these tiny Amigurumi gnomes is a fun and rewarding experience that will surely brighten up your day. Give it a try and let your creativity run wild in the enchanting world of crochet gnomes!
Materials
Cotton Yarn in the following colors:
- Color A (Accent Color) – (Note: The sample uses Red for the hat in the pattern steps)
- White (for the Beard)
- Brown (for the Pants)
- Green (for the Shirt)
- Jute (for Skin tone)
- Crochet Hook: G6 / 4.00 mm
- Safety Beads (x2): 6 mm
- Stuffing
- Darning Needle
Abbreviations
- ch: Chain Stitch
- st: Stitch
- slst: Slip Stitch
- sc: Single Crochet
- inc: Increase
- invdec: Invisible Decrease
- FLO/BLO: Front / Back Loops Only
- hdc: Half-Double Crochet
- mbo: Mini Bobble Stitch (3dc-bobble)
- bump: Bump (2dc-bobble)
- { }: Worked in the same stitch
Other Useful Info
- Gauge: 5 Rnds and 4 sts per 1” (This isn’t critical for this pattern’s success, but can help if you want to match the size exactly).
- Finished Size: about 2 inches tall
- Worked in the Round: without turning
The Tiny Amigurumi Gnome Pattern
Hat (Starts in Color A, e.g., Red)
- Create a magic loop.
- Rnd 1: sc 6 into the magic loop (6)
- Rnd 2: sc in each st (6)
- Rnd 3: 2 times (8)
- Rnd 4: sc in each (8)
- Rnd 5: working in the FLO, 2 times (10)
- Slst 1, cut the yarn, and pull through. Hide the end into the next st.
Body & Head (Worked onto the BLO of Rnd 4 of the Hat)
Pull a loop of Skin Tone yarn through the first unused BLO from Rnd 4 of the hat and ch 1. Working in each unused BLO starting in the same st:
- Rnd 6: sc 3, {sc 1, ear, sc 1}, sc 1, mbo, sc 1, {sc 1, ear, sc 1} (10)
Ear instruction
- ch 3, skip first ch, slst 1, sc 1
Rounds for the Body
- Rnd 8: 2 times (10)
- Bump instruction: 2-dc bobble
- Rnd 9: sc in each (10)
- Add safety eyes on either side of the nose (the mbo in Rnd 6).
- Change to Pant Color (Brown).
- Rnd 10: sc 5, bump, sc 3, bump (10)
- Rnd 11: invdec 1, sc 1, invdec 1 (8) – Stop early before completing the round to close.
- Cut the yarn, stuff fully.
- Sew the remaining opening closed with your darning needle. You can also add magnets inside before closing to make them stick to metal surfaces!
Finishing Touches: The Beard
Add a beard with embroidery using 2 strands of white yarn held together. Start by adding the main part of the beard using the 4 stitches between the arms (the two bumps) in Rnd 7. Pull all these strands down and through the same stitch between the legs (in Rnd 9).
Finally, add a mustache pulled from under the nose (the mbo) to the ears on either side to finish the look. Double knot the two ends together on the back of the gnome and carefully cut the excess yarn close to the knot to hide it inside.
Your tiny amigurumi gnome is complete! We hope you enjoyed this easy and fast crochet pattern.