Crochet Guitar Keychain & Bag Charm

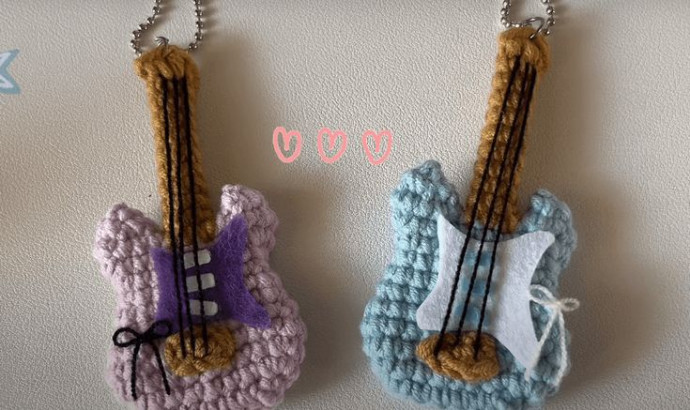
Add a touch of handmade charm to your keys or bag with the Crochet Guitar Keychain & Bag Charm! This adorable accessory is perfect for music lovers or anyone looking to jazz up their everyday items. Handcrafted with love and attention to detail, this crochet keychain brings a unique flair to your style while keeping your keys easily identifiable. With its cute guitar design and vibrant colors, it's sure to bring a smile to your face every time you reach for your keys. Upgrade your accessory game and show off your fun personality with the Crochet Guitar Keychain & Bag Charm today!
Materials Needed:
- Crochet yarn (colors of your choice)
- Crochet hook
- Stitch marker
- Yarn needle
- Scissors
- Felt (white and blue) for decorations
- Glue (for attaching felt and strings)
Abbreviations:
- ch – chain
- sc – single crochet
- inc – increase (2 sc in the same stitch)
- dec – decrease (sc 2 together)
- sl st – slip stitch
Step-by-Step Crochet Guitar Pattern
Body of the Guitar
Round 1:
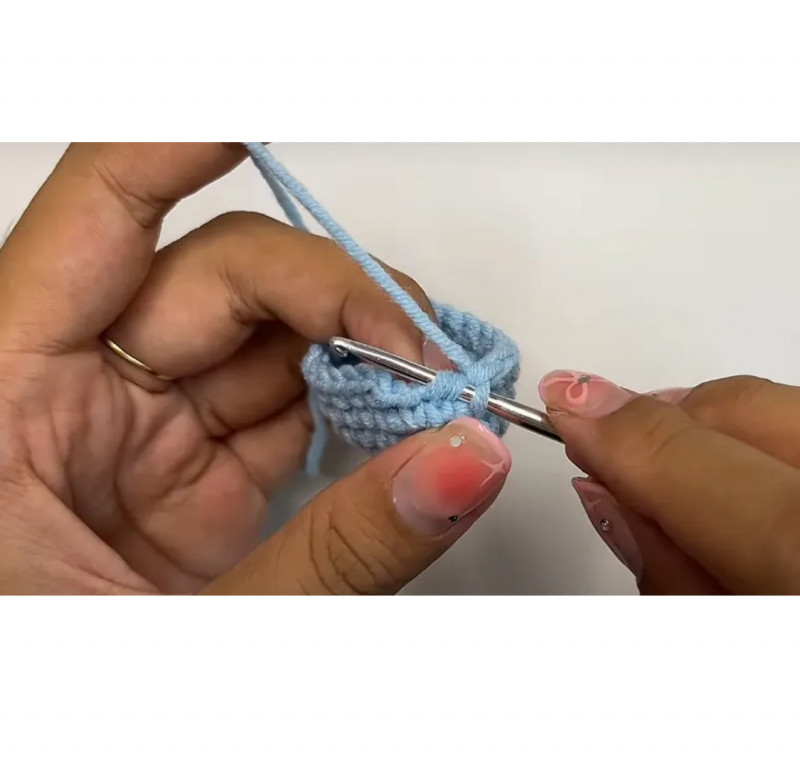
Create a slip knot and chain 8. Starting from the 2nd chain from the hook, make 1 sc. Continue with 5 more sc along the chain. In the last chain, make 1 increase (2 sc in the same stitch). Crochet along the bottom of the chain, make 1 sc in the next stitch. Continue with 4 more sc, then 1 increase in the last stitch. You should have 15 sc at the end of this round. Join with a sl st to the first sc.
Round 2:
Ch 1, sc in the same stitch. Sc 6, then make 3 sc in the next stitch (this forms the guitar’s curve). Sc 6, then 3 sc in the last stitch. Sl st to the first sc of this round.
Round 3:
Ch 1, sc 7. Make 2 increases consecutively. Repeat sc 7, then 2 more increases. Sl st to join the round.
Round 4:
Sc around (23 sc total). Close the round with a sl st.
Round 5:
Ch 1, sc 1, then dec. Sc 10, then dec. Sc in the last stitch. Sl st to close the round. Tip: Continue shaping the body by following similar increase and decrease rounds, ensuring each round is neatly joined with a slip stitch.
Neck of the Guitar
Rounds 1-10:
Mark where the neck will begin (center of the guitar body). Attach a different color yarn with a sl st, then ch 1. Sc in each marked stitch around (6 sc per round) to form a cylinder shape. Continue for 10 rounds to shape the neck.
Closing the Neck:
Use sc to attach both sides of the neck together, ensuring it holds its shape.
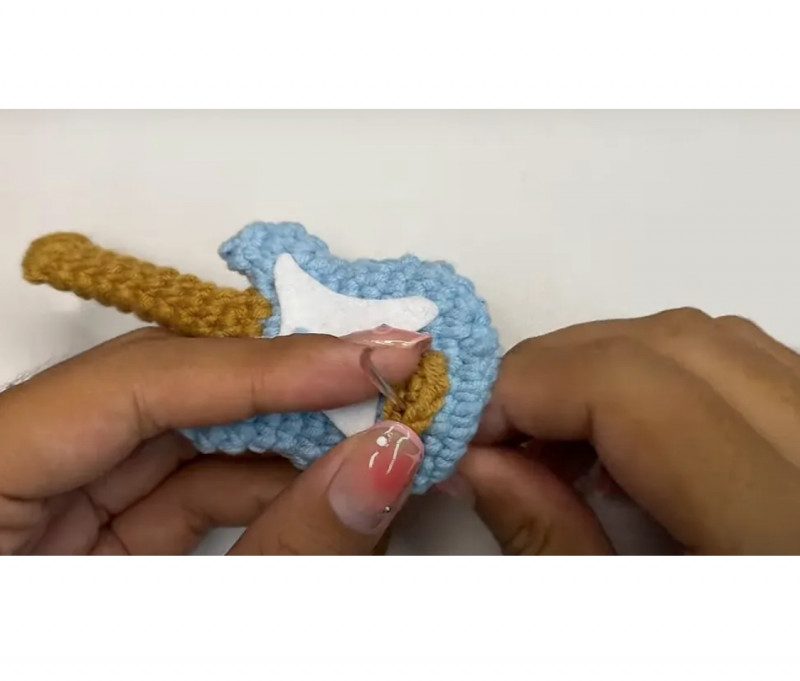
Adding the Details
Bridge & Strings:
Bridge: Chain 4, then sc from the 2nd chain across. Attach the piece to the body of the guitar.
Cut separate strands of yarn and attach them from the bridge upwards to resemble strings.
Felt Decorations:
Cut small felt pieces for the pickguard and pickups. Secure them onto the guitar body using glue.
Finishing Touches
Weave in all loose ends with a yarn needle. Attach a keychain ring or clip as desired. Double-check that all details are firmly secured.