Crochet Mario Brothers Mushroom Dolls: Bring Joy to Your Collection

Crochet Mario Brothers Mushroom Dolls are adorable handmade creations that bring a touch of nostalgia and creativity to any Mario fan's collection. Each meticulously crafted doll exudes charm and whimsy, making them a perfect addition to your gaming-inspired decor or a unique gift for a fellow enthusiast. Whether you display them proudly on a shelf or use them as delightful ornaments, these crocheted Mushroom Dolls are sure to spark joy and add a playful vibe to your surroundings. So why not treat yourself or a loved one to one of these cute and cuddly creations, guaranteed to bring a smile to their face every time they see it!
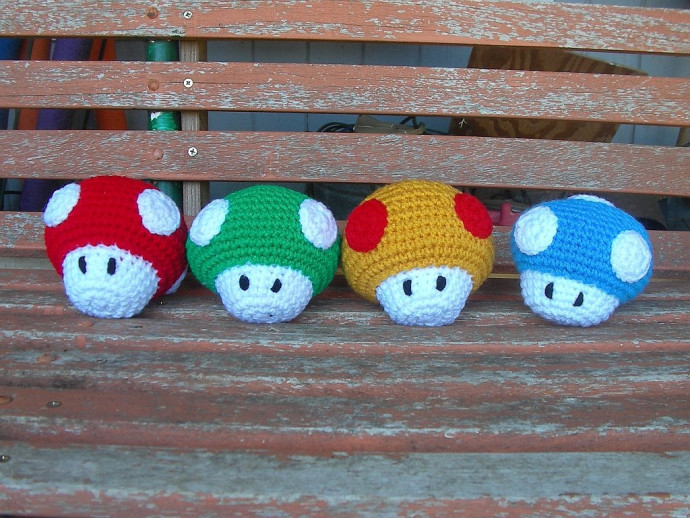
Mario Mushrooms
Materials Needed
- WW yarn in white, the colors you need for the tops (varies with the type of mushroom) and a tiny amount of black
- G Hook
- Fiberfill
- Yarn Needle for weaving in ends
Notes
Gauge isn't important. Any size hook or yarn works here, but choice of yarn and hook will determine the finished size.
Numbers in ( ) at the end of each round or row indicate the total number of stitches that should be in that round or row.
Mushroom Instructions
Base Creation
Beginning at the base with white:
RND 1: 8 sc in magic ring (8)
RND 2: 2 sc in each sc around (16)
RND 3: sc in next sc, 2 sc in next sc around (24)
RND 4-7: sc in each sc around f/o white (24)
RND 8: Join the main color of the mushroom top, 2 sc in Front Loops Only of each sc crochet around (48)
RND 9: (working through both loops now) sc in each sc around (48)
RND 10: sc in next 3 sc, 2 sc in next sc around (60)
RND 11-13: sc in each sc around (60)
RND 14: sc in next 4 sc, dec over next 2 sc around (50)
RND 15: sc in each sc around (50)
RND 16: sc in next 3 sc, dec over next 2 sc around (40)
RND 17: sc in each sc around (40)
Stuffing the Mushroom
Begin stuffing here if you haven't already. It's important to stuff the mushroom fairly firmly, and shape it as you progress.
RND 18: sc in next 2 sc, dec over next 2 sc around (30)
RND 19: sc in next sc, dec over next 2 sc around (20)
RND 20: dec over next 2 sc around (10)
F/O leaving long tail. Using a chopstick or the back side of a large crochet hook, finish stuffing and shape the top. Using yarn needle weave the tail through the last round and pull to close.
Creating the Spots
Spot Instructions
Make 5 spots using white (or alternate color):
RND 1: 8 sc in magic ring
RND 2: 2 sc in each sc around (16)
F/O and weave ends in on the backside of the disk.
Positioning the Spots
Position spots with one centered on the top of the mushroom, and four equally spaced around the sides. Sew on. (I like to use sewing thread for these because it doesn't add any unsightly bulk to the spots)
Adding Facial Features
Using black yarn, choose the face 'area' (between two of the side spots) and make a few whipstitches for each eye.