How to Crocheting a Mini Bear Toy

Crocheting a little mini bear toy can be such a joyful and heartwarming experience! This delightful project allows you to express your creativity while creating a cute and cuddly companion. With each stitch, you can infuse love and care into every detail of the tiny bear, making it a truly special gift for yourself or a loved one. Whether you're an experienced crocheter or just starting, this adorable project is sure to bring a smile to your face and warmth to your heart. Get ready to dive into the cozy world of crocheting and bring a little mini bear toy to life!
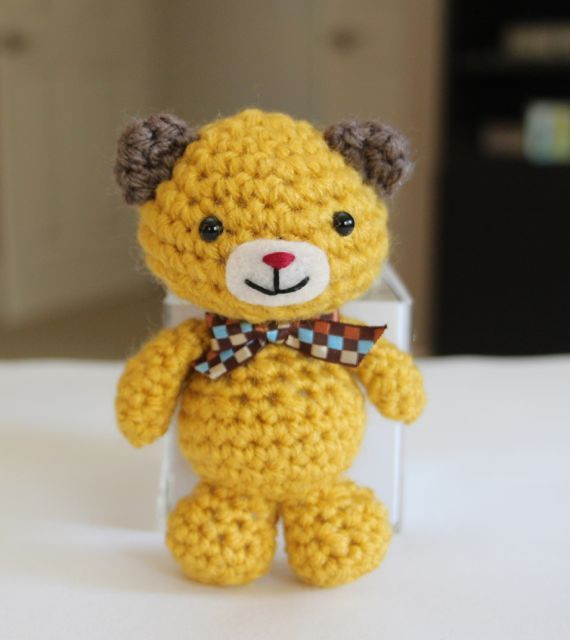
Materials Used
For this project, you'll need the following materials:
- Vanna’s Choice worsted weight yarn in Mustard (body) and Taupe (ears)
- 6mm black safety eyes
- Fiber fill
- Size 4.00mm/G hook
- Felt
- Black and red embroidery thread
- Ribbon
Head
Follow these rounds to crochet the head:
- Rnd 1: make 6sc into magic ring
- Rnd 2: sc into each st [12]
- Rnd 3: sc in all 12 st [12]
- Rnd 4: (sc, inc in next st) repeat 6 times [18]
- Rnd 5: (2sc, inc in next st) repeat 6 times [24]
- Rnd 6: (3sc, inc in next st) repeat 6 times [30]
- Rnd 7-8: sc in all 30 st [30]
- Rnd 9: (3sc, dec in next st) repeat 6 times [24]
- Rnd 10: (2sc, dec in next st) repeat 6 times [18]
- Rnd 11: (sc, dec in next st) repeat 6 times [12]
- Rnd 12: (sc, dec in next st) repeat 4 times [8]
Body
Continue with the body using the following rounds:
- Rnd 1: make 6sc into magic ring
- Rnd 2: inc into each st [12]
- Rnd 3: (sc, inc in next st) repeat 6 times [18]
- Rnd 4-5: sc in all 18 st [18]
- Rnd 6: (sc, dec in next st) repeat 6 times [12]
- Rnd 7: sc in all 12 st [12]
- Rnd 8: (4sc, dec in next st) repeat twice [10]
- Rnd 9: sc in all 10 st [10]
- Rnd 10: (2sc, dec in next st) repeat twice, 2sc [8]
Ears/Tail
For the ears and tail, follow these instructions:
- Rnd 1: make 4sc into magic ring
- Rnd 2: sc in all 4 st [4]
Leave a tail. For the ear, sew the opening shut before attaching to head.
Arm (Make Two)
For the arms, repeat the following:
- Rnd 1: make 4sc into magic ring
- Rnd 2: inc in each st [8]
- Rnd 3-5: sc in all 8 st [8]
- Rnd 6: (2sc, dec in next st) repeat twice [6]
- Rnd 7: sc in all 6 st [6]
Leave a tail. Sew the opening shut before attaching to body.
Leg (Make Two)
For the legs, use the same pattern:
- Rnd 1: make 4sc into magic ring
- Rnd 2: inc in each st [8]
- Rnd 3: (sc, inc in next st) repeat 4 times [12]
- Rnd 4: sc in all 12 st [12]
- Rnd 5: (2sc, dec in next st) repeat 3 times [9]
- Rnd 6: sc in all 9 st [9]
- Rnd 7: (2sc, dec in next st) repeat twice, sc [7]
Leave a tail for attaching to body. In my example, I did not sew the opening shut before attaching to the body.
Finishing Touches
Cut a small piece of felt for the snout of the bear. Use a needle and embroidery floss to make the nose and mouth. Glue the snout into place, tie a ribbon around the neck and you are finished with your little mini bear!