Handmade Christmas Angel Doll Crochet Pattern

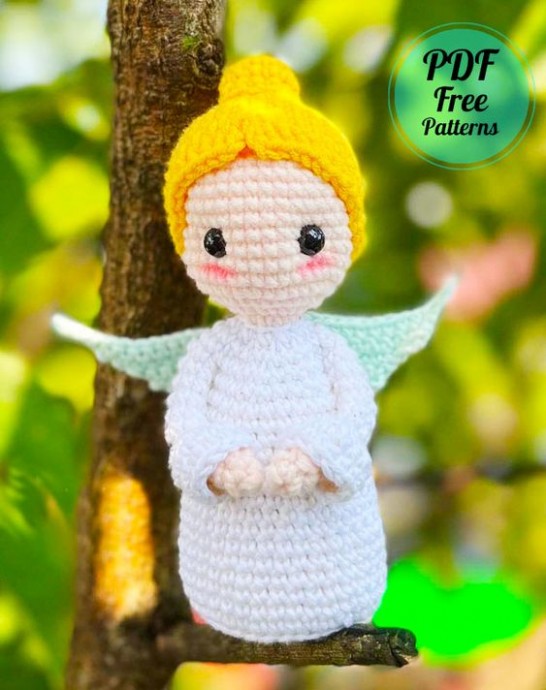
Create your very own handmade Christmas angel doll with this adorable crochet amigurumi pattern. This project is perfect for those who love to crochet and want to add a festive touch to their holiday decor. The angel doll can be customized with different colors and embellishments to suit your personal style. Whether you're a beginner or an experienced crocheter, this pattern is sure to bring joy and creativity to your Christmas crafting.
The pattern includes step-by-step instructions and detailed photos to guide you through the process of creating your very own angel doll. You can choose to make multiple dolls to give as gifts or keep them all for yourself to spread Christmas cheer throughout your home. Get your crochet hooks ready and start crafting your very own festive angel doll today!
Crochet Abbreviations
- ch – chain
- mr – magic ring
- sc – single crochet
- slst – slip stitch
- inc – increase
- dec – decrease
- hdc – half double crochet
- dc – double crochet
Materials
- You can use any type of yarn you like with an appropriate hook size; I used a 2.5 mm hook with milk cotton yarn.
- Brown, pink, white, or beige color (for the patch on the belly).
- Fillings.
- Black, thin wire.
Hands (Make 2)
RND 1: 5sc in mr [5]
RND 2-4: 5sc [5]
RND 5: In white, 5sc [5]
RND 6: Blo 2sc, 1inc, 2sc [6]
RND 7-11: 6sc [6]
– On Blo of R6, attach the white yarn
RND 1: (lsc, 1inc)2, 1inc [8]
RND 2: 8sc [8]
RND 3: (3sc, 1inc)2 [10]
Body
– Start with white yarn
RND 1: 5sc in mr [5]
RND 2: 5inc [10]
RND 3: (lsc, 1inc)5 [15]
RND 4: (2sc, 1inc)5 [20]
RND 5: (3sc, 1inc)5 [25]
RND 6: (4sc, 1inc)5 [30]
RND 7: (5sc, 1inc)5 [35]
RND 8: BLO 35sc [35]
RND 9-13: 35sc [35]
RND 14: (5sc, 1dec)5 [30]
RND 15: 30sc [30]
RND 16: (4sc, 1inc)5 [25]
RND 17-19: 25sc [25]
– Start adding fiber filling into the doll
RND 20-21: 25sc [25]
RND 22: 6sc (hands, 6sc) 13sc (hands, 6sc) 6sc [37]
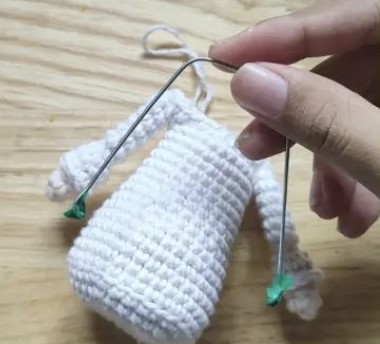
– Put a wire frame connecting both hands to be able to move the hands around
RND 23: (3sc, 1dec)7 2sc [30]
RND 24: (lsc, 1dec)10 [20]
RND 25: 10dec [10]
Change to skin color and start crocheting the head
RND 26: Blo 10sc [10]
RND 27: 10inc [20]
RND 28: (lsc, 1inc)10 [30]
RND 29: (4sc, 1inc)6 [36]
RND 30-37: 36sc [36]
RND 38: (4sc, 1dec)6 [30]
RND 39: (3sc, 1dec)6 [24]
RND 40: (2sc, 1dec)6 [18]
RND 41: (1sc, 1dec)6 [12]
RND 42: 6dec [6]
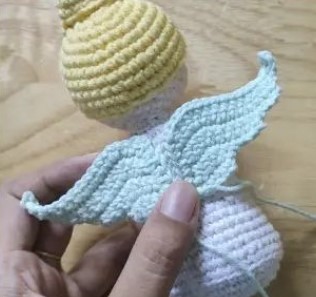
Wings (Make 2)
Start with 6ch
RND 1: 4sc, 1sl, ch1, turn
RND 2: 2sc, 1inc, lsc, ch 4, turn
RND 3: 4sc, 1inc, 2sc, 1sl, ch1, turn
RND 4: 2sc, 1inc, 5sc, ch4, turn
RND 5: 8sc, 1inc, 2sc, 1sl, ch1, turn
RND 6: 2sc, 1inc, 9sc, ch4, turn
RND 7: 12sc, 1inc, 2sc, 1sl, ch1
– Make single crochet along the side of the wing with 4 to 5 sc
Hair Wig
RND 1: 7sc in MR [7]
RND 2: 7inc [14]
RND 3: (1sc, 1inc)7 [21]
RND 4: (2sc, 1inc)7 [28]
RND 5: (3sc, 1inc)7 [35]
RND 6-9: 35sc [35]
RND 10: 10sc, 6hdc, (12sc, ch2, 1sl), (1sl, 1hdc), 7hdc, 10x
Hair Bun
RND 1: 7sc in MR [7]
RND 2: 7inc [14]
RND 3: (2sc, 1inc)4, 2sc [18]
RND 4-5: 18sc [18]
Assembling
– Tuck the base of the doll inward; it will shove back inside, forming a cup and allowing the doll to stand on its own.
– The wings have to be sewn in a way that the side facing us will be different from one another.
– You can use any technique you like in making the doll’s face.