Crochet Your Adorable Amigurumi Doll Lucie

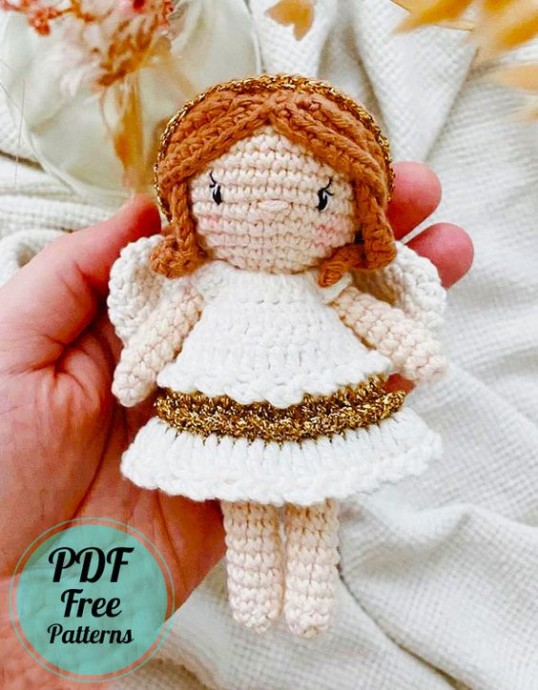
Create your very own adorable Amigurumi doll named Lucie with this crochet pattern. This pattern will guide you through the process of making a charming little angel doll that will surely bring a smile to anyone's face. Using your crochet skills, you can customize Lucie with different colors and details to make her truly unique. Whether you're a beginner or an experienced crocheter, this project is perfect for anyone looking to create a cute and cuddly doll. With this pattern, you can crochet a one-of-a-kind Amigurumi doll that will make a perfect gift for a loved one or a delightful addition to your own collection. Lucie the Little Angel is a fun and rewarding project that allows you to unleash your creativity and create something special with just a few simple stitches. Follow the step-by-step instructions to bring Lucie to life and enjoy the process of crocheting your very own handmade doll. Let your imagination run wild as you crochet this charming little angel doll and watch as she becomes a cherished keepsake for years to come.
Materials
Ricorumi in colors:
- Powder (022)
- White (002)
- Clay (055)
- Gold (lame 002)
Crochet hook 2.5 mm, stuffing, stitch marker, pins, scissors, black embroidery floss, yarn needle, glue, small button, pink blush
Abbreviations
- sc : Single Crochet
- inc : Increase
- dec : Decrease
- st: Stitch
- hdc: Half Double Crochet
- sl-st : Slip Stitch
- ch : Chain
- ..in : make increase into same stitch as many as the number which is given in front of “inc” abbreviation (e.g. 3inc, 4inc..).
- FLO : Crochet into front loops only
- BLO : Crochet into back loops only
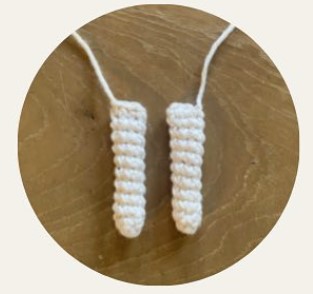
Arms
With powder.
RND 1: 5 sc in Mr (5)
RND 2: (1 sc, inc) x 2, 1 sc (7)
RND 3-10: 7 sc (8 rnds) (7)
Fold the arm and make 4 sc through the back and front loops.
Cut the yarn and leave a long tail for sewing. Make 2 arms. Do not stuff.
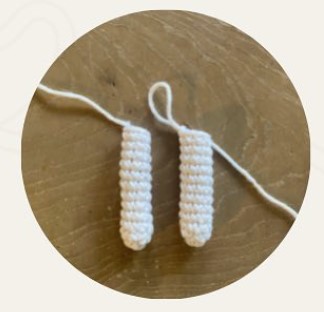
Legs
With powder.
RND 1: 6 sc in Mr (6)
RND 2: (1 sc, inc) x 3 (9)
RND 3-12: 9 sc (10 rnds) (9)
Make 2 legs, don’t cut the yarn of the 2nd leg. Stuff slightly.
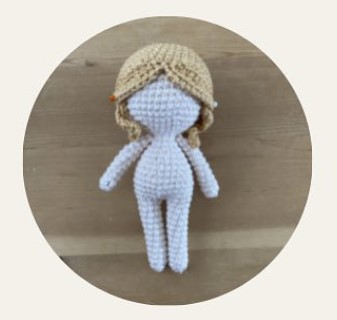
Body
Ch 2 and join to the 1st leg with a sc (counts as your first st.). Stuff as you go.
RND 13: 9sc, 2sc, 9sc, 2sc (22)
RND 14: (4sc, inc)x2, (5sc, inc)x2 (26)
RND 15: (12sc, inc)x2 (28)
RND 16-18: 28sc (3 rnds) (28)
RND 19: 2sc, (4sc, dec)x4, 2sc (24)
RND 20: 24sc (24)
RND 21: 2sc, (3sc, dec)x4, 2sc (20)
RND 22: 20sc (20)
RND 23: (8sc, dec)x2 (18)
RND 24: (4sc, dec)x3 (15)
RND 25: (3sc, dec)x3 (12)
Do not cut the yarn. Leave your work as it is.
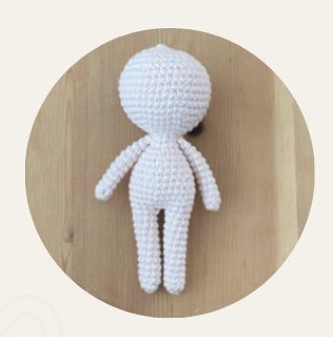
Head
Stuff the neck and head firmly.
RND 26: (1 sc, inc) x 6 (18)
RND 27: (2 sc, inc) x 6 (24)
RND 28: (3 sc, inc) x 6 (30)
RND 29: (4 sc, inc) x 6 (30)
RND 30: (6 sc, inc) x6 (42)
RND 31-36: 42sc (6 rnds) (42)
RND 37: (5 sc, dec) x 6 (36)
RND 38: (4 sc, dec) x 6 (30)
RND 39: (3 sc, dec) x 6 (24)
RND 40: (2 sc, dec) x 0 (18)
RND 41: (1 sc, dec) x 6 (12)
RND 42: 6 dec (6)
Cut the yarn leaving a long tail to weave through the front loops of the 6 remaining sts. Hide the yarn end in the head. Attach the arms in RND 25.
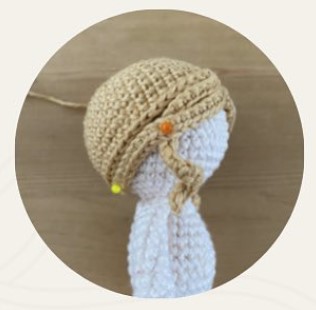
Hair
With clay.
RND 1: 6 sc in mr (6)
RND 2: 6 inc (12)
RND 3: (1 sc, inc) x 6 (18)
RND 4: (2 sc, inc) x 6 (24)
RND 5: (3 sc, inc) x 6 (30)
RND 6: (4 sc, inc) x 6 (36)
RND 7: (5 sc, inc) x 6 (42)
RND 8-13: 42 sc (6 rnds) (42)
RND 14: (ch 21, start in 2nd ch from hook and make 20sc, slst in next st)x4
End with a slst. Cut the yarn leaving a long tail to sew the hair to the head.
Glue or sew 2 strands to the left and 2 strands to the right of the head (see pictures).
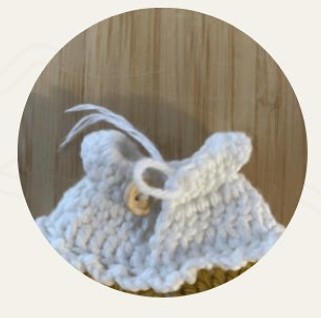
Dress
With white. Work back and forth until row 5.
ROW 1: ch 20, turn (6)
ROW 2: start in 3rd ch from hook and make 12 dc inc, turn (36)
ROW 2: 5 sc, ch 2, skip 8 sts, 10 sc, ch 2, skip 8 sts, 5 sc, ch 2, turn (24)
ROW 4: (3 dc, inc) x 6, ch 2, turn (30)
ROW 5: (4 dc, inc) x 8 (36)
Connect with a sl st in the first dc of row 5. Work in rnds from now on.
RND 6: BLO 26 sc (36)
Change colour to gold.
RND 7: (5 dc, inc) x 6 (42)
RND 9: BLO 42 sc (42)
Change colour to white.
RND 9: (6 dc, inc) x 6 (48)
End with a sl st. Do not cut the yarn.
Fringes
With the white thread, repeat (ch 3, skip 1 st, sl st) all around. Cut the yarn and weave in.
Attach the white yarn in the front loops of RND 6. Repeat (ch 3, skip 1 st, sl st) all around. Cut the yarn and weave in.
Attach the gold yarn in the front loops of RND 8. Repeat (ch 3, skip 1 st, sl st) all around. Cut the yarn and weave in.
Sew a small button in the back of the dress. Use the beginning of the thread to make a small loop to attach the button.
Halo
With gold: ch 80. Cut yarn. Tie the halo around the head.
Wings
With white.
RND 1: 6 sc in a magic ring (6)
RND 2: 6 inc (12)
RND 3: (1 sc, Inc) x 6 (12)
RND 4: (8 sc, Inc) x 2 (20)
RND 5: (9 sc, Inc) x 2 (22)
RND 6: (10 sc, Inc) x 2 (24)
RND 7: 24 sc (24)
RND 8: (4 sc, dec) x 4 (20)
RND 9: (3 sc, dec) x 4 (18)
RND 10: (2 sc, dec) x 4 (12)
RND 11: (1 sc, dec) x 4 (8)
RND 12: 4 dec (4)
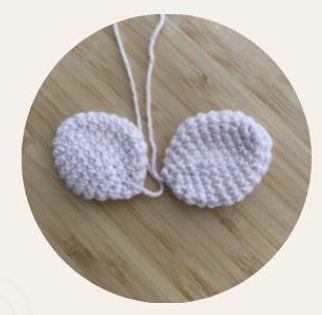
Cut the yarn leaving a long tail to weave through the front loops of the 4 remaining sts and to sew the wings to the dress. Make two wings. Do not stuff.
Assembly
- Sew the wings to the dress.
- Make the eye embroidery in RND 32, with 7sts apart.
- Embroider the nose between RNDs 31-32 (1st wide).
- Give her some pink blush on the cheeks.
- Attach a gold thread to the head if you want to use it as a Christmas ornament.