Crochet Pyramid Pouches: A Fun and Stylish DIY Project

Crochet Pyramid Pouches Overview
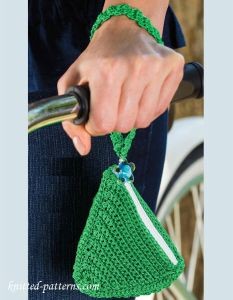
Crochet pyramid pouches are a fun and stylish way to store your essentials while adding a unique touch to your accessories! These cute little pouches can be customized with different colors and patterns to suit your personal style. With just some basic crochet stitches, you can create a functional and versatile pouch that is perfect for holding small items like coins, lip balm, or even small trinkets. Whether you're a crochet enthusiast looking for a new project or a beginner eager to try something new, making a crochet pyramid pouch is a great way to get creative and add a touch of handmade charm to your everyday life!
Finished Measurements
Each Triangle: 4 inches across bottom x 4 inches tall
Materials Needed
- Omega La Espiga #6 nylon cord (410 yds per cone): 150 yds #24 light green
- Size B/1/2.25mm crochet hook or size needed to obtain gauge
- Tapestry needle
- 5 yds green cotton embroidery floss
- 6-inch nylon zipper
- 1-inch button, bead or charm
- Large-eye sewing needle
Gauge
12 sc = 2 inches; 14 rows = 2 inches
Pattern Notes
Weave in loose ends as work progresses.
Work in back loops of all stitches unless otherwise stated.
Join with slip stitch as indicated unless otherwise stated.
Pouch Construction
Triangle
Make 4.
Row 1: Ch 2, 2 sc in 2nd ch from hook, turn. (2 sc)
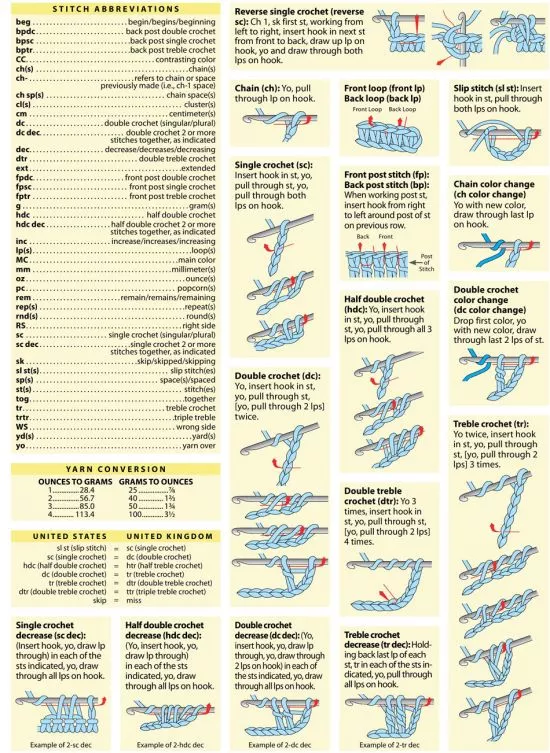
Row 2 (RS): Ch 1, working in back lps (see Pattern Notes and Stitch Guide), 2 sc in each st across, turn. (4 sc)
Row 3: Ch 1, 2 sc in first st, sc in each of next 2 sts, 2 sc in last st, turn. (6 sc)
Row 4: Ch 1, sc in each st across, turn.
Row 5: Ch 1, 2 sc in first st, sc in each st across to last st, 2 sc last st, turn. (8 sc)
Row 6: Rep row 4.
Rows 7-22: [Rep rows 5 and 6, alternately] 8 times, at end of last row, do not turn. (24 sc)
Edging
With RS facing and working in ends of rows, [ch 1, 24 sc evenly sp across side edge to next corner] twice, ch 1, join (see Pattern Notes) in first st of row 22. Fasten off. (48 sc)
Wrist Strap
Row 1: Leaving a 6-inch tail, ch 2, sc in 2nd ch from hook, turn. (1 sc)
Row 2: Ch 1, 3 sc in back lp of sc, turn. (3 sc)
Rows 3-51: Ch 1, sc in back lp of each st across, turn.
Row 52: Ch 1, sc dec (see Stitch Guide) in next 3 sts. Leaving a 6-inch tail, fasten off. (1 sc)
Assembly Instructions
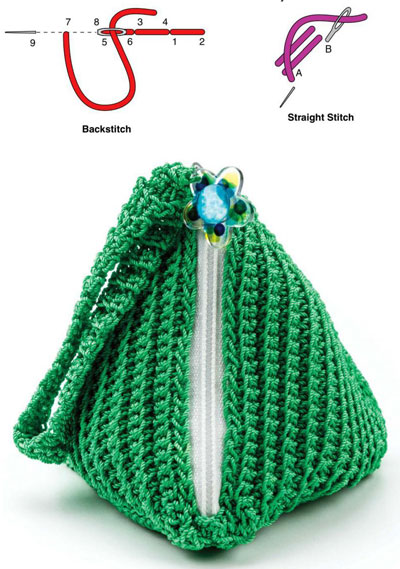
Place WS of edge of row 22 on RS of zipper tape, leaving approximately 1/8 inch between zipper teeth and top edge of Triangle, pin in place. With embroidery floss doubled and sewing needle, backstitch (see illustration) through both layers beneath back lps of row 22 sts. Rep with 2nd Triangle across 2nd edge of zipper tape.
Hold 3rd Triangle with WS tog to 1 Triangle sewn to the zipper. Working through both thicknesses and in inner lps (back lp of lower Triangle and front lp—see Stitch Guide of upper Triangle), join yarn in ch-1 at corner farthest from zipper edge, ch 1, sl st in each st across to corner closest to zipper edge, ch 1, sl st in next corner ch-1 of both Triangles, across edges of 3rd Triangle and 2nd Triangle attached to zipper, *ch 1, sl st in each st across to next corner, ch 1, sl st in next corner ch-1 of both Triangles*, across edges of 3rd Triangle and any edge of 4th Triangle, rep between *, across edges of 4th Triangle and first Triangle attached to zipper, rep between *, across 4th Triangle and 2nd Triangle attached to zipper, rep between *, sl st to corner sl st.
Unzip zipper. With embroidery floss, sew several straight stitches (see illustration) across bottom end of zipper and through sc at bottom of zipper. Trim away excess zipper, leaving approximately 1 inch, and sew to WS of Pouch to secure.
Fold Wrist Strap in half. With beginning and ending tails, sew to opening in zipper pull tab. With embroidery floss, sew button to Wrist Strap just above pull tab.


