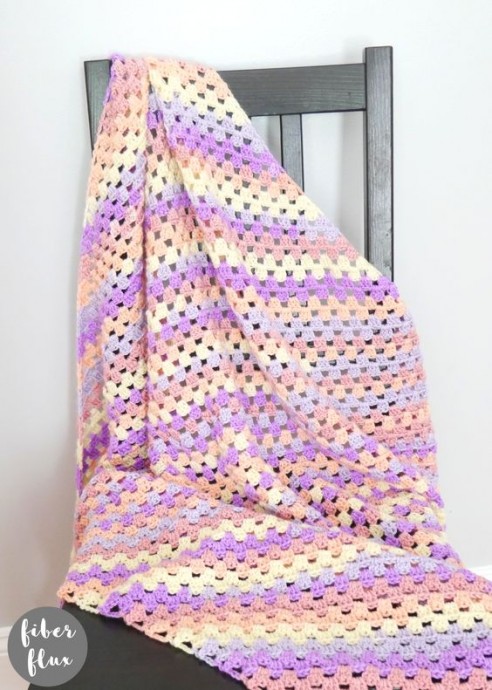
The Ultimate Guide to Making Your Own C2C Granny Stripe Blanket

The Crochet C2C Granny Stripe Blanket is a delightful project that combines the charming tradition of the granny stripe pattern with the modern flair of the corner-to-corner technique. This unique blend creates a beautiful and visually striking blanket that is not only cozy but also a pleasure to make. With its crisp lines and cozy texture, this blanket is perfect for both beginners and seasoned crocheters looking for a fun and rewarding project.
The C2C Granny Stripe Blanket allows you to play with an array of colors, creating a personalized masterpiece that is bound to become a cherished keepsake or a thoughtful gift. So grab your yarn and hook, and let's create a cozy corner of comfort with this charming and versatile pattern!
Materials
- H (5.0 mm) crochet hook
- 1202 yards of #3 lightweight yarn (I used 2 cakes of Horizon by Hobbii in the #2 “Sunrise” colorway)
- Yarn/tapestry needle
- Scissors
- Measuring tape
Sizing
- 40 inches wide
- 40 inches tall
Pattern Notes
- To make your blanket bigger, simply work part one of the patterns until the blanket is half the size you need it to be. Just be sure you complete an EVEN number of rows before you move on to the second (decrease part) of the blanket.
C2C Granny Stripe Blanket Pattern
Part One - The Increase
- Chain 6, then work a sl st into the furthest ch from the hook to create a ring.
- Row 1: Ch 4 (counts as a dc, ch 1), then work 3 dc into the ring. Then ch 1, then work a dc into the center of the ring.
- Row 2: Ch 4, then work (3 dc, ch 1) into the first ch 1 space of the row. Work (3 dc, ch 1, 1 dc) into the last ch 1 space of the row.
- Row 3: Ch 4, then work (3 dc, ch 1) into the first ch 1 space of the row. Work (3 dc, ch 1) into each ch 1 space across. Then work (3 dc, ch 1, 1 dc) into the last ch 1 space of the row.
- Repeat row 3 until your blanket is roughly half the size you’d like it to be (or you’ve used half of your yarn), then continue onto the next section to begin the decrease part.
Part Two - The Decrease
- Row 1: Ch 4, then skip the first ch 1 space. Work (3 dc, ch 1) in each ch 1 space across until just before the last space (turning chain space). Instead of working into this space, work a dc into the top chain of the turning chain.
- Repeat row 1 of the decrease until just a top point remains. Fasten off and weave in ends that remain. Note: if the top is challenging for you, be sure to check out the video for this part (or any other part) to see me walk through it step by step!
Finishing
- Weave in any ends and you’re done!
No comments
Write a comment
