Cozy and Stylish Crochet Leg Warmers

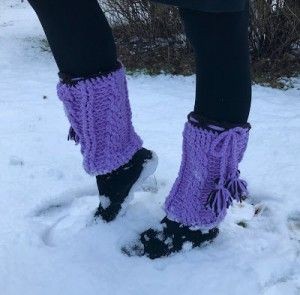
Introducing the Cozy and Stylish Crochet Leg Warmer: Step into the world of fashion and comfort with our exquisite crochet leg warmers. These trendy accessories are designed to keep your legs warm and cozy during the chilly winter months, while adding a touch of style to your outfits. Crafted with love and attention to detail, our crochet leg warmers are the perfect blend of functionality and fashion. Made from high-quality yarn, our leg warmers are soft, breathable, and incredibly comfortable to wear. The intricate crochet patterns not only provide extra insulation but also create a visually appealing texture that will make heads turn. Whether you're heading out for a casual stroll, hitting the gym, or attending a special event, our crochet leg warmers are versatile enough to complement any outfit.
Leg Warmers Directions
For this M size you will need:
- LANG YARNS, Merino 50 – 100% virgin wool, merino extrafine, super-wash, 90m/100g – 3 skeins
- LANG YARNS, Merino 70 – 100% virgin wool, merino extrafine, super-wash, 70m/59g – 0.5 skein
For this pattern you will need 8.00 mm and 7.00 mm crochet hooks.
These Leg Warmers are made as one part, from bottom up.
Size: M this can easily be adapted to a smaller size or bigger size just by reducing or increasing the number of chains and rows for the leg warmers as well as making less or more chains in the foundation chain.
Difficulty Level: Level 1 – Easy, for beginners
US Crochet Terms
- SlSt – slip stitch
- CH/s – chain/s
- SC – single crochet
- HDC - half double crochet
- DC - double crochet
- FPDC - front post double crochet
- BPDC - back post double crochet
- SK - skip
- T - turn
- ST/s - stitch(es)
- REP - repeat
- YO – yarn over
Special Stitches Used
Front and back post crochet stitches are used to create wonderful texture in crochet. Instead of making your stitch through the loops at the top of the stitch, you make it around the stitch. The most challenging things about crochet post stitches are knowing where and how to insert the hook.
Front Post Double Crochet Stitches (FPDC)
Yarn over, insert your hook from front to back then from back to front around the post of the stitch indicated, yarn over, pull through the stitch, then finish your double crochet as normal, yarn over, pull through 2 loops, yarn over, pull through last 2 loops.
Back Post Double Crochet Stitches (BPDC)
Yarn over, you insert your hook from back to front then from front to back around the post stitch indicated, yarn over, pull through the stitch, then finish your double crochet as normal, yarn over, pull through 2 loops, yarn over, pull through last 2 loops.

Pattern Notes
- The direction shown is for M size but can be easily converted into a bigger or smaller size – just measure your starting foundation chain shorter or longer.
- In my project: A Ch 3 at the beginning of the row counts as dc only in the 1st row.
- Join rows by sl st to create rounds.
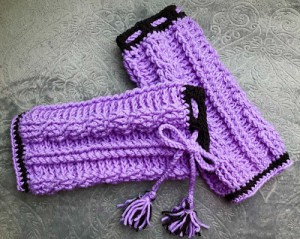
- Work from bottom up. Make borders at the bottom and at the top. Create a drawstring and tassels on the top.
The Pattern
The Leg Warmer
Pick up the 8.00 mm crochet hook and let’s make a chain crochet foundation.
Ch36 (we need to have 3 parts, each one has 12 chains)
Join the foundation chain by sl st. Make sure the foundation chain is not twisted.
R1: Ch3 (1dc), 1dc in each st around, join row by sl st in 3rd ch from the beginning (36 dc)
R2: Ch2, 1bpdc in the next 3st, 1 fpdc in the next 4st, 1bpdc in the next 3 st, 1 fpdc in the next 2 st = the first part
*1bpdc in the next 3st, 1 fpdc in the next 4st, 1bpdc in the next 3 st, 1 fpdc in the next 2 st* = the second part
Repeat from * to * one more time to create the third part.
Join the row by sl st.
You will have 36 st around.
R3: = R2: Ch2, 1bpdc in the next 3st, 1 fpdc in the next 4st, 1bpdc in the next 3 st, 1 fpdc in the next 2 st = the first part
*1bpdc in the next 3st, 1 fpdc in the next 4st, 1bpdc in the next 3 st, 1 fpdc in the next 2 st* = the second part
Repeat from * to * one more time to create the third part.
Join the row by sl st. In this row we will make a cable stitch.
R4 = Ch2, 1bpdc in the next 3st, cable pattern in each "4 fpdc part": skip 2 stitches, 1 fpdc in the next 2st, 1 fpdc in the first skipped st, 1 fpdc in the second skipped st. Continue with our pattern: 1bpdc in the next 3 st, 1 fpdc in the next 2 st.
*1bpdc in the next 3 st, sk 2 st, 1 fpdc in the next 2 st, 1 fpdc in the first sk st, 1 fpdc in the second sk st, 1bpdc in the next 3 st, 1 fpdc in the next 2 st*
Repeat from * to * one more time.
Join the row by sl st.
R5-R6 = R2
R7=R4 (cable st pattern)
R8-R9 = R2
R10= R4 (cable st pattern)
R11-12 = R2
R13= R4 (cable st pattern)
R14-15 = R2
R16= R4 (cable st pattern)
R17-19 = R2
R20= R4 (cable st pattern)
R21-R23 = R2
The Border on Top of Leg Warmer
Take a smaller hook - I used a 7mm crochet hook.
R1: Ch1 (1sc), 1dc in each st around, join row by sl st in ch from the beginning (36 sc)
R2: Ch1 (1sc), 1dc in each st around, join row by sl st in ch from the beginning (36 sc)
R3: Ch2 (1hdc), 1hdc in next st, ch1, sk 1 st,
*1hdc in next 2 st, ch1, sk 1 st* repeat from *to* till end of row, sl st in 2nd ch from the beginning
R4: Ch1 (1sc), 1dc in each st around, join row by sl st in ch from the beginning (36 sc)
Fasten off. Weave in all ends.
The Bottom Border
Turn your work upside down and work on the opposite side of the foundation chain.
R1: Ch1 (1sc), 1dc in each st around, join row by sl st in ch from the beginning (36 sc)
R2 = R1
R3 = R1
You may like your leg warmers to be longer if so just add more rounds until you are happy with the length. Fasten off and repeat the same for the other leg warmer.
Fasten off. Weave in all ends.