Charming Handmade Gift Card Holder Using Crochet

Create a charming gift card holder using the art of crochet. This handmade accessory adds a personal touch to any gift-giving occasion. By using various crochet stitches and colors, you can customize the design to suit the recipient's style and preferences. The intricate details of the crochet work will make the gift card holder stand out and be appreciated by the recipient. Whether you are a beginner or an experienced crocheter, this project is a fun and rewarding way to showcase your skills and creativity. This project is a wonderful opportunity to express your love and thoughtfulness through a handmade gift that is both useful and visually appealing. Let your imagination run wild as you crochet a one-of-a-kind gift card holder that will delight the lucky recipient.
Materials:
- DK weight yarn
- 20 yds main color (MC)
- 5 yds accent color (A)
- Size H/8 (5mm) hook
- Yarn needle
- Optional embellishments if desired (felt, buttons, etc)
Difficulty:
Intermediate – Worked in the round and includes foundation single crochet and reverse single crochet.
Size:
Approximately 4″ x 2 3/4″ (fits standard size gift card)
Gauge:
Solid piece (back) should measure approximately 3 1/2″ x 2 1/4″ – just slightly larger than the gift card.
Abbreviations Used:
- RS = right side
- WS = wrong side
- ch = chain
- sc = single crochet
- fsc = foundation single crochet
- rsc = reverse single crochet
- sl st = slip stitch
- st(s) = stitch(es)
- sp(s) = space(s)
- sk = skip
Notes:
- On the last row, both the solid and window pieces should have 13 sc across each long side, 9 sc across each short side, and ch 2 spaces in each corner.
- When joining, I like to clip the pieces together in the corners with locking stitch markers, safety pins, or other clips. That holds them in place and makes the joining easier.
Solid Piece:
For solid option, make 2 (back and front). For window option, make 1 (back).
Rnd 1 (WS): With MC, 5 fsc, [ch 2, sc in bottom (“chain” section) of last fsc] twice. Working along bottom sts, sc in next 4 sts, ch 2, sc in same st, ch 2, join with sl st to top of first st. This round should form a solid rectangle with ch sps in each corner.
Rnds 2-5: Turn, sl st in first corner sp, ch 2, sc in same sp, [sc in each st across to next corner, [sc, ch 2, sc] in corner sp] 3 times, sc in each st across to next corner, sc in next corner, ch 2, join with sl st to first sc. Fasten off.
Window Piece:
For window option, make 1 (front).
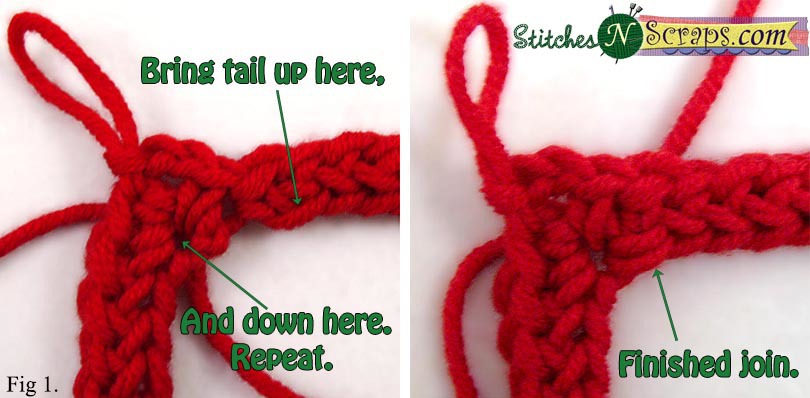
Rnd 1 (RS): With MC, 11 fsc, ch 2, sc in bottom (“chain” section) of last fsc worked, 6 fsc, ch 2, sc in bottom of last fsc worked, 10 fsc, ch 2, sc in bottom of last fsc worked, 5 fsc, sc in bottom of first fsc of row (being careful not to twist your work), ch 2, sl st in top of first fsc. Use tail to join the bottom of the first and last fsc stitches (see Fig 1). This rnd should make an open rectangle.
Rnd 2: Turn, sl st in first corner sp, ch 2, sc in same sp, [sc in each st across to next corner, [sc, ch 2, sc] in corner sp] 3 times, sc in each st across to next corner, sc in next corner, ch 2, join with sl st to first sc.
Joining / Edging:
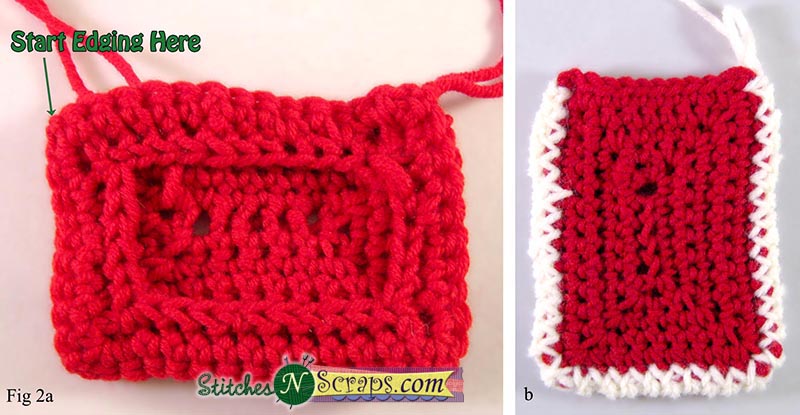
- Hold front and back with wrong sides together, front facing you, and long side on top (see Fig 2a).
- Working through both thicknesses, join A with sc in top left corner, (rsc in each st across to next corner, rsc in corner) twice.
- Turn work so that back is facing you and short, open edge is on top (see Fig 2b).
- Working around the open edge, 2 sc in same corner sp on back, sc in next 8 sts, 2 sc in next corner sp on back, 2 sc in next corner sp on front, sc in next 8 sts, 2 sc in next corner sp on front, join with sl st to first sc, fasten off.
Finishing:
- Weave in all ends
- For hanging loop:
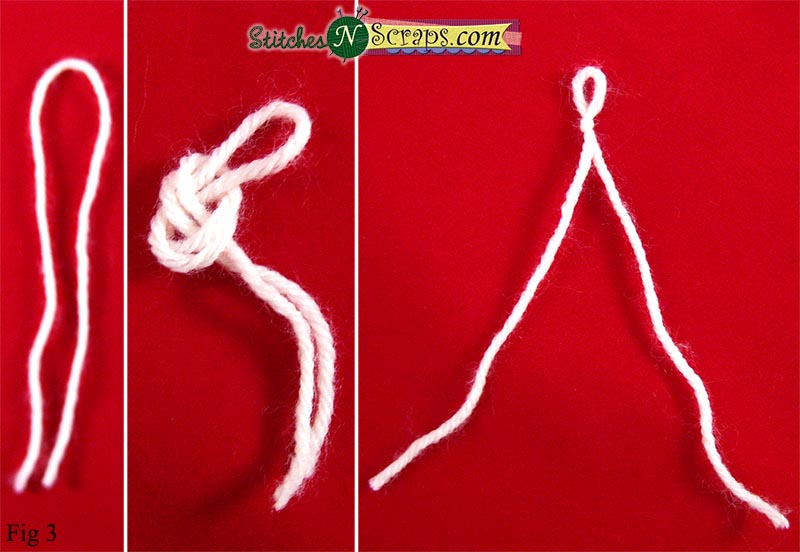
- Cut a 12″ piece of A and fold in half. Tie loop end in a secure knot, leaving a 1/2″ loop above the knot (see Fig 3).
- Place loop at center-top of holder and sew in place with the ends.
- For lacing and bow – window option only:
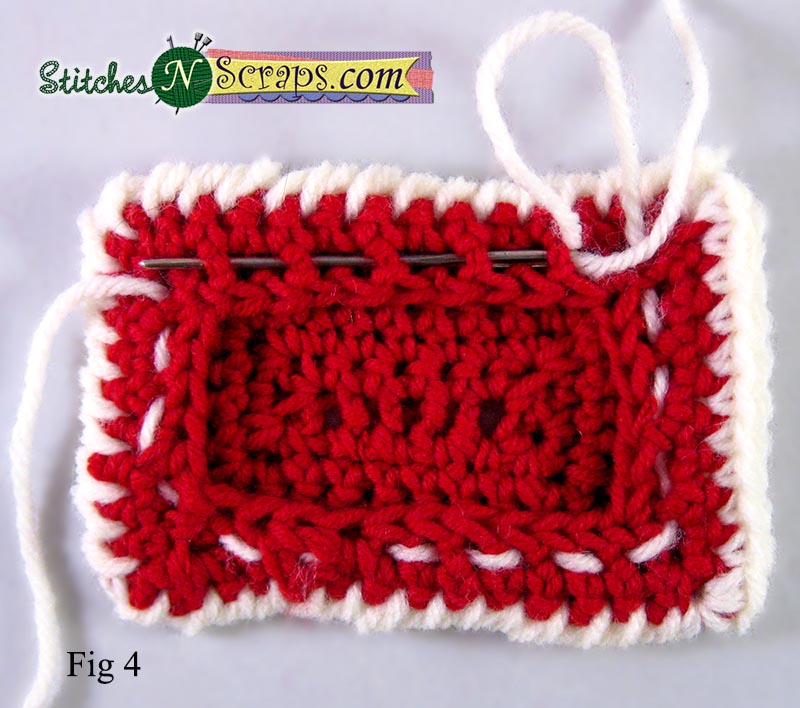
- Position holder so that open edge is to the right and front is facing you (See Fig 4).
- Cut a 12″ piece of A. Starting at top left corner, use yarn needle to weave it in and out of the stitches on row 1, around the front opening. Tie ends in a bow and trim.