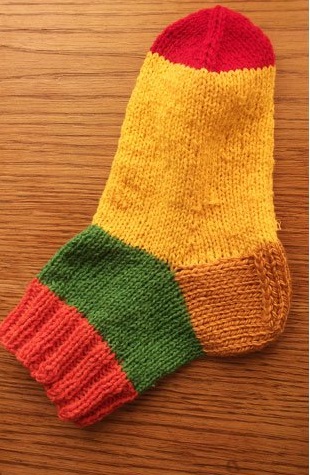
Mastering Seamless Sock Knitting Techniques for a Perfect Fit


Introduction to Seamless Sock Knitting
This technique foresees knitting without any seams. Socks are knitted in spiral order, so they perfectly fit your foot.
Materials Needed
Measuring Your Foot
You should calculate the number of stitches based on your foot's circle. Take two measurements from your foot:
1st Measurement: Instep Circle
You should gage your foot from heel to the instep with a tape measure incline.
2nd Measurement: Foot Circle
This is measured from the sole in the thinnest part of the foot above the bone.
Then, you should set the average circle: add the instep circle and the foot circle, and divide this number by 2. For example, if the instep circle is 31 cm and the foot circle is 21 cm, then:
21 + 31 = 52, 52 ÷ 2 = 26 cm.
You should calculate the quantity of stitches based on this length. It's better to round off the final number to the quantity of stitches that can be divided by 4 for comfortable knitting with 4 needles.
Knitting the Sock
Cast the needed number of stitches, place them on 4 needles, and knit the brioche round-knit. Usually, brioche is 5-6 cm, but you can make it thinner—it’s up to you.
Then, knit 7-8 cm for the front side up to the heel.
Creating the Heel
You should knit the heel with 2 needles from half of the stitches, leaving the remaining stitches on the other needles. Knit the work front side on 2 needles for about 5.5-6 cm; this is your heel height. It can be less depending on your leg size, but starting with size 5, it's a constant.
Heel Shaping
To give the heel a shape, we make the heel descent: divide all the stitches into three parts. If there are extra stitches, attach them to the central part (if the number of stitches is not divisible by 3). The stitches of the central part will be knitted further, and the lateral parts (which will form the sides of the heel) will be gradually connected to the central part.
Start the descent of the stitches from the wrong side to finish it from the front. Knit two-thirds of the stitches with the wrong ones, then knit 2 stitches together—the last stitch from the central part and the first stitch from the third part—together with wrong stitches. After that, you should turn the work and knit along the front side of the heel, slipping the first stitch without knitting at the turn.
Knit the front side; the last stitch of the central part and the first stitch of the first part should be knitted together (slip the first stitch, knit the second one with the front stitch, then cast the slipped stitch again to the knitted one). You should turn the work again, remove the first stitch without knitting, and continue.
Continuing the Descent
Continue knitting until all sides of the stitches are closed. Now gather stitches from the side of the heel; from each second row, collect 1 stitch + 1 additional stitch, i.e., from 2 rows you should collect 3 stitches. Turn to circular knitting, take the stitches from the left needles into work, along with the newly dialed stitches from the side parts of the heel and the stitches of the central part of the heel. Knit one row of front stitches.
Then, in each 2nd circular row for a better heel fit, knit the 3rd and 2nd stitches from the end of the 1st knitting needle together with the front stitch, and the 2nd and 3rd stitches of the 4th needle together with a broach.
Finishing the Sock
Repeat the decrease until the initial number of stitches (dialed to start knitting the work) is reached. Then, knit the foot front side in a circle to the bone of the thumb or to the end of the little finger.
Knitting the Toe Cap
Decline the stitches as follows: in each 2nd row, the 3rd and 2nd stitches from the end of the 1st and 3rd needles are knitted together with a knit stitch, and the 2nd and 3rd stitches of the 2nd and 4th needles are knitted together with a broach. When half the stitches remain on the needles, perform such reductions in each circular row until 4 stitches remain.
We tighten these with a thread and fix.


