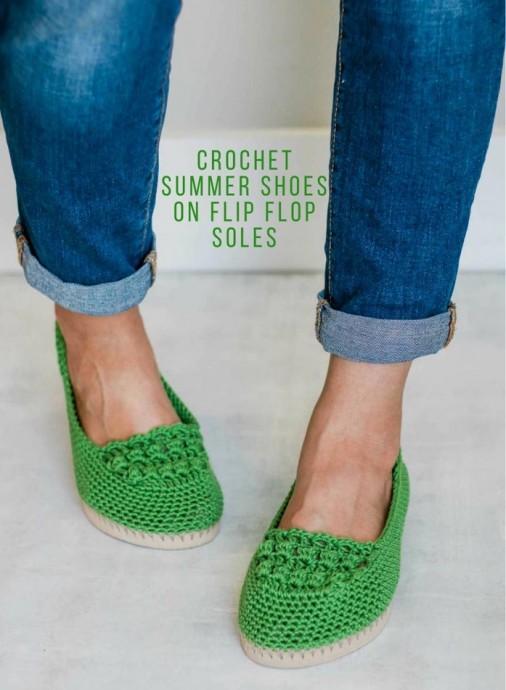
How to Create Crocheted Flip Flops: A Step-by-Step Guide

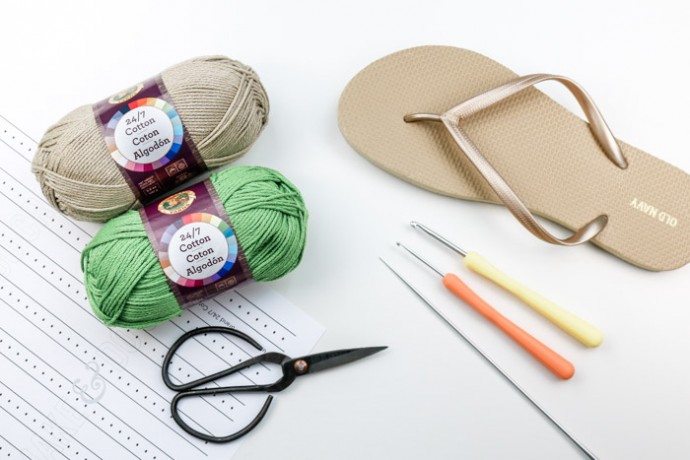

You’ll Need:
Lion Brand 24/7 Cotton (Weight: 4/medium* – 186 yds, 3.5 oz);
Grass Taupe (#761-122) – 1 skein;
Taupe (#761-122) (or color to match flip flop sole) – 1 skein;
Tapestry needle;
Crochet hook 2.25 mm;
Crochet hook 4 mm;
Measuring tape;
1 pair of flip flops (one size smaller than you wear normally. See pattern notes.)
Sharp tool to poke holes;
Sharp scissors;
Stitch markers;
Strong glue such as E6000 to glue strap plugs to sole (optional).
Gauge:
7.5 sc = 12 rounds = 2”
Sizes:
This pattern works well for a women’s size 6-10. See notes for suggestions on making larger sizes.
Overall Pattern and Sizing Notes
Transforming flip flops into shoes isn’t an exact science! Keep an open mind and don’t be afraid to customize the shoes to your liking.
You’ll likely want to size down when buying your flip flops. Look for a flip flop that offers about 0.25” of sole around your foot (more like the fit of a normal shoe). In the pattern sizing, the shoe sizes mentioned describe the shoe size you normally wear and not the sized-down size of your flip flops.
The pattern explains locations on the flip flop as if it’s a clock where the top of the toe is 12:00 and the heel is 6:00.
Similar to some ballet flats, your shoes should curl in a bit. That’s what gets them to shape to your feet without a lot of increasing or decreasing. They will stretch out slightly with wear.
The shoes are crocheted tightly, similar to amigurumi. Make a deliberate effort to keep your stitches tighter than normal. Check your gauge if you’re unsure.
The shoe sides and heel are worked in a spiral, so you will not ch 1 at the beginning of each round.
Left and right shoes are identical.
To make a larger size shoe, try adding an additional round or two in Rounds 1-9. You may also choose to work one extra repeat of Rows 2 and 3 in the toe section.
Instructions
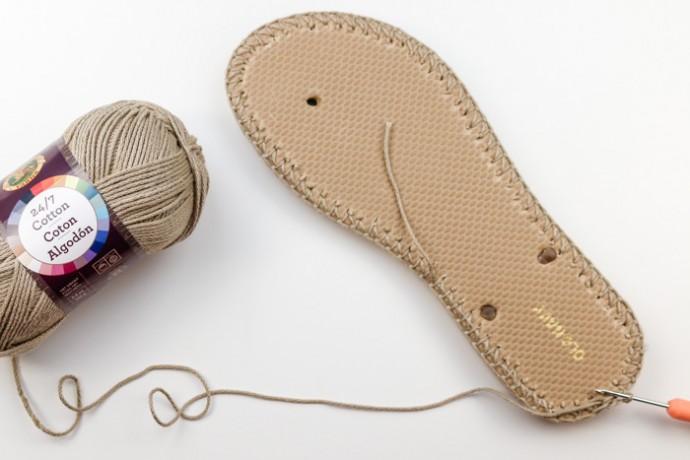
Trim straps off flip flops by cutting the mid-foot straps at an extreme angle so you can keep them in place without feeling them inside the shoe. (See photo below for an example of straps cut off.) Save the rubber plug from the strap between your toes and glue back in place if desired.
Tape a ruler around the flip flop sole. Alternatively, hold a measuring tape up to the flip flop sole. With your sharp instrument, poke holes in each dot on the ruler or approximately 7 mm apart. Pierce the hole at an angle from about the middle of the way down the sole to approximately 0.25” into the top of the sole. Ensure your holes are far enough from the edge so that the yarn won’t rip through the rubber when you create your first row of crochet. If using heavier cotton that’s more similar to a worsted weight cotton, try poking holes approximately 1 cm apart.
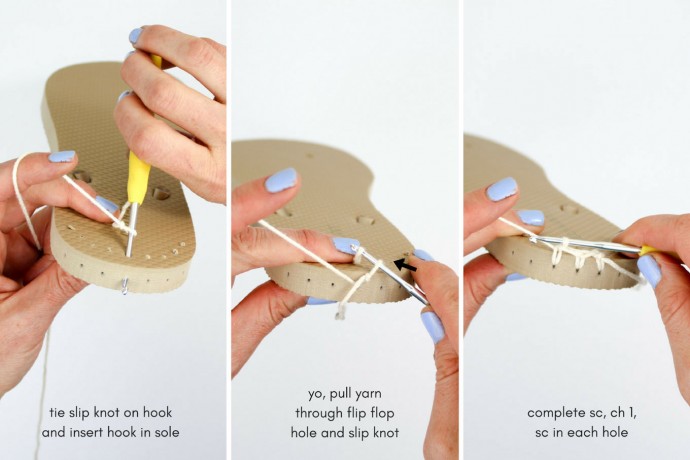
Tie a slip knot around the smaller hook. Insert the hook at the back of the heel (6:00 position) from the top of the flip flop toward the bottom of the sole, grabbing the yarn and pulling it through to the top of the flip flop and through the slip knot to attach the yarn to the flip flop. Crochet over the tail of this yarn as you work Round 1.
Round 1:
Continuing with the smaller hook, sc in each hole around the sole, join with a sl st to the first sc. Do not turn. Place a marker in the first st of the round and move it up as you work each round (or just keep track of which sole hole you began in).
Rounds 2-9:
With the larger hook, sc in each sc around the sole. Do not turn.
Remove the marker. Place stitch markers at the 4:00 and 8:00 positions. This is where the back heel “lip” of your slipper will taper to.
Do not turn work, continue with the rest of Row 9.
Row 9 Continued:
Sc in each sc until 1 st remains before the next marked st, sl st in the next sc, turn.
Tip:
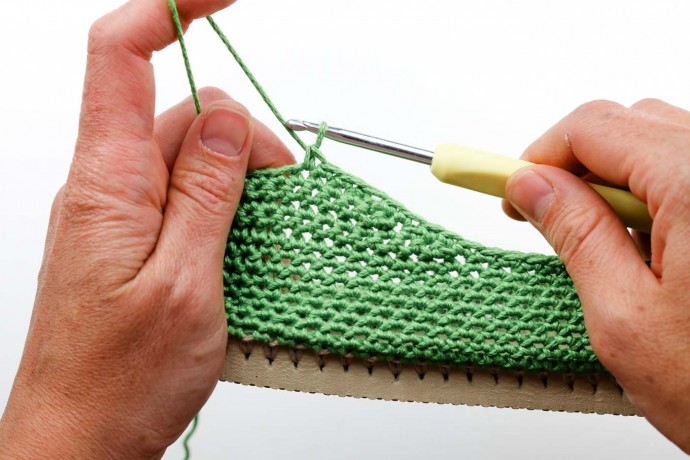
To make the heel taper appear smoother, keep working yarn toward the inside of the shoe when starting Rows 10-13. (For example, see 8:25 mark of the video tutorial above. Similarly, if you have questions about Rows 10-13, reference the video tutorial for extra help.)
Row 10:
Ch 1, sk the first sl st, sl st in the next sc, sc in each sc until 1 st remains before the next marked st, sl st in the next sc, turn.
Rows 11-12:
Ch 1, sk the first sl st, sl st in the next sc, sc in each sc until 3 stitches remain before the next marked st, sl st in the next sc, turn.
Row 13:
Ch 1, sk the first sl st, sl st in the next sc, sc in each sc to the back of the heel, sl st in the next sc. Fasten off.
Do not weave in the end. You’ll work over this tail later.
Top of Shoe
Find the approximate midpoint of the front of the slipper (12:00), then place stitch markers at the 1:30 and 10:30 positions with 12 sc between them.
Join yarn in the 11:00 marked st. (Left-handed crocheters, join in the 1:00 marked st.) Weave in the tail from attaching yarn now before this section is worked or crochet over it in Row 1.
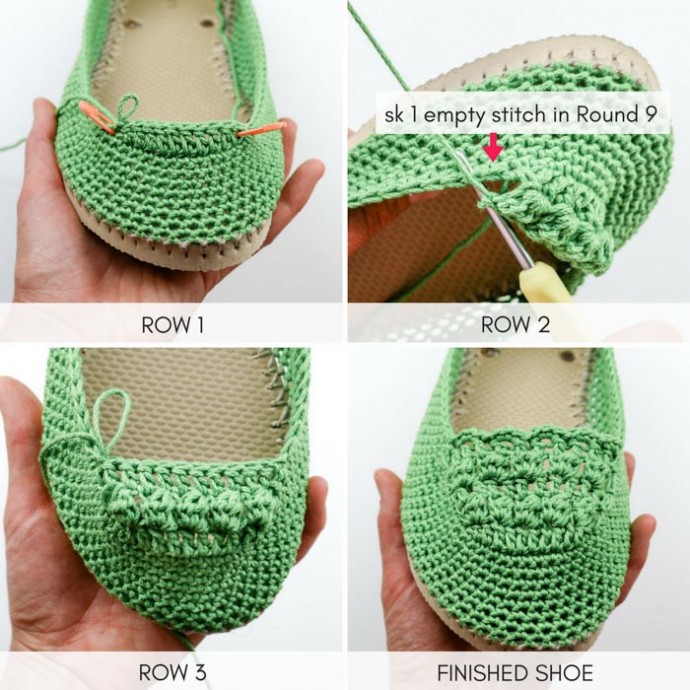
Row 1 (RS):
With the toe facing toward you, sk the next sc, dc in each of the next 10 sc, sk the next sc, sl st in the next 3 sc of Rnd 9 (up the left edge of the shoe), turn. (10 dc)
Row 2 (WS):
Sk the next 3 sl sts, [1 puff st in the next dc, ch 1, sk the next dc] 5 times, sk the next empty sc of Rnd 9, sl st in the next 3 sc of Rnd 9 (up the left edge of the shoe), turn. (5 puff sts, 5 chs)
Row 3 (RS):
Sk the next 3 sl sts, dc in each puff stitch and ch to create 10 total dc, sk the next empty sc up the left edge of the shoe, sl st in the next 3 sc of Rnd 9 (up the left edge of the shoe), turn. (10 dc)
Row 4 (WS):
Repeat Row 2. (5 puff sts, 5 chs)
Row 5 (RS):
Repeat Row 3, but do not turn at the end of the row. (10 dc)
Round 1 is worked clockwise (left-handed crocheters: counter-clockwise) from where the yarn is currently attached, around the heel and back to where Row 5 began. It then continues on to create one final row of the toe section. Crochet over yarn tail at the heel as you work. While crocheting over heel lip short rows, work stitches at whatever frequency necessary to create the smoothest edge. (See photo below.)
If the shoe is fitting a bit loose, work 2-3 decrease stitches (sc2tog) near the heel as you crochet Round 1.
Round 1:
Sc in each empty sc st around the sides and heel of the shoe, stopping once you reach the shoe top section; to finish the toe section with a scalloped edge: [3 sc in the first dc, sl st in the next dc] 5 times, sl st in the next 2 sts from the beginning of the round.
Where is video mentioned in pattern?