How to Crochet Your Own Easter Bunny

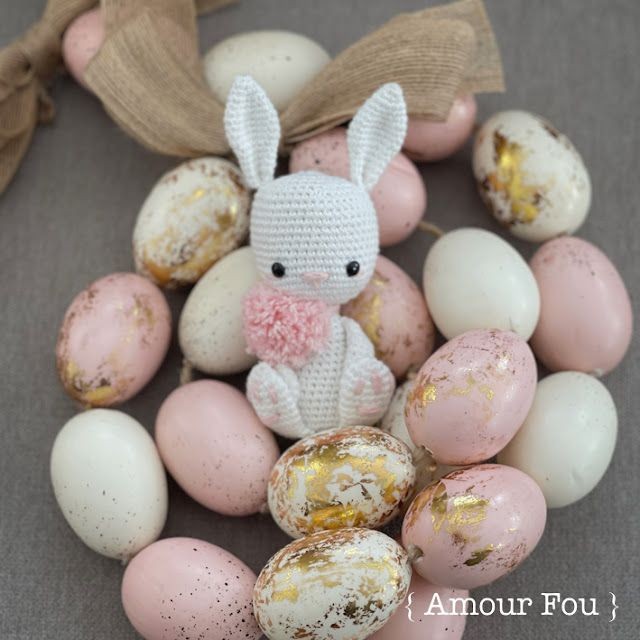
Create your very own Easter Bunny using the art of crocheting! Crafted with soft yarn and a crochet hook, this adorable bunny will make the perfect addition to your Easter decorations. You can customize the bunny by choosing different colors for the yarn, adding embellishments like bows or buttons, and even adjusting the size to your liking. Crocheting an Easter Bunny is a fun and creative way to celebrate the holiday season. Whether you are an experienced crocheter or just starting out, this project is perfect for all skill levels. You can follow a pattern or let your creativity run wild by designing your own bunny from scratch. Once you finish crocheting your Easter Bunny, you can display it proudly as a centerpiece on your Easter table or give it as a thoughtful handmade gift to friends and family. Let your imagination soar as you bring this charming Easter Bunny to life through the art of crocheting!
Finished Size
If crocheted with a 2.00 mm hook, this little bunny measures approximately 14 cm. Of course, should you choose a different hook and yarn, final measures will vary.
Materials
- 2.00 mm crochet hook
- 100 % cotton yarn for a 2.00 mm hook
- A pair of 6 mm safety eyes
- Tapestry needle
- Polyfiber fill
Colors
- White
- Pink
Abbreviations
- st = stitch
- ch = chain
- slst = slip stitch
- sc = single crochet
Body
Using white:
1. Start with a magic ring of 6 sc.
2. Crochet 2 sc in each st (12).
3. Crochet *1 sc, 2 sc in the next st*, repeat * (18).
4. Crochet *2 sc, 2 sc in the next st*, repeat * (24).
5. Crochet *3 sc, 2 sc in the next st*, repeat * (30).
6. to 10. Crochet 30 sc.
11. Crochet *3 sc, one decrease*, repeat * (24).
12. to 14. Crochet 24 sc.
15. Crochet *2 sc, one decrease*, repeat * (18).
Stuff firmly.
16. to 18. Crochet 18 sc.
19. Crochet *1 sc, one decrease*, repeat * (12).
20. to 23. Crochet 12 sc.
Don't break the yarn! Now we will start with the head…
Head
24. Crochet 2 sc in each st (24).
25. Crochet *1 sc, 2 sc in the next st*, repeat * (36).
Stuff the neck area firmly…
26. Crochet *5 sc, 2 sc in the next st*, repeat * (42).
27. to 39. Crochet 42 sc.
Place safety eyes between rounds 30 and 31 (with a distance of 8 stitches), embroider the snout and embroider the cheeks with a bit of pink yarn…
40. Crochet *5 sc, one decrease*, repeat * (36).
41. Crochet *4 sc, one decrease*, repeat * (30).
42. Crochet *3 sc, one decrease*, repeat * (24).
43. Crochet *2 sc, one decrease*, repeat * (18).
Stuff firmly.
44. Crochet *1 sc, one decrease*, repeat * (12).
45. Crochet 6 decreases (6).
Close. Break the yarn and weave in ends.
Feet
Make two, using white:
1. Start with a magic ring of 5 sc.
2. Crochet 2 sc in each st (10).
3. Crochet *1 sc, 2 sc in the next st*, repeat * (15).
4. to 9. Crochet 15 sc.
No need to stuff the feet…
10. Crochet *1 sc, one decrease*, repeat * (10).
11. and 12. Crochet 10 sc.
13. Press the opening with your fingers and single crochet together both opposing sides.
Close and break the yarn, leaving a long tail to sew to the head.
Arms
Make two, using white:
1. Make 2 chain stitches. Crochet 4 sc in the second chain from hook.
2. Crochet 2 sc in each stitch (8).
3. to 10. Crochet 8 sc.
No need to stuff the arms…
11. Press the opening with your fingers and single crochet together both opposing sides.
Close. Break the yarn and leave a long tail to sew arms to body.
Tail
Using white:
1. Magic ring of 6 sc.
2. Crochet 2 sc in each st (12).
3. Crochet *1 sc, 2 sc in the next st*, repeat * (18).
4. to 6. Crochet 18 sc.
7. Crochet *1 sc, one decrease*, repeat * (12).
Close and break the yarn, leaving a long tail to sew to the back of the body.
Ears
Make two, using white:
1. Magic ring of 6 sc.
2. Crochet 6 sc.
3. Crochet 2 sc in each st (12).
4. and 5. Crochet 12 sc.
6. Crochet *1 sc, 2 sc in the next st*, repeat * (18).
7. to 10. Crochet 18 sc.
11. Crochet *1 sc, one decrease*, repeat * (12).
12. to 15. Crochet 12 sc.
16. Flatten the opening with your fingers and crochet together, with sc, both opposing sides.
Close and break the yarn, leaving a long tail to sew to the head.
Assembly
- Curve the ears and sew them to the head.
- Flatten the feet and sew them to the body and, using pink yarn, embroider the paws.
- Sew the arms to the sides of the body.
- Stuff the tail and sew it to the back of the body.
- Using pink yarn, make a fluffy pompon and tie it to the neck of your bunny.
- Weave in all ends!