

Easy Chunky Crochet Headband Pattern — Beginner-Friendly Puff-Stitch Tutorial


Crocheting a beautiful headband is a delightful and creative project to take on! With just a hook and some colorful yarn, you can craft a stylish accessory that not only keeps your ears warm but also adds a charming touch to any outfit. The best part is that you can personalize it with different stitches, patterns, and embellishments to match your unique style. Whether you're a beginner or a seasoned crocheter, making a headband is a fun and rewarding way to showcase your skills and creativity. So grab your supplies, put on some cozy music, and let's crochet a fabulous headband together!
Difficulty
Beginner Friendly
Materials Used
Alize Superlana Maxi 75% Acrylic 25% Wool, 100gr 100mtr 109 yds
7mm hook, scissors, tapestry needle.
Measurements
One Size Women Adult
Length: 25" (65cm), Width: 4.5" (11cm)
Stitches Used
- ch = chain
- dc = double crochet
- Blosc = back loop only single crochet
- SPuff = simple puff stitch
- Sc = single crochet
- st = stitches
Gauge for This Pattern Using This Yarn
10cm x 10cm = 9 st x 8 rows
Instructions
This pattern is beginner friendly, as it uses only basic stitches. You should be familiar with single crochet, double crochet, half double crochet, and slip stitch.
Instructions for the SPuff stitch will be included in the pattern.
This pattern is made with very bulky yarn for maximum warmth and texture.
This pattern is made in rows.
Please make a gauge before you start to count your measurements with the specific yarn of your choice.
Of course, you can choose any combination of colors or make it with one color as you wish!
Instructions
Foundation chain: ch 45
R1: dc in 4th ch from hook (first 3 ch count as 1st dc), dc in next ch and all across to the end of the row, turn your work = 42 st
R2: Now we will make the SPuff stitch. It is very simple: ch1, sc in first st from hook, tr in next st, sc in next st, tr in next st, sc in next, and so on across to the end of row - 1 tr, 1 sc. This gives us the simple puff stitch - finish with a sc and turn work.
R3: ch1 and sc in 1st st from hook, sc in next st (top of the SPuff st from previous row), sc in next st, and so on across to end of row - 1 sc in every st from previous row. Please count your st to make sure you did not increase or decrease the number of stitches = 42 st, turn your work.
R4: ch 1 and sc in 1st st from previous row, blosc in next st, blosc in every st across to end of row.
R5: Repeat R4 (BLOSC in every st across to end of row).
R6: A second row of SPuff st. Again: ch1, sc in first st from hook, tr in next st, sc in next st, tr in next st, sc in next and so on across to the end of row - 1 tr, 1 sc. Finish with a sc and turn work.
R7: ch1 and sc in 1st st from hook, sc in next st (top of the SPuff st from previous row), sc in next st, and so on across to end of row - 1 sc in every st from previous row.
Repeat rows R8 + R9: ch 1 and sc in 1st st from previous row, blosc in next st, blosc in every st across to end of row. Cut the yarn, secure it, and weave in ends.
- Funny Pictures
-
 Weekly Treat of Funniest Parenting Memes for Good Laugh out Loud Right Now
-
 Really Funny Pics to End These Weekend Perfectly
-
 Incredibly Relatable Pics for Your Amusement
- Recipes
-
 Baked Sweet Potato Parmesan Tater Tots
-
 Saffron Lemon Chicken With Persian Rice
-
 Croatian Plum Dumplings
- Lifehacks
-
 Silt Crochet Stitch Photo Tutorial
-
 Crochet Mesh Stitch in Corner to Corner! A Lacy C2C Stitch Photo Tutorial
-
 Woven Shell Crochet Stitch Photo Tutorial
- Crochet Ideas
-
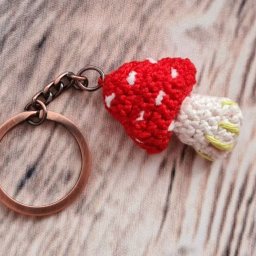 DIY Crochet Mushroom Keychain — Easy Step-by-Step Pattern with Photos
-
 Make a Leafy Texture: Easy Crochet Sprig Stitch (Free UK Pattern)
-
 Free Crochet Sleep Mask Pattern — Cute DK Cotton Eye Mask (UK Terms, Advanced Beginner)
- DIY
-
 Cozy Crochet: Free Up-and-Down Stripe Cotton Washcloth Pattern (Quick & Easy)
-
 How to Make Realistic Crepe Paper Daffodils — Easy Step-by-Step DIY
-
 Make Adorable Easter Egg Bird Feeders — Easy DIY Seed Ornaments for Your Backyard
- Knitting Ideas
-
 Knit the Fish Scale Stitch: Easy 4-Row Pattern for a Textured, Scaly Look
-
 Knitted Camisole Party Frock — Vintage Pattern with Step-by-Step Instructions
-
 DIY Knitted Cuddly Cat Toy — Free Pattern & Step-by-Step Instructions