Crochet Almond Ridges Stitches

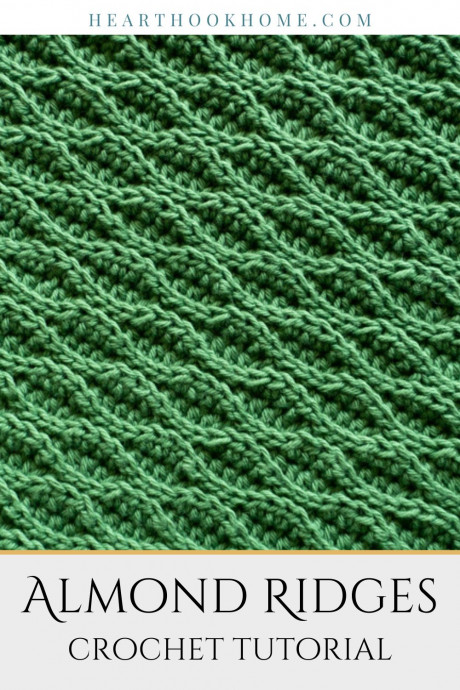
Introduction to Crochet Almond Ridges Stitches
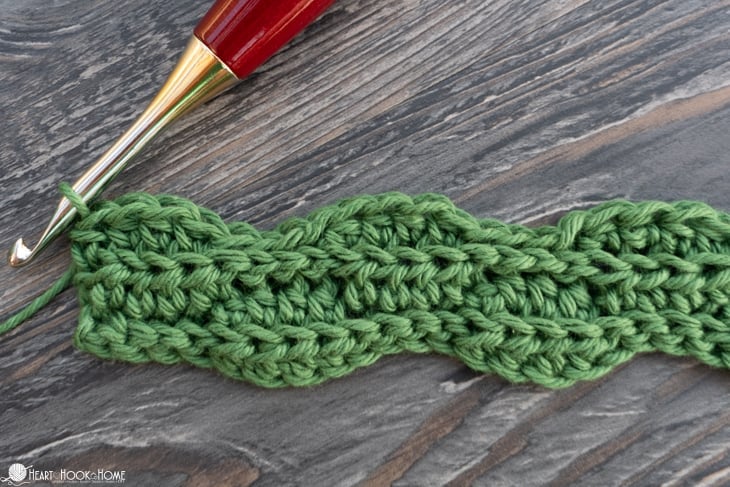
Crochet Almond Ridges stitches are a charming and textured stitch pattern that can add a lovely dimension to your crochet projects. This stitch creates a bumpy, raised effect resembling little almond-shaped ridges that bring a unique touch to your work. It is perfect for creating scarves, blankets, or even for adding embellishments to your projects. Crocheting this stitch may seem a bit intimidating at first, but with a bit of practice, you'll soon master it and be amazed at the beautiful results. So grab your yarn, hook, and let's create some cozy and visually appealing pieces together! Happy crocheting!
Basic Techniques
For this stitch, we are repeating a four-row sequence. Once you get the foundation built, this stitch set is a breeze! All you need to know is how to make a slip stitch and how to make a Half Double Crochet stitch. Easy peasy!
Working into the Back Loop Only
For the entirety of this stitch set (with the exception of the first row), we work into the back loop only (BLO). This helps to give it that great, ridged effect we love.
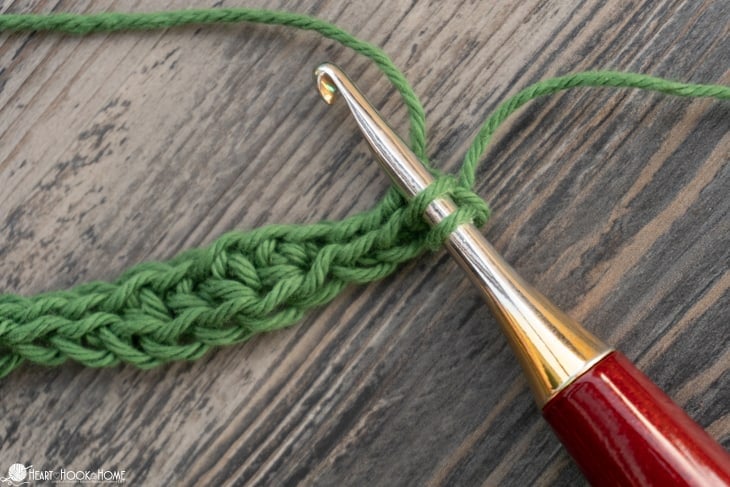
Almond Ridges Foundation Steps
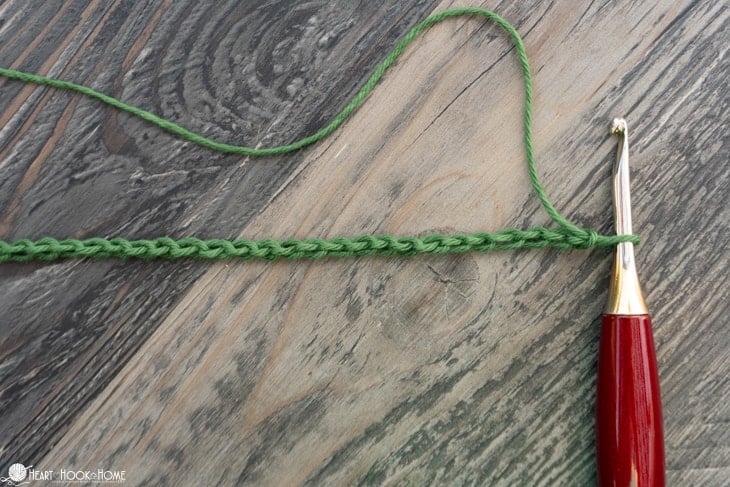
Step 1: Chain a multiple of eight stitches + 5.
Step 2: Slip stitch in the second chain from the hook and the next 3 chains.
Step 3: Hdc in each of the next four chains.
Step 4: Slip stitch in each of the next four chains.

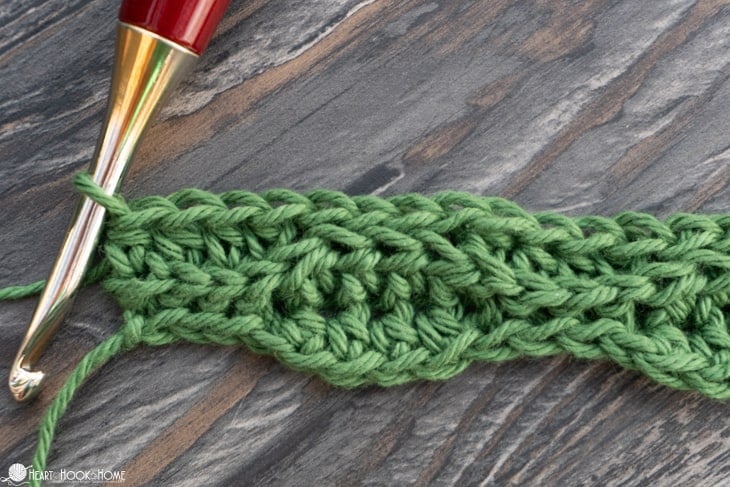
Alternate steps 3 & 4 until you reach the end of the row, ending with 4 slip stitches. Foundation row complete!
Note! Remember to go into the Back Loop Only for the duration of the entire pattern.
Chain one and turn. Slip stitch in the first 4 stitches, hdc in the next 4 stitches, slip stitch in the next 4 stitches, hdc in the next 4 stitches, and slip stitch in the next 4 stitches. Alternate four slip stitches and four hdc stitches to the end of the row, ending with slip stitches.

First two rows completed.
Tips for Successful Crocheting
Tip: If you start a row with slip stitches, you will always end that row with slip stitches. Alternately, if you start a row with hdc, you will always end that row with hdc.
Now that we have two rows that both start (and end) with slip stitches, it is time to make two rows that start (and end) with hdc stitches. Don’t forget that you are still (always) going into the Back Loop Only.
Creating Half Double Crochet Rows
Chain one and turn, hdc in the first 4 stitches, slip stitch in the next 4 stitches, hdc in the next 4 stitches, alternating to the end of the row so that you end with 4 hdcs.
One hdc row made!
When you have two rows that both start (and end) with hdc, it's time to do two more rows that start (and end) with slip stitches.
Alternate two rows that start with slip stitches and two rows that start with hdc until your piece is as tall as you like. End your pattern with two rows that start and end with slip stitches.
- Funny Pictures
-
 Hilarious Memes for Those Bored to Tears
-
 Weekly Treat of Funniest Parenting Memes for Good Laugh out Loud Right Now
-
 Really Funny Pics to End These Weekend Perfectly
- Recipes
-
 Crispy Baked Avocado Fries
-
 Scrambled Chickpea and Spinach Pitas
-
 Cinnamon Pancakes
- Lifehacks
-
 Crochet Basics: Aligned Cobble Stitch
-
 Brick Stitch Crochet Tutorial
-
 Crochet Basics: Wattle Stitch
- Crochet Ideas
-
 Crochet Snorlax Plushie Doll
-
 Crochet Beautiful Penguin Toy
-
 Crochet Tiny Snowman
- DIY
-
 DIY Santa Craft For Kids
-
 Paper Plate Angel Craft
-
 Upcycled Mason Jar Chicken Vase
- Knitting Ideas
-
 Knitted Bridger Cowl
-
 Knitted Keepsake Bag
-
 Knitted Cutie Cupcake Dolls