Crochet Hippo Amigurumi: A Guide to Your Next Fun Project

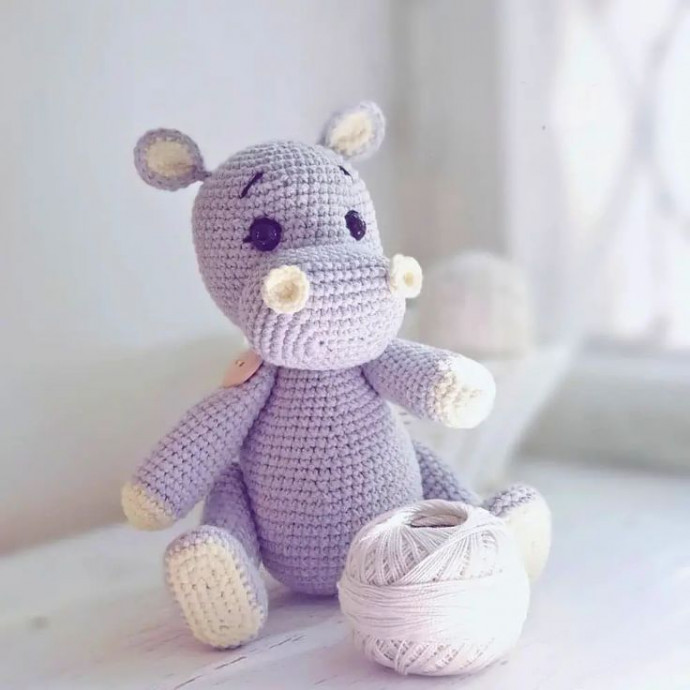
Crochet Hippo Amigurumi is the cutest addition to any amigurumi collection! With its adorable design and lovable charm, this handmade crochet hippo will bring a smile to anyone's face. Whether you're a seasoned crocheter or a beginner looking for a fun project, creating a Crochet Hippo Amigurumi is a delightful way to showcase your creativity and spread joy. From its cozy yarn texture to its endearing oversized features, this hippo amigurumi is sure to become a treasured and huggable companion for kids and adults alike. Dive into the world of crochet and let your imagination run wild with this charming and friendly crochet project!
Materials
- Yarnart Jeans Yellow (#86) Weight 160m/50g Sport (12 WPI)
- Yarnart Jeans Grey (#80) Weight 160m/50g Sport (12 WPI)
- Hook 2.00 mm
- Stuffing
- Safety Eyes
- Strong Thread (or Dental Floss)
- 4 Buttons
- Needle for Sewing on Parts
- Needles for Stabbing
- Marker or Contrast Thread (Optional)
- Black Thread for Face Embroidery
Abbreviation
- MR – Magic Ring
- SC – Single Crochet
- INC – Increase
- DEC – Decrease
- CH – Chain Stitch
- HDC – Half Double Crochet
- *…* N – Repeat Sequence in Brackets N Times
- (…) Amount of Stitches After the Row
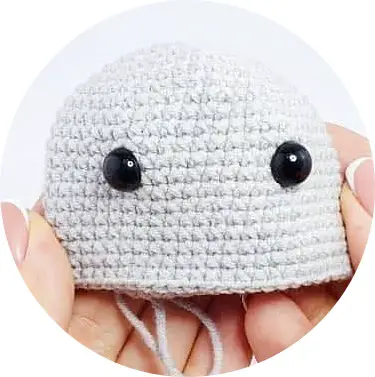
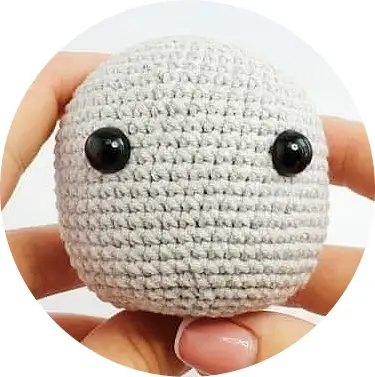
Head
Grey yarn
1. 6 MR
2. 6 INC (12)
3. *1 SC, 1 INC* 6 (18)
4. *2 SC, 1 INC* 6 (24)
5. 1 SC, 1 INC, *3 SC, 1 INC* 5, 2 SC (30)
6. *4 SC, 1 INC* 6 (36)
7. 2 SC, 1 INC, *5 SC, 1 INC* 5, 3 SC (42)
8. *6 SC, 1 INC* 6 (48)
9. 3 SC, 1 INC, *7 SC, 1 INC* 5, 4 SC (54)
10. *8 SC, 1 INC* 6 (60)
11-23. /13 Rows/ 60 SC
Eyes between 13 and 14 rows, 10 SC between eyes
24. *8 SC, 1 DEC* 6 (54)
25. *7 SC, 1 DEC* 6 (48)
26. *6 SC, 1 DEC* 6 (42)
27. *5 SC, 1 DEC* 6 (36)
28. *4 SC, 1 DEC* 6 (30)
29. *3 SC, 1 DEC* 6 (24) To Stuff
30. *2 SC, 1 DEC* 6 (18)
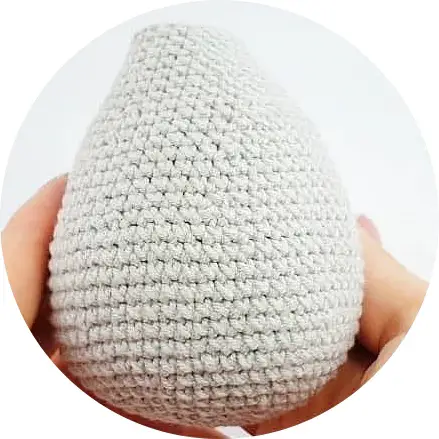
31. *1 SC, 1 DEC* 6 (12)
32. 6 DEC (6)
Body
1. 6 MR
2. 6 INC (12)
3. *1 SC, 1 INC* 6 (18)
4. *2 SC, 1 INC* 6 (24)
5. 1 SC, 1 INC, *3 SC, 1 INC* 5, 2 SC (30) Fill and Shape the Tummy
6. *4 SC, 1 INC* 6 (36)
7. 2 SC, 1 INC, *5 SC, 1 INC* 5, 3 SC (42)
8. *6 SC, 1 INC* 6 (48)
9. 3 SC, 1 INC, *7 SC, 1 INC* 5, 3 SC (54)
10. *8 SC, 1 INC* 6 (60)
11. 15 SC, *4 SC, 1 INC* 6, 15 SC (66)
12-18. /7 Rows/ 66 SC
19. 15 SC, *4 SC, 1 DEC* 6, 15 SC (60)
20. *8 SC, 1 DEC* 6 (54)
21-22. 54 SC
23. *7 SC, 1 DEC* 6 (48)
24. 48 SC
25. *6 SC, 1 DEC* 6 (42)
26. 42 SC
27. *5 SC, 1 DEC* 6 (36)
28. 36 SC
29. *4 SC, 1 DEC* 6 (30)
30. 30 SC
31. *3 SC, 1 DEC* 6 (24)
32-33. 24 SC
Cut the Yarn, Close the Loop. Leave the long end for sewing.
Legs
Yellow Yarn 7 CH
1. 5 SC, 4 in 1 by chain, 5 SC, 4 in 1 on the other side of the chain (18)
2. 5 SC, 3 in 1, 2 SC, 3 in 1, 5 SC, 3 in 1, 2 SC, 3 in 1 (26)
3. 6 SC, 3 in 1, 4 SC, 3 in 1, 7 SC, 3 in 1, 4 SC, 3 in 1, 1 SC (34)
Change to Grey Yarn 4-6. 34 SC
7. 6 SC, 6 DEC, HDC, 16 SC (28)
8. 5 SC, 4 DEC, HDC, 15 SC (24)
9. 5 SC, 2 DEC, HDC, 15 SC (22)
10. 5 SC, 1 DEC, 10 SC, 1 DEC, 3 SC (20)
11. *3 SC, 1 DEC* 4 (16)
12-14. 16 SC
15. *3 SC, 1 INC* 4 (20)
16. 20 SC
Stuff the ready part of the leg rather tightly.
17. *4 SC, 1 INC* 4 (24)
18-23. /6 Rows/ 24 SC
Stuff slightly just enough to shape.
24. *2 SC, 1 DEC* 6 (18)
25. *1 SC, 1 DEC* 6 (12) 26. 6 DEC (6)
Tighten the hole.
Hide the end of the yarn inside.
Crochet the second leg in the same way.
Arms
Yellow Yarn
1. 6 MR
2. 6 INC (12)
3. *1 SC, 1 INC* 6 (18)
4. 18 SC
Change to Grey Yarn
5-20. /16 Rows/ 18 SC
Stuff half arm rather tightly, the other half
Stuff slightly just enough to shape.
21. *1 SC, 1 DEC* 6 (12)
22. 6 DEC (6)
Tighten the hole. Hide the end. Crochet the second arm in the same way.
Ears

Crochet 2 Yellow and 2 Grey Details
1. 6 MR
2. 6 INC (12)
3. *1 SC, 1 INC* 6 (18)
Fold the Yellow and Grey part and crochet together with Grey yarn.
Close detail in a half, sew the bottom together. Cut the yarn. Leave a long end for sewing.
Muzzle
Grey Yarn 7 CH
1. 5 SC, 4 in 1 by chain, 5 SC, 4 in 1 on the other side of the chain (18)
2. 5 SC, 3 in 1, 2 SC, 3 in 1, 5 SC, 3 in 1, 2 SC, 3 in 1 (26)
3. 6 SC, 3 in 1, 4 SC, 3 in 1, 7 SC, 3 in 1, 4 SC, 3 in 1, 1 SC (34)
4. 7 SC, 3 in 1, 6 SC, 3 in 1, 9 SC, 3 in 1, 6 SC, 3 in 1, 2 SC (42)
5. 8 SC, 1 INC, 8 SC, 1 INC, 11 SC, 1 INC, 8 SC, 1 INC, 3 SC (46)
6-7. 46 SC
8. 8 SC, 1 DEC, 8 SC, 1 DEC, 11 SC, 1 DEC, 8 SC, 1 DEC, 3 SC (42)
9-10. 42 SC
Nostrils
Yellow Yarn
1. 6 MR
2. 6 INC (12)
Cut the yarn. Leave a long end for sewing.
Crochet the second nostril in the same way.
Assembly
Sew the muzzle between 15 (under the eyes) and 28 rows.
When a couple of cm are left to the end, fill the muzzle.
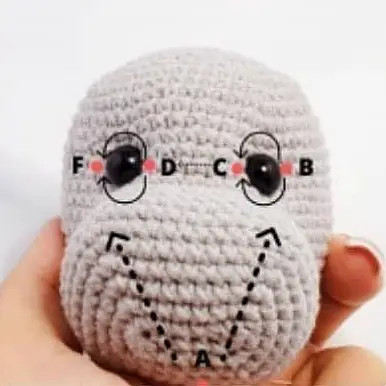
Sew to the end make a face tightening.
You will need a strong thread or dental floss and a long needle.
1. Insert the needle into the base of the head (A) and pull it in the middle of the eye (B).
2. Make a stitch to C and hook the thread from above.
3. Make a large stitch between the eyes and pull the thread in the middle of the eye (D).
4. Make a stitch to F and hook the thread from above. Pull it out at the base of the head (A)
Repeat the steps, but hook the thread from below. Pull and tie several knots.
Sew the ears on the 7th row.
Sew on the corners of the muzzle for the center of the nostrils.
Embroider eyelashes and eyebrows with black thread.
Sew the head to the body.
Attach the legs to the body with a button attachment.
Take a strong thread (or dental floss) and a long needle. Insert the needle from the inside of the leg and string the button. Leave the end of the thread 10-15 cm. Insert the needle in the opposite direction and output to the place where you started.
Pierce the needle through the body.
Repeat with the second leg the same actions as with the first.
Again, pierce the needle through the body and bring the thread to the starting point.
For reliability, you can repeat the process 1-2 times. Tighten the thread and tie a knot. Cut the ends and hide.
Attach the arms in the same way.
- Funny Pictures
-
 The Best Office Memes to Laugh and Remember Some Great Things
-
 Relatable Memes to Laugh Before Going to Sleep
-
 Friday Memes That Just Perfectly Describe Marriage and Parenting
- Recipes
-
 Russian Tea Cakes (Snowball Cookies)
-
 Rigatoni with Sausage, Tomatoes, and Zucchini
-
 Healthy Crab Cakes (Keto)
- Lifehacks
-
 How to Crochet a Harlequin Stitch
-
 Removing The Toughest Stains
-
 Crochet Basics: Crumpled Griddle Stitch
- Crochet Ideas
-
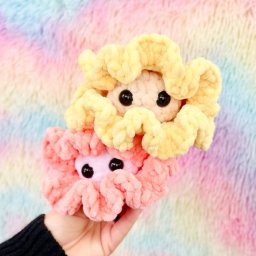 Crochet Clemmy the Clam
-
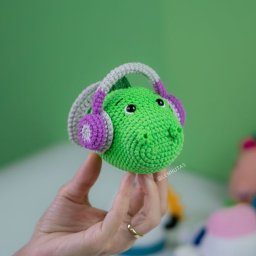 Crochet Dinosaur Head Keychain
-
 Crochet Bambolino Heart Keychain
- DIY
-
 DIY Snowman Wreath
-
 Crochet Mini Bag
-
 Crochet Adorable Baked Cake
- Knitting Ideas
-
 Knitted Easter Bunny
-
 Knitted Mobile Phone/Glasses Case
-
 Knitted Halloween Pumpkin