How to Create Nitrography Art: Step-by-Step Instructions


You'll Need
To get started on your nitrography project, gather the following materials:
- Thick cardboard (or fibreboard)
- Scheme
- Different colours of threads
- Glue
- Scissors
- Toothpick
Instructions
We start by transferring the scheme to cardboard or fibreboard. Pay particular attention to the selection of colors for the threads. In the process of creating a similar picture using the nitrography method, any materials can be used in the form of residues of yarn from knitting, colorful acrylic threads, as well as floss, which in this case will need to be folded several times beforehand. The main condition is their uniform thickness.
Advice for Beginners
Do not use material that has a non-smooth structure in the initial stages of nitrography. Threads with shaggy or curly components, although they give an interesting effect on the result, but they are quite laborious to work with.
Using glue, smear the line on the sheet. This can be done with a toothpick or a thin stick. It is much more convenient to do this with these objects than with a brush. Thus, it is much more convenient to smear glue in hard-to-reach places among glued threads.
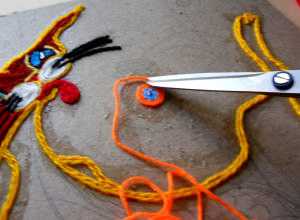
Next, on a non-hardened adhesive base, we begin to gently glue the thread, step by step, gently pressing it with your fingers. It is crucial to lay out the material according to the template. The tip of the thread should be cut off at the moment when you reach the point of making a sharp turn of the thread or when it is necessary to introduce the next shade.
Filling the Template
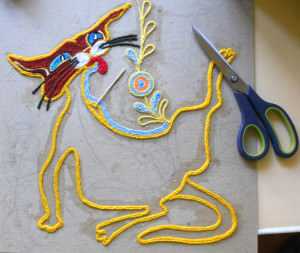
At the beginning of the process, glue the outline of a large template, after which you need to proceed to fill the entire space in the middle of the product. For smaller elements, fill the internal part first and then draw up the outlines.
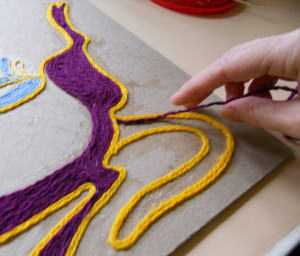
Try to glue the threads close to one another, without allowing any unnecessary gaps. Only by doing so will you achieve a neat and high-quality product.
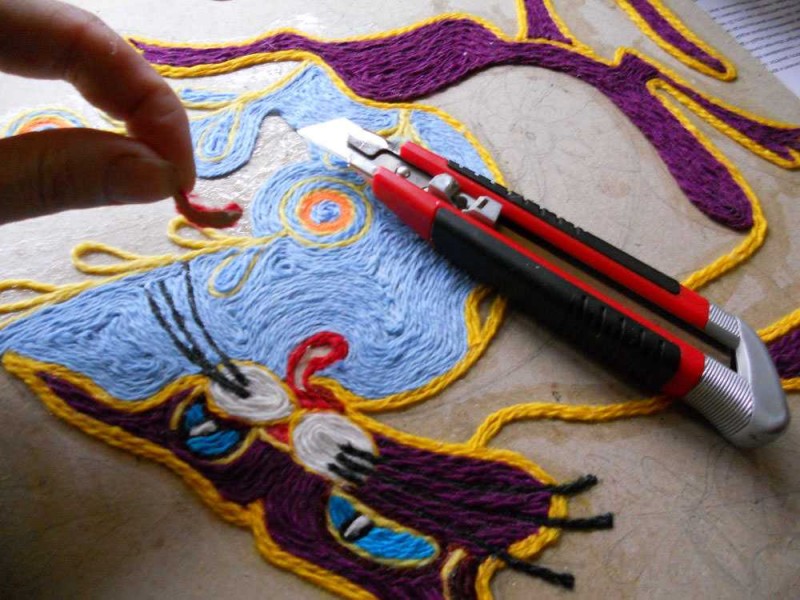
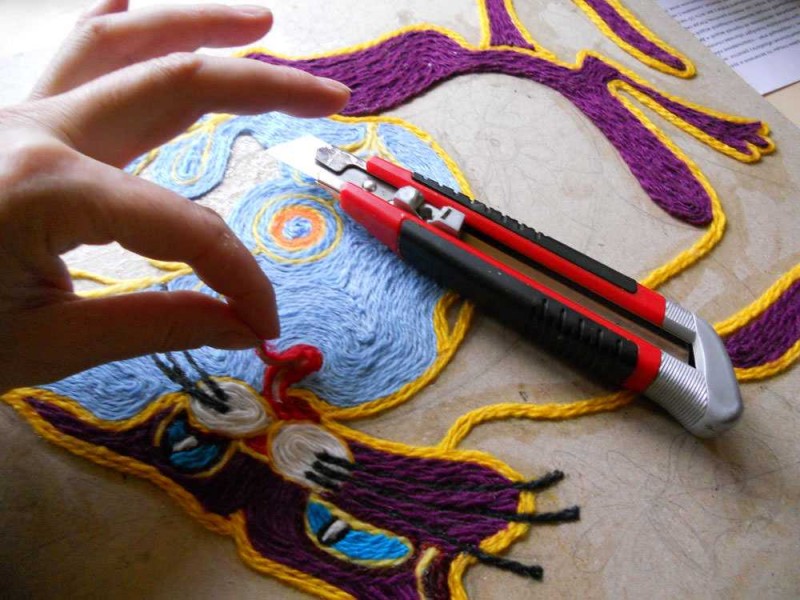
Replacing Thread Colors
In the process, it may happen that you need to replace one color of material with another. Thanks to the multilayer thick base in the form of cardboard or fibreboard, this will be a straightforward task.
Take a paper knife and cut the desired contour of the surface where you plan to change the shade of the threads. This piece comes off together with the paper layer. On the newly formed empty surface, glue the material of the required shade. These actions can be carried out repeatedly, but carefully, considering the remaining layers of cardboard.
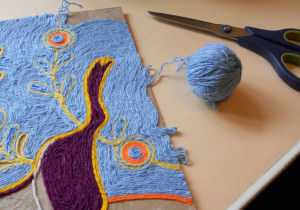
Finishing Touches
When creating the edges of a picture using nitrography, do not cut each of the fibers individually. This practice will not help you save material. Instead, try to pull the threads beyond the borders of the product, and then trim everything with one stroke of scissors. The pile remaining at the edges can be easily hidden in a frame under a baguette.
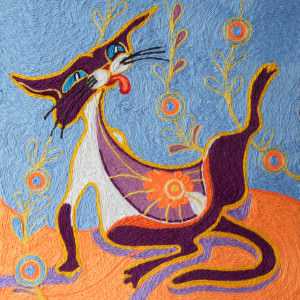
At the end of your work, try steaming the finished product with an iron through a damp cloth. This action will help the threads to cling to one another, resulting in a smooth and beautiful nitrography piece. You will beautifully replicate a bright cat, as shown in the photo, by following this simple action plan.
- Funny Pictures
-
 Pics to Get the Excitement Today
-
 Funny Christmas Meme Dump
-
 Funniest Relatable Felines in the Form of Memes
- Recipes
-
 Cinnamon Sugar Swirl Cupcakes
-
 Cheesy Bacon Ranch Roasted Potatoes
-
 Blooming Onion Bites with Dipping Sauce
- Lifehacks
-
 7 Toilet and Bathroom Cleaning Hacks
-
 Tips & Hacks for Clean Carpets
-
 7 Kitchen Hacks & Simple Solutions
- Crochet Ideas
-
 Crochet Watermelon Amigurumi
-
 Crochet Shark Applique
-
 Crochet Pineapple Amigurumi
- DIY
-
 Yarn Wrapped Christmas Wreath Ornaments
-
 Egg Carton Snowman Ornament
-
 Stick Peppermint Candy Ornament
- Knitting Ideas
-
 Knitted Star Square Dishcloth
-
 Knitted Free 2025 Year Dishcloth
-
 Knitted Belle Finger Puppet