How to Make a Cozy Crochet Sleeping Mask

Introduction
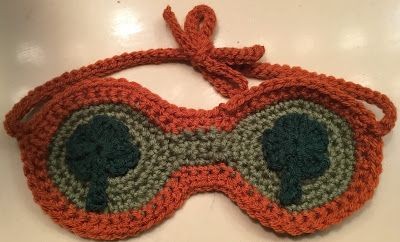
Looking for a cozy and stylish way to catch some Z's? A crochet sleeping mask is both cute and comfortable, making bedtime feel like a luxurious experience. With its soft yarn texture and customizable design options, you can match it to your pajamas or express your unique style. Whether you're on a long flight or just need some uninterrupted shut-eye at home, a crochet sleeping mask will have you dozing off in no time. Say goodbye to harsh light disruptions and hello to sweet dreams wrapped in a charming handmade accessory!
Product Specifications
Size: Fits most adults
Materials:
--3.5mm (for Appliqué) & 4.5mm hook (for Mask)
--#4 worsted weight yarn - I used Midgreen, Burnt Pumpkin, and Dark Green
--Tapestry needle for weaving
U.S. Stitch Abbreviations
- Ch: chain
- St: stitch(es)
- Sl st: slip stitch
- SC: single crochet
- HDC: half double crochet
- Rep: repeat
- MR: magic ring
- FO: fasten off
Directions
For my mask, I made my first circle and bridge of nose section. I then made my second circle and whipstitched together. I then added the border.
I worked the pattern in the round unless otherwise noted. So, use a stitch marker to keep track of the first stitch of each round and move up accordingly.
First Eye
- With 4.5mm hook, 6 SC into MR. (6)
- 2 SC in each stitch around. (12)
- 2 SC in first stitch, 1 SC in next stitch. Rep around. (18)
- 2 SC in first stitch, 1 SC in next 2 stitches. Rep around. (24)
- 2 SC in first stitch, 1 SC in next 3 stitches. Rep around. (30)
For a smaller, adult-sized, STOP increase rounds.
For a larger, adult-sized, CONTINUE to make another increase round:
- 2 SC in first stitch, 1 SC in next 4 stitches. Rep around. Sl st join to first stitch. (36)
Bridge of Nose
- Ch5. SC in 2nd ch from hook and next 3 ch. Sl st to 2nd stitch of Round 6. Ch1 and Turn. (4)
- 1 SC in each stitch. Ch1 and turn. (4)
- 1 SC in each stitch. Sl st to 3rd stitch of Round 6. Ch1 and turn. (4)
- 1 SC in each stitch. FO and leave a long tail for attaching the second eye. (4)
Second Eye
Rep steps #1 - 6 of the first eye. Attach the second eye to the opposite end of the Bridge of the Nose. Weave ends.
Border
- Join yarn in any stitch and Ch1. SC evenly around the first eye, across the bridge, around the second eye, across the bridge and sl st join to the first stitch.
- 1 SC in each stitch around.
Straps
I joined yarn on each side with a sl st and then Ch51. I sl st in the 2nd ch from the hook and across. Sl st joined to the mask and weaved ends. Rep on opposite side. (Note: Make sure the strap will be long enough for your head before completing; you may need to make it bigger or smaller, depending on the size of your head)
4-Leaf Clover (Make 2)
- With a 3.5mm hook, make a MR and *Ch2. 2 HDC, Ch2 and sl st into MR.* Rep until you have 4 clovers made. Then sl st into MR. Ch5. SC in 2nd ch from hook. Sl st into remaining chains. Sl st into MR and FO. Leave a tail long enough for attaching.
And, that's it!!!! Super easy, cute, and functional...
- Funny Pictures
-
 Feline Memes to Feel Better
-
 Best Funny Pics of the Day Especially for You
-
 Pictures That Have No Right to be This Funny
- Recipes
-
 Strawberry Banana Bread
-
 Baked Beans and Hot Dogs with Biscuit Topping
-
 Roasted Rosemary Lemon Chicken Breasts
- Lifehacks
-
 Crochet Tutorial: Flower Puff Stitch
-
 8 Basic Crochet Tips
-
 7 Crochet Tips And Tricks
- Crochet Ideas
-
 Crochet Snorlax Plushie Doll
-
 Crochet Cat in 1 Row
-
 Crochet Beautiful Penguin Toy
- DIY
-
 Popsicle Stick and Jingle Bell Christmas Tree Ornament
-
 Upcycled Mason Jar Chicken Vase
-
 Make A Candle Holder From Plastic Spoons
- Knitting Ideas
-
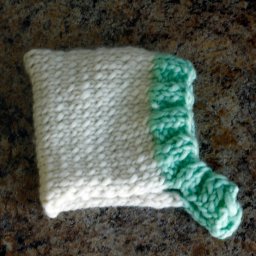
 Knitted Newborn Striped Beanie
-
 Knitted Chunky Newborn Pixie Hat
-
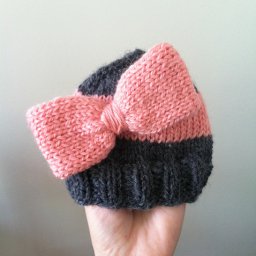 Knitted Big Bow Hat