Crochet Amigurumi Plush Bunny Tutorial

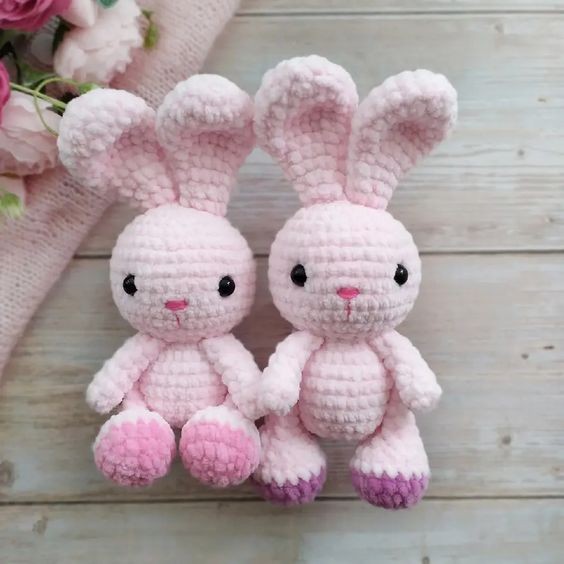
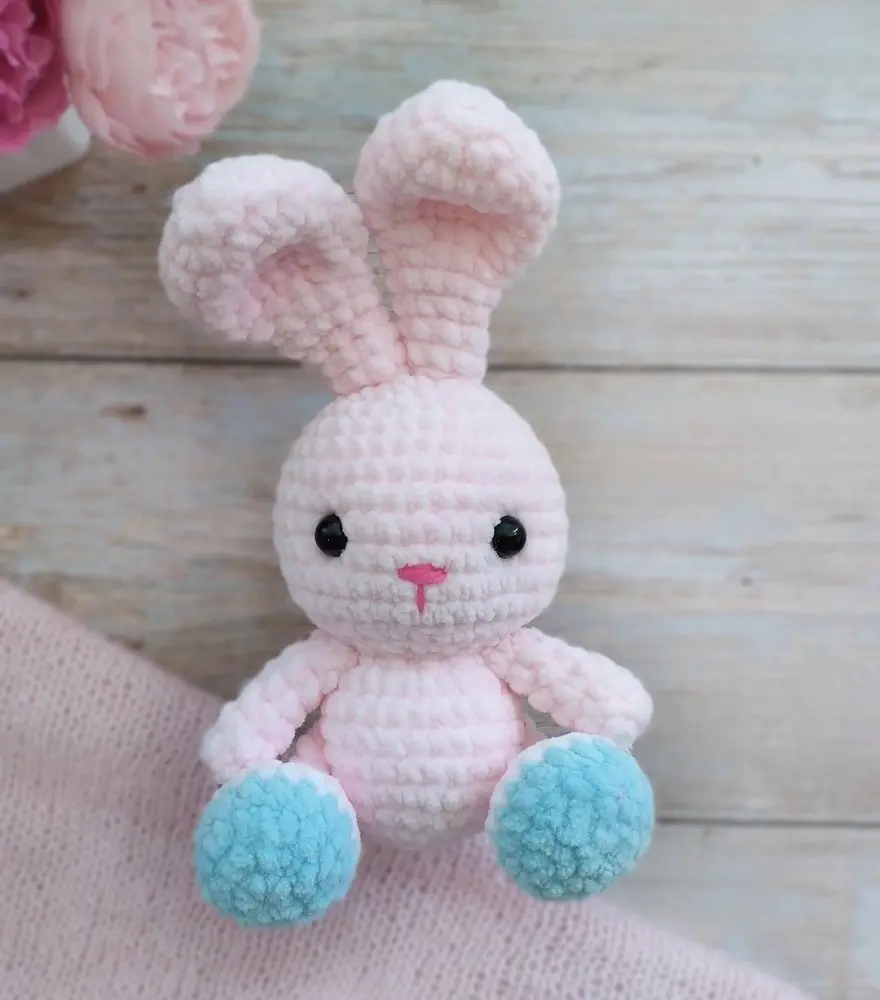
Discover the enchanting world of crochet with the adorable Amigurumi Plush Bunny! This delightful project combines the art of crochet with the cuteness of a bunny, resulting in a charming and huggable toy. With just a few basic crochet stitches and some soft yarn, you can bring this lovable bunny to life. This project is perfect for both beginners and experienced crocheters alike. The intricate details of the bunny's features, such as its floppy ears and fluffy tail, will make it a cherished companion for children and adults alike. Whether you're looking for a unique gift or a fun project to indulge in, the Crochet Amigurumi Plush Bunny is sure to bring a smile to your face and warmth to your heart. So grab your crochet hook and let your creativity soar as you embark on this delightful crochet adventure!
The finished size of the amigurumi bunny is approximately 19 cm (7.5″) with ears.
Materials
- Yarn: Himalaya Dolphin Baby or YarnArt Dolce, Himalaya Velvet (100 g/120 m) – 0.5 skein
- YarnArt Jeans (55% cotton, 45% acrylic; 50 g/160 m) for a nose
- Hook size: 3.5 mm
- 8-10 mm sewing eyes
- Strong thread in the tone of plush yarn for sewing details
- Two plastic transparent buttons with a diameter of 12 mm
- Stitch marker
- Sewing pins
- Tapestry needle
- Scissors
- Fiberfill
Abbreviations
R = row
mc = magic circle
ch = chain
sl st = slip stitch
sc = single crochet
inc = increase (2 sc in the next stitch)
dec = decrease (single crochet 2 stitches together)
(12) = number of stitches you should have at the end of the round/row
(…)*6 = repeat whatever is between the brackets the number of times stated
F.o. = finish off
Free Crochet Plush Bunny Pattern
Head (One Piece)
Stuff as you go.
R 1: 6 sc in mc (6)
R 2: (inc)*6 (12)
R 3: (inc)*12 (24)
R 4: (3 sc, inc)*6 (30)
R 5: (5 sc, inc)*5 (35)
R 6: (6 sc, inc)*5 (40)
R 7-11: 40 sc (5 rows)
R 12: (2 sc, dec)*10 (30)
R 13: (1 sc, dec)*10 (20)
R 14: (2 sc, dec)*5 (15)
R 15: (inc)*15 (30)
R 16-20: 30 sc (5 rows)
R 21: (3 sc, dec)*6 (24)
R 22: (2 sc, dec)*6 (18)
R 23: (1 sc, dec)*6 (12)
R 24: (dec)*6 (6)
F.o.
Arms (Make 2)
R 1: 6 sc in mc (6)
R 2-6: 6 sc (5 rows)
Don’t stuff with fiberfill.
Fold top of arm flat and sc through both sides across.
F.o.
Legs (Make 2)
Start with additional color:
R 1: 6 sc in mc (6)
R 2: (inc)*6 (12)
R 3: (1 sc, inc)*6 (18)
R 4: 18 sc
Change to main color:
R 5: 18 sc
R 6: 3 sc, (1 sc, dec)*4, 3 sc (14)
R 7: 3 sc, 4 dec, 3 sc (10)
R 8: 3 sc, 2 dec, 3 sc (8)
R 9-10: 8 sc (2 rows)
Stuff only bottom of the leg.
Fold top of leg flat and sc through both sides across.
F.o.
Ears (Make 2)
R 1: 6 sc in mc (6)
R 2: (inc)*6 (12)
R 3: (1 sc, inc)*6 (18)
R 4-7: 18 sc (4 rows)
R 8: (1 sc, dec)*6 (12)
R 9-10: 12 sc (2 rows)
R 11: (1 sc, dec)*4 (8)
R 12: 8 sc
Don’t stuff with fiberfill.
F.o.
Tail
R 1: 6 sc in mc (6)
R 2: (inc)*6 (12)
R 3: (1 sc, inc)*6 (18)
R 4: 18
R 5: (1 sc, dec)*6 (12)
R 6: (1 sc, dec)*3 (9)
Stuff with fiberfill.
F.o.
Assembly
Sew the ears on the head.
Sew the eyes on the head between R 8 and R 9 at the distance of 10 st from each other.
Embroider a nose between R 9 and R 10.
Sew the arms to the body between R 14 and R 15 at the distance of 3 st from each other (in R 14).
Attach the legs to the body between R 19 and R 20 at the distance of 14 st from each other using 12 mm buttons.
Sew the tail to the body between R 19 and R 21.
- Funny Pictures
-
 Hilarious Memes for Those Bored to Tears
-
 Weekly Treat of Funniest Parenting Memes for Good Laugh out Loud Right Now
-
 Really Funny Pics to End These Weekend Perfectly
- Recipes
-
 Crispy Baked Avocado Fries
-
 Scrambled Chickpea and Spinach Pitas
-
 Cinnamon Pancakes
- Lifehacks
-
 Crochet Basics: Aligned Cobble Stitch
-
 Brick Stitch Crochet Tutorial
-
 Crochet Basics: Wattle Stitch
- Crochet Ideas
-
 Crochet Snorlax Plushie Doll
-
 Crochet Beautiful Penguin Toy
-
 Crochet Tiny Snowman
- DIY
-
 DIY Santa Craft For Kids
-
 Paper Plate Angel Craft
-
 Upcycled Mason Jar Chicken Vase
- Knitting Ideas
-
 Knitted Bridger Cowl
-
 Knitted Keepsake Bag
-
 Knitted Cutie Cupcake Dolls