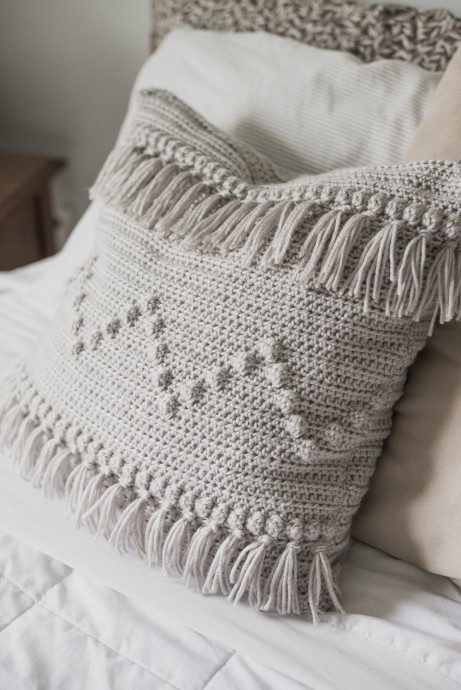
How to Crochet a Stylish Pillow


You’ll Need:
2 skeins of Main Street Yarn Shiny + Soft in Light Grey color;
Crochet hook 5 mm;
18" x 18" pillow;
8 half-inch buttons;
Yarn needle;
Needle and thread (for buttons);
Sewing pins (optional).
Size:
18” x 18”.Stitches Control:
13 sts x 11 rows = 4” x 4”.Special Stitches
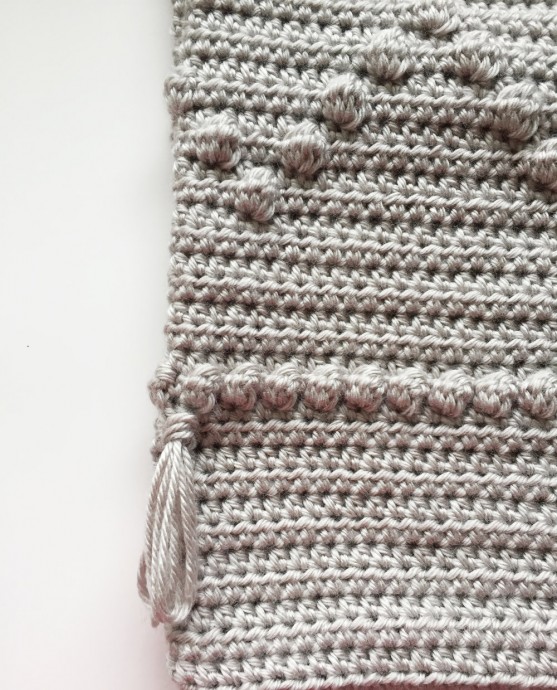
bo: yo, insert hook into designated stitch, draw loop back through, yo, draw through first two loops on your hook, [yo, insert hook into the same stitch, draw loop back through, yo, draw through first two loops on your hook], repeat [ ] two more times, you will end up with five loops on your hook, yo, and pull through all five loops to complete the bobble stitch.
Instructions
Front
Row 1: ch 61, hdc in 2nd ch from hook and across (60 total sts-- and for the remainder of piece).
Rows 2 – 12: ch 1, turn, hdc across row.
Row 13: ch 1, turn, [bo, hdc] across row.
Rows 14 – 20: ch 1, turn, hdc across row.
Row 21: ch 1, turn, hdc in 4 sts, bo, [hdc in 15 sts, bo] 3 times, hdc in last 7 sts.
Row 22: ch 1, turn, hdc across row.
Row 23: ch 1, turn, hdc in 2 sts, [bo, hdc in 3 sts, bo, hdc in 11 sts] 3 times, bo, hdc in 3 sts, bo, hdc in last 5 sts.
Row 24: ch 1, turn, hdc across row.
Row 25: ch 1, turn, bo, [hdc in 7 sts, bo] 7 times, hdc in last 3 sts.
Row 26: ch 1, turn, hdc across row.
Row 27: ch 1, turn, hdc in 10 sts, [bo, hdc in 3 sts, bo, hdc in 11 sts] 3 times, bo, hdc in last st.
Row 28: ch 1, turn, hdc across row.
Row 29: ch 1, turn, hdc in 12 sts, [bo, hdc in 15 sts] 3 times.
Rows 30 – 44: ch 1, turn, hdc across row.
Row 45: ch 1, turn, [bo, hdc] across row.
Rows 46 – 50: ch 1, turn, hdc across row.
Finish off (you can leave an extra long tail for sewing the pillow together).
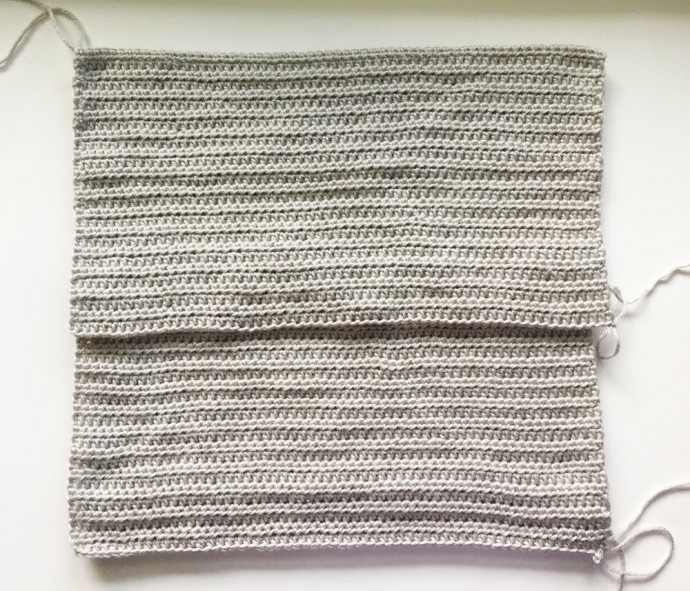
Back
Make 2.
Row 1: ch 61, hdc into 2nd ch from hook and across (60 total sts, and for remainder of piece).
Rows 2 – 28: ch 1, turn, hdc across row.
Finish off.
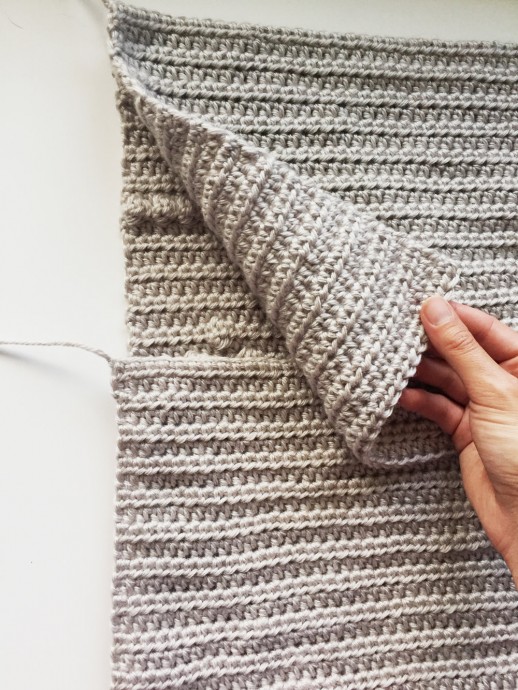
Assembly
To sew the pillow together, you will layer the front side facing in (or right side up) and layer the two back pieces on top of it. You will align all the outside edges, then let the middle overlap- this is where your buttons will be sewn on.
At this point you can pin the pieces together, and using your yarn needle and long yarn tail, sew around the entire perimeter of the pillow. Be sure when you're working on the overlapped parts that you get all the edges when sewing-- you will be working through all 3 pieces (2 back and front). Use a whip stitch over the very edge of the pillow, making sure not to sew too tightly.
Once you make it all the way around, you will weave in ends and turn right side out.
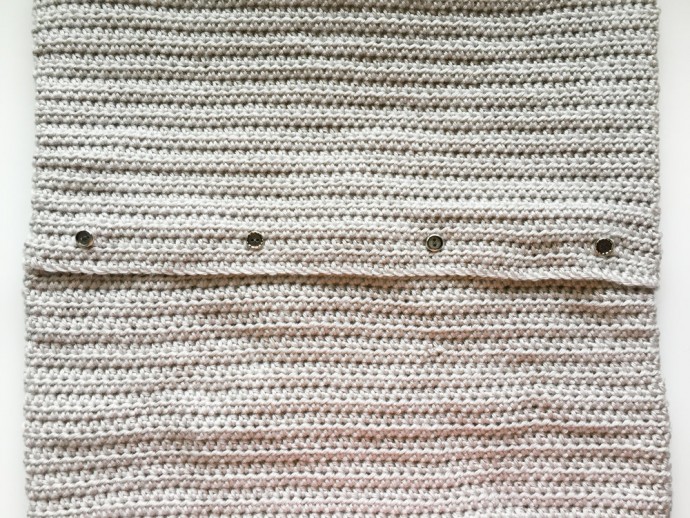
To sew on the buttons, first you'll want to arrange them out to get them all spaced evenly. Make sure before you sew them on though that they fit through your crochet. Half-inch buttons should fit through the natural holes of your pieces.
When you've figured out where your buttons will go, you will then sew them onto the under side, the bottom back piece using needle and thread.
The top piece will come down over your button and you'll slip it through one of the holes in your crochet piece to close it. After your buttons are done, you're ready for the fringe.
Fringe
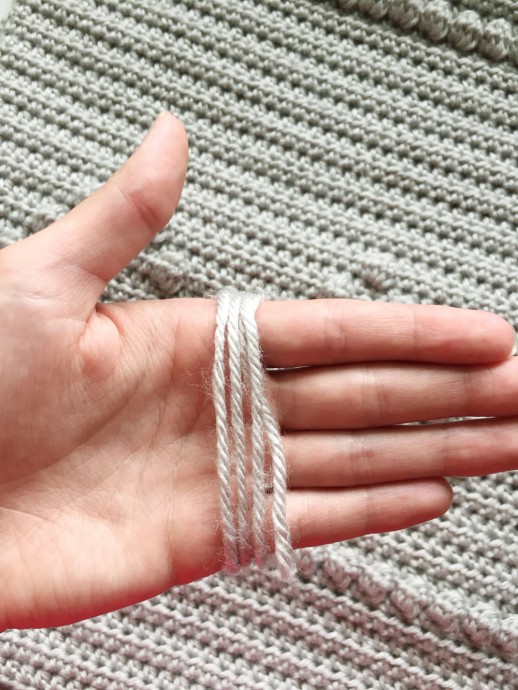
Cut pieces of yarn measuring 26 inches in length then wrapped them around your hand. You could also use a piece of cardboard about 3 inches wide. It ended up being wrapped 4 times. Then, slid it off your hand.
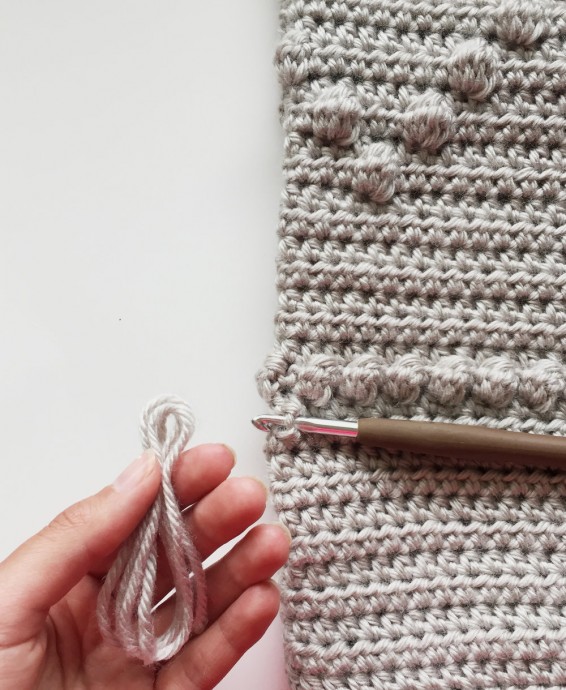
And took the side that had all the loops on it, and was ready to attach it to the front side of my pillow. Use a crochet hook to draw the fringe through and I put fringe below each of the straight bobble rows.
Side note: the bottom of the pillow is "row 1".
Pull the loops through with your hook, but not all the way through.
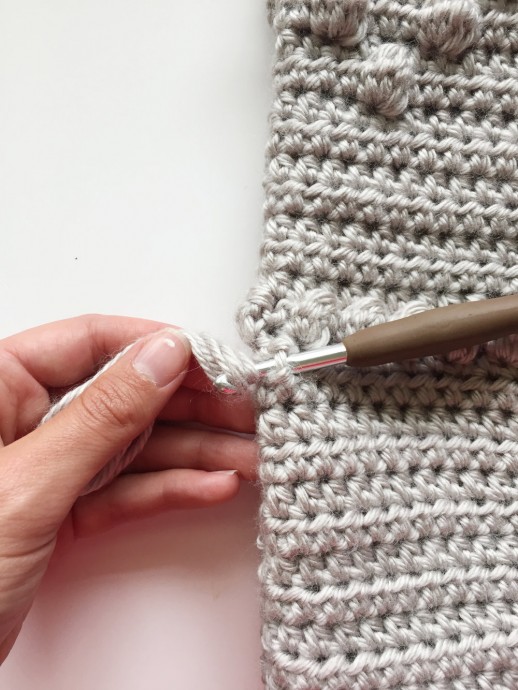
Then you'll take the side with the two spare ends and pull it through your looped end using your crochet hook. You're essentially just tying the bunch of yarn onto your pillow.
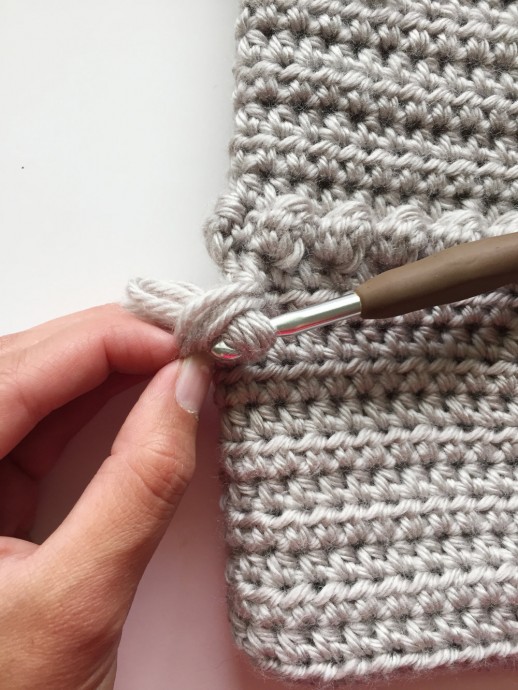
Then you'll just pull the ends through and adjust your knot to your liking. Repeat that all the way across on both the top and bottom of the pillow. Put fringe every couple of stitches on the pillow. To secure the fringe even more, you could sew along the knots using a yarn needle and a piece of yarn. Once all your fringe pieces were on the pillow, then cut all the ends, and made sure they were all even.