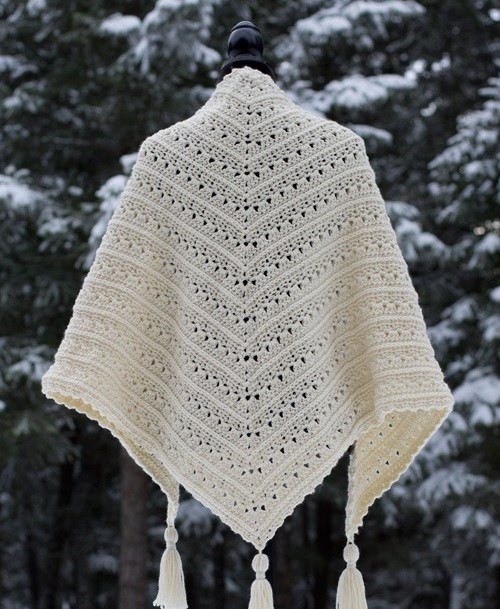
Step-by-Step Crochet Shawl Pattern

Materials Needed
You’ll need:
- Approximately 2 skeins (740 yds) Red Heart With Love in Aran;
- Crochet hook 5.5 mm;
- Yarn needle;
- Scissors;
- 12″ x 12″ interlocking blocking boards;
- Metal “T” Pins.
Measurements
72″ wide by 30″ long
Stitch Control
13 hdc in 4”
Special Stitches
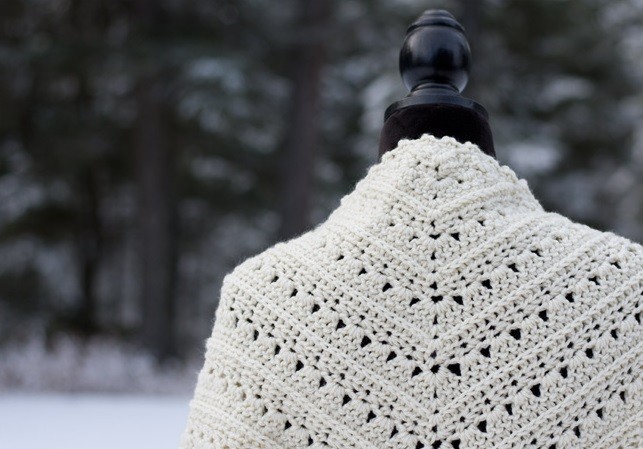
hdc in the 3rd loop: After turning, work all stitches for that row in the 3rd loop of the hdc from the previous row (it will be in the front). Instructions: Look at the top of the stitch, and locate the sideways “V”, bend the stitch to look at the back, and you should see another “V”. You’ll be working into the back loop of that “V”, this is called the 3rd loop. For this shawl, the textured portion created by working hdc in the 3rd loop should always be facing you when beginning a new row where working in the 3rd loop is called for.
Instructions
Notes
This shawl can be made smaller or larger based on the number of repeats you do.
ch-2 and ch-3 at the beginning of a row count as stitches.
Round 1
In magic circle, 3 hdc, ch 1, 3 hdc, ch 2 (counts as first hdc of row 2), turn. (6 hdc, 1 ch)
Row 2
Working all stitches in the 3rd loop, 2 hdc in the first st (same as base of beg ch), hdc in next 2 sts, (hdc, ch 1, hdc) in ch-1 sp, hdc in next 2 sts, 3 hdc in final st, ch 2 (counts as first hdc of row 3), turn. (12 hdc, 1 ch)
Row 3
(sc, ch 2, sc) in first st, sk 2 sts, (sc, ch 2, sc) in next st, sk 2 sts, (sc, ch 3, sc) in ch-1 sp, sk 2 sts, (sc, ch 2, sc) in next st, sk 2 sts, (sc, ch 2, sc) in the top of ch-2 at the end of the row, hdc in the same st, ch 3 (counts as first dc of row 4), turn. (4 ch-2 sps, 1 ch-3 sp, 10 sc, 1 hdc, 2 ch)
Row 4
2 dc in first ch-2 sp, 3 dc in each ch-2 sp to center, (3 dc, ch 1, 3 dc) in center ch-3 sp, 3 dc in each ch-2 sp to last, 2 dc in last ch-2 sp, dc in top of turning ch-2, ch 2 (counts as first hdc of row 5), turn. (18 dc, 2 ch)
Row 5
2 hdc in first st, hdc in each dc along the first side, (hdc, ch 1, hdc) in ch-1 sp, hdc in each dc st along second side, 3 hdc in the top of ch-3 from previous row, ch 2 (counts as first hdc of row 6), turn. (23 hdc, 2 ch)
Row 6
Working all stitches in the 3rd loop, 2 hdc in the first st (same as base of beg ch), hdc in the next 11 sts, (hdc, ch 1, hdc) in ch-1 sp, hdc in the next 11 sts, 3 hdc in the top of ch-2, ch 2 (counts as first hdc of row 7), turn. (29 hdc, 2 ch)
Row 7
*(sc, ch 2, sc) in first st, sk 2 sts* repeat from * to * until the end of the first side, (sc, ch 3, sc) in ch-1 sp, sk 2 sts, repeat from * to * until the last st of the row, (sc, ch-2, sc, hdc) in final st, ch 3 (counts as first dc of next row), turn. (10 ch-2 sps, 1 ch-3 sp, 22 sc, 1 hdc, 2 ch)
Repeat rows 4-7 until your shawl is as big as you want it. Each row 5 and each row 6 repeat should increase each side’s stitch count by a multiple of 3. Ending on row 7 should leave you with a pretty, bumpy edging along the bottom 2 sides of the shawl. Continue to work row 7 evenly along the top edge of the shawl, or if you don’t want bumps near your neck work sc sts evenly along the top edge.
Stitch Counts
The following stitch counts include the ch-2 or ch-3 that counts as a hdc or dc for these rows. **This is not a complete list, but should give you a good start**:
- Row 8 st counts per side: 18 dc
- Row 9 st counts per side: 21 hdc
- Row 10 st counts per side: 24 hdc
- Row 11: 8 ch-2 sps per side, 1 ch-3 sp at the bottom
- Row 12 st counts per side: 27 dc
- Row 13 st counts per side: 30 hdc
- Row 14 st counts per side: 33 hdc
- Row 15: 11 ch-2 sps per side, 1 ch-3 sp at the bottom
- Row 16 st counts per side: 36 dc
- Row 17 st counts per side: 39 hdc
- Row 18 st counts per side: 42 hdc
- Row 19: 14 ch-2 sps per side, 1 ch-3 sp at the bottom
- Row 20 st counts per side: 45 dc
- Row 21 st counts per side: 48 hdc
- Row 22 st counts per side: 51 hdc
- Row 23: 17 ch-2 sps per side, 1 ch-3 sp at the bottom
- Row 24 st counts per side: 54 dc
- Row 25 st counts per side: 57 hdc
- Row 26 st counts per side: 60 hdc
- Row 27: 20 ch-2 sps per side, 1 ch-3 sp at the bottom
- Row 28 st counts per side: 63 dc
- Row 29 st counts per side: 66 hdc
- Row 30 st counts per side: 69 hdc
Once your shawl is as long as you’d like, fasten off and continue with tassels.
Tassels
This is a slightly fancier tassel than most because you will be creating a cord for the center to tie your tassel to the shawl. If you don’t want/need a pretty cord you can simply attach the tassel to the shawl with a 12″ piece of doubled-over yarn instead.
Cut 25 12″ lengths of yarn for each tassel. (There will be 3 of them)
Cut another 12″ piece of yarn and tie the center of your bundle of yarn lengths with this.
Cut one more 12″ piece of yarn. Hold one end still and twist the other end until it twists in on itself making a pretty cord. Keeping a tight hold over the ends, lay the cord over the center of the yarn bundle on top of the yarn you just used to tie the bundle together. Fold the tassel in half over the cord. This may require an extra pair of hands.
Attach the tassel to the ch-2 sp on one of the points on the shawl with a square knot. If you don’t want your tassel to dangle at the end of the cord you may tie it closer to the shawl, leaving longer ends. I left a space big enough to stick a finger through on mine. Weave the leftover ends into the shawl.
Cut 1 24″ length of yarn and wrap it around the tassel, 1″ below the top, several times. Knot the ends securely. Optional: Put a dot of craft glue on the knot to hold it in place.
Repeat this process 3 times.