Crochet Mesh Top

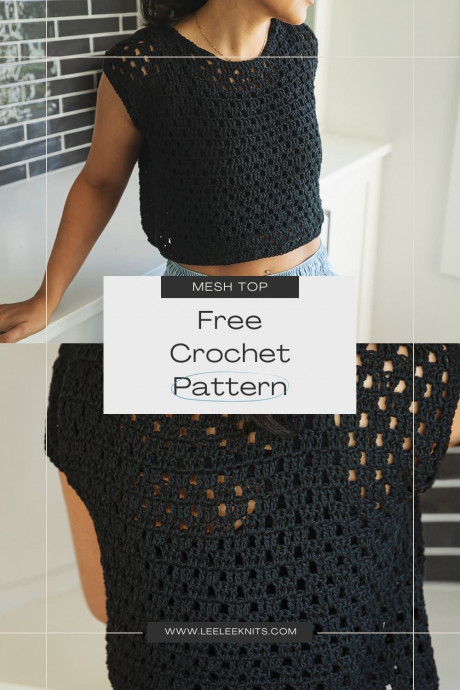
Crochet mesh tops are an absolute must-have for any fashion-forward individual! These airy and versatile tops provide the perfect mix of trendy style and comfort. Whether you're heading to the beach, a music festival, or a casual day out, a crochet mesh top effortlessly elevates your look. The intricate patterns and open-knit design add a touch of bohemian charm, making it easy to pair with your favorite jeans or a flowy skirt. You'll be sure to turn heads and receive compliments wherever you go in a crochet mesh top. So go ahead, embrace your inner fashionista and rock that crochet mesh top with confidence!
Materials – What You’ll Need to Crochet Your Top
You will need the following materials to make one top:
- Paintbox Yarns Cotton Mix DK weight yarn in Pure Black (or colour of your choice): 500(540, 590, 650, 720, 800) yards.
- Size F5 (3.75 mm) crochet hook.
- Scissors.
- Measuring Tape.
- Tapestry/yarn needle (for weaving in ends).
Abbreviations
- Ch : Chain.
- Sc : Single Crochet.
- Dc : Double Crochet.
- Sts : Stitches.
- “ : Inches.
Sizes
This loose fitting top is meant to have plenty of ease around the bust. The pattern has been written for the following sizes: XS(S, M, L, XL, 2XL).
Bust circumference measurements: 38(42,46,50,54,58) “.
Gauge
16 sts X 7 rows = 4″ in Double Crochet.
Construction/Notes
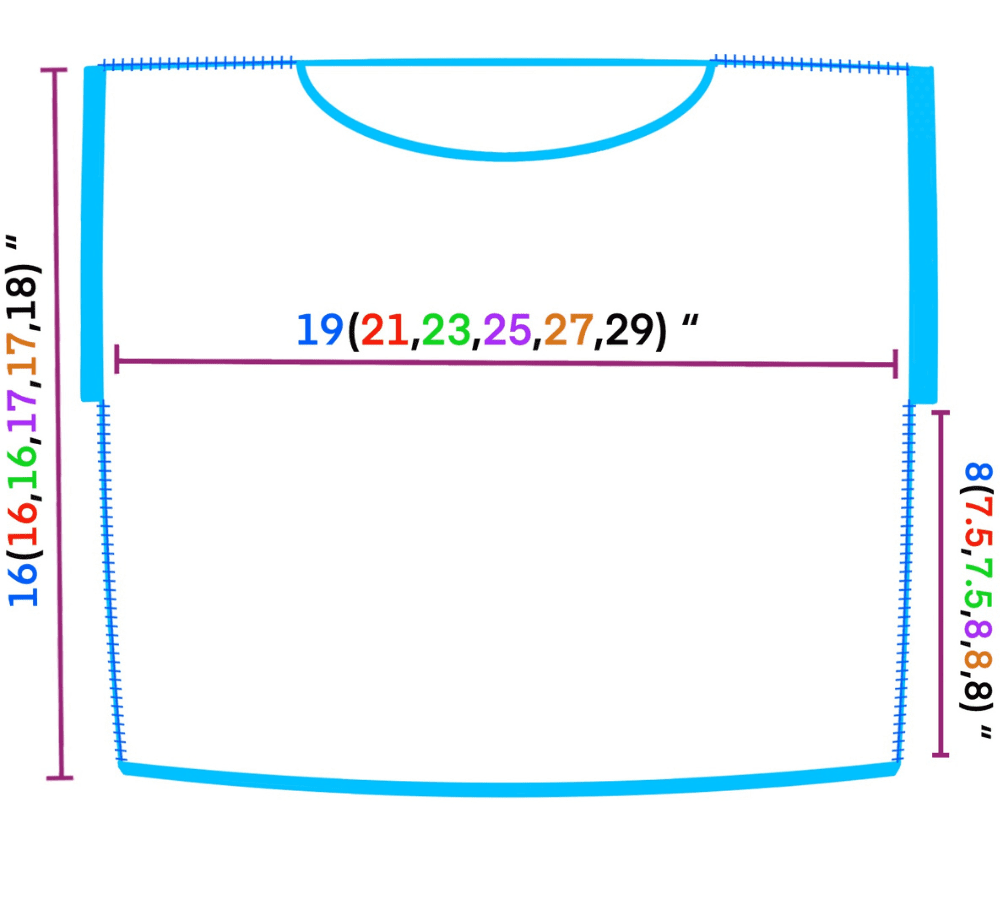
The top is worked flat, with one back panel and one front panel. The panels are seamed together at the sides and shoulders with a whip stitch as depicted in the diagram below. The bottom and neckline trim, as well as the sleeve cuffs are worked by single crocheting in the round around the bottom edge, neckline, and armholes once the panels have been seamed together.
Back Panel
Chain 77(85,93,101,109,117).
Row 1: DC in 4th ch from hook (skipped chs count as first DC) and in next ch; *CH1, skip next ch, DC in next 3 chs; repeat from * to end of row; CH4 (counts as first DC and CH1SP of next row) and turn.
Row 2: Skip first 2 dcs, DC in next dc; *DC in next ch1sp, DC in next dc, CH1 and skip next dc, DC in next dc; repeat from * to end of row; CH3 and turn.
Row 3: DC in next ch1sp, DC in next dc; *CH1, skip next dc, DC in next dc, DC in next ch1sp, DC in next dc; repeat from * to end of row (last 2 DC of row are in first 2 chs of turning ch), CH4 and turn.
Repeat rows 2 and 3 until work measures 15.5(15.5,15.5,16.5,16.5,17.5) “ in length. Fasten off and continue to Front Panel.
Front Panel
Work the front panel exactly like the back panel until 4 rows remain (do not fasten off). Shape the neckline as follows for the remaining 4 rows:
Neckline Shaping Right Side
Row 1: Skip first two dcs, DC in next dc; *DC in next ch1sp, DC in next dc, CH1 and skip next dc, DC in next dc; repeat from * 6(7,8,9,10,11) more times, CH1 and turn.
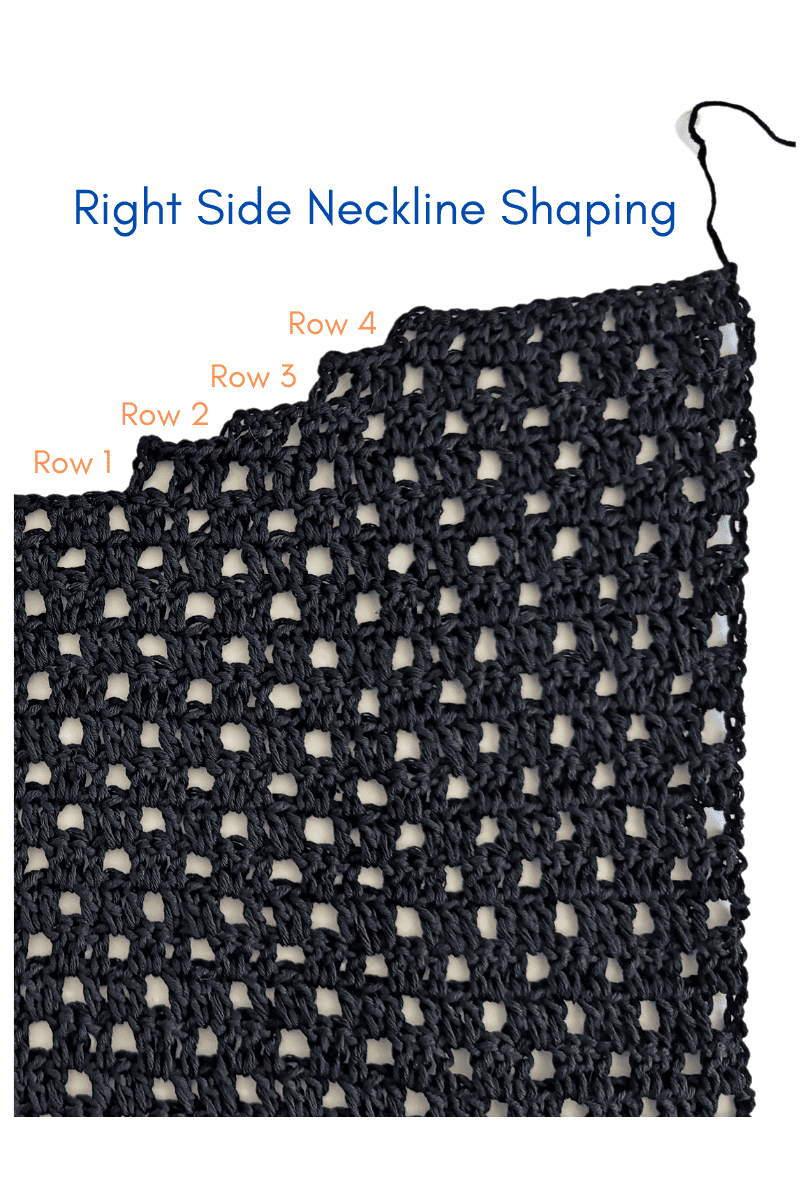
Row 2: SS in same st and next 4 sts, CH3, DC in next ch1sp, DC in next dc; *CH1, skip next dc, DC in next dc, DC in next ch1sp, DC in next dc; repeat from * to end of row, CH4 and turn.
Row 3: Skip first two dcs, DC in next dc; *DC in next ch1sp, DC in next dc, CH1 and skip next dc, DC in next dc; repeat from * 4(5,6,7,8,9) more times, CH1 and turn.
Row 4: SS in same st and next 4 sts, CH3, DC in next ch1sp, DC in next dc; *CH1, skip next dc, DC in next dc, DC in next ch1sp, DC in next dc; repeat from * to end of row. Fasten off and continue to Neckline Shaping Left Side.
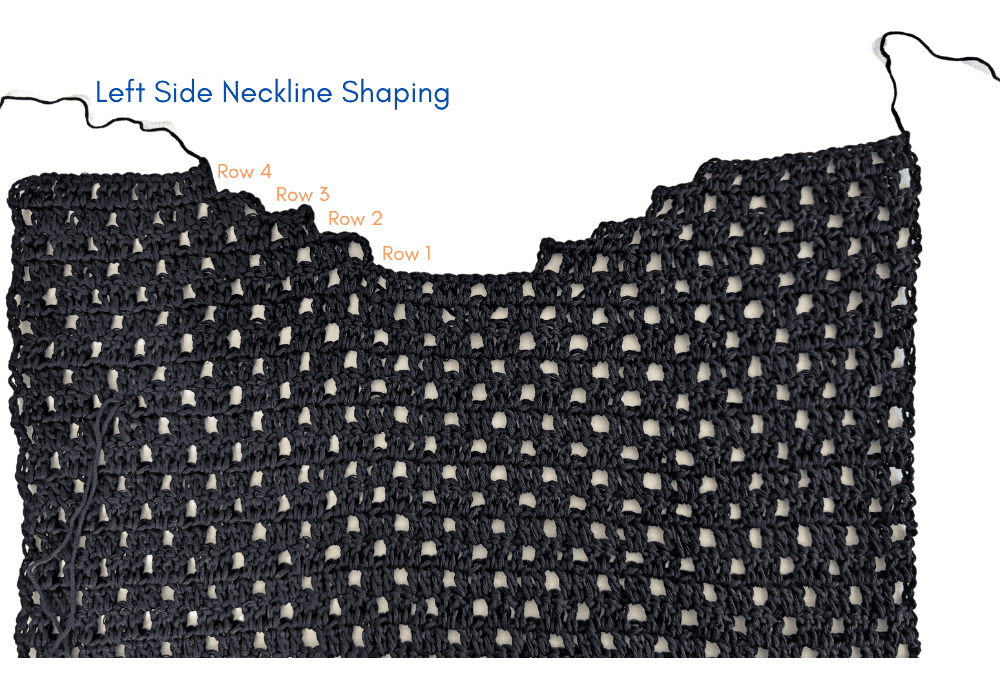
Neckline Shaping Left Side
Count 13 sts down from the last stitch of the right side, and then attach yarn in the next st and CH4.
Row 1: Skip next dc, DC in next dc; *DC in next ch1sp, DC in next dc, CH1 and skip next dc, DC in next dc; repeat from * to end of row, CH3 and turn.
Row 2: DC in next ch1sp, DC in next dc; *CH1, skip next dc, DC in next dc, DC in next ch1sp, DC in next dc; repeat from * 5(6,7,8,9,10) more times, CH1 and turn.
Row 3: SS in same st and next 4 sts, CH4, skip next dc, DC in next dc; *DC in next ch1sp, DC in next dc, CH1 and skip next dc, DC in next dc; repeat from * to end of row, CH3 and turn.
Row 4: DC in next ch1sp, DC in next dc; *CH1, skip next dc, DC in next dc, DC in next ch1sp, DC in next dc; repeat from * 3(4,5,6,7,8) more times.
Fasten off and continue to Seaming.
Seaming
Use a whip stitch to seam panels together at shoulders and sides, leaving room for arm holes. See diagram in Notes/Construction section for side seam measurements. Continue to Bottom Trim.
Bottom Trim
Join yarn in a ch near one of the side seams. Begin crocheting in the round as follows:
Round 1: CH1, SC in same st; SC in each ch that has a dc worked into it, skipping the ch1sps (i.e. SC in 3 out of every 4 chs); join to first sc of round with SS.
Rounds 2 and 3: CH1, SC in same st; SC in each sc around and join to first sc with SS.
Fasten off and continue to Sleeve Cuffs.
Sleeve Cuffs
Join yarn in a turning ch sp near side seam and begin crocheting in the round as follows:
Round 1: CH1, SC in same st and in same turning ch sp; 2SC in each turning ch sp around; join to first sc of round with SS.
Neckline Trim
Join yarn in a st near centre of back of neckline. Begin crocheting in the round as follows:
Round 1: CH1, SC in same st; SC in each st around neckline (when you reach a turning ch sp at neckline shaping, work 2SC in each turning ch sp); join to first sc of round with SS.
Round 2: CH1, SC in same st; SC in each sc around and join to first sc with SS.
Fasten off, weave in all loose ends and enjoy your new crochet mesh top!