Crochet The Feather Stitch

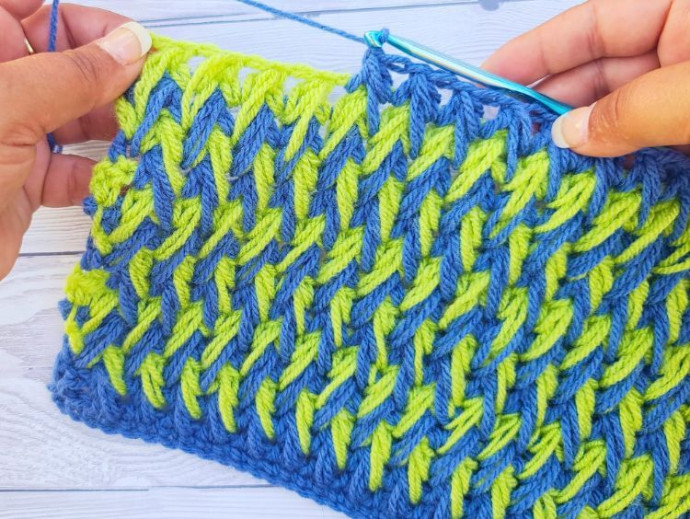
Crocheting the feather stitch can add a beautiful and unique texture to your projects. The feather stitch creates a delicate and airy look, perfect for adding a touch of elegance to scarves, blankets, or even garments. With a bit of practice, you'll soon master this stitch and be able to incorporate it into your crocheting repertoire with ease. Happy crocheting!
Supplies Used
- Acrylic Aran Yarn
- 5mm crochet hook
- Multiple Color Use
- When using 2 or more colors, change colors every row
Abbreviations For The Feather Stitch
Pattern written in US terms using Craft Yarn Council abbreviations:
- st(s) – stitch(es)
- ch(s) – chain(s)
- sk – skip
- yo – yarn over
- hdc – half double crochet
- sc – single crochet

Special Stitches For The Feather Stitch
There are no special stitches for this stitch.
How To Crochet The Feather Stitch
Note: ch2 at the beginning or end of rows doesn’t count as a stitch.
Stitches contained within ** are the repeat section for that row.
Starting Chain: This pattern requires you to chain multiples of 2. My starting chain is 36ch.

Row Instructions
Row 1
Sc in 2nd ch from hook, sc in all remaining chs, ch2 (does not count as a st), turn.
Row 2
Hdc, *ch1, sk1, hdc*, repeat from * until the end of the row, ch2 (does not count as a st), turn.
Row 3
Step 1: Hdc in the stitch below, ch1.
Step 2: Yo, insert hook in the next ch1 space and pull up a loop, yo, insert hook in the stitch you skipped on row 1 and pull up a loop, yo, insert hook in the next ch1 space and pull up a loop, you will have 7 loops on your hook.
Step 3: Yo and pull through all 7 loops on your hook, ch1.
Step 4: *Yo, insert hook in the same ch1 space you crocheted last and pull up a loop, yo, insert hook into the stitch you skipped on row 1 and pull up a loop, yo, insert hook in the next ch1 space and pull up a loop, yo and pull through all 7 loops on hook, ch1.*
Step 5: Repeat Step 4 from * until you crocheted in the last ch1 space.
Step 6: Finish the row by making 1hdc in the last stitch, ch2 (does not count as a st), turn.

Row 4
Step 1: Hdc in the stitch below, ch1.
Step 2: Yo, insert hook in the next ch1 space and pull up a loop, yo, insert hook in the ch1 space 2 rows below and pull up a loop, yo, insert hook in the next ch1 space and pull up a loop, you will have 7 loops on your hook.
Step 3: Yo and pull through all 7 loops on your hook, ch1.
Step 4: *Yo, insert hook in the same ch1 space you crocheted last and pull up a loop, yo, insert hook in the next ch1 space below the ch1 space you just crocheted into and pull up a loop, yo, insert hook into the next ch1 space, yo and pull through all 7 loops on hook, ch1.*
Step 5: Repeat Step 4 from * until you crocheted in the last ch1 space.
Step 6: Finish the row by making 1hdc in the last stitch, ch2 (does not count as a stitch), turn.

Repeat row 4 until you have the required length for your work.
Changing Colors
Changing colors every row without cutting yarns: At the end of the video tutorial, I am showing you how to change colors every row without cutting the yarn. It’s simpler than it looks! You crochet 2 rows on the right side, then 2 rows on the left side.
