Crochet Simple V-neck Vest

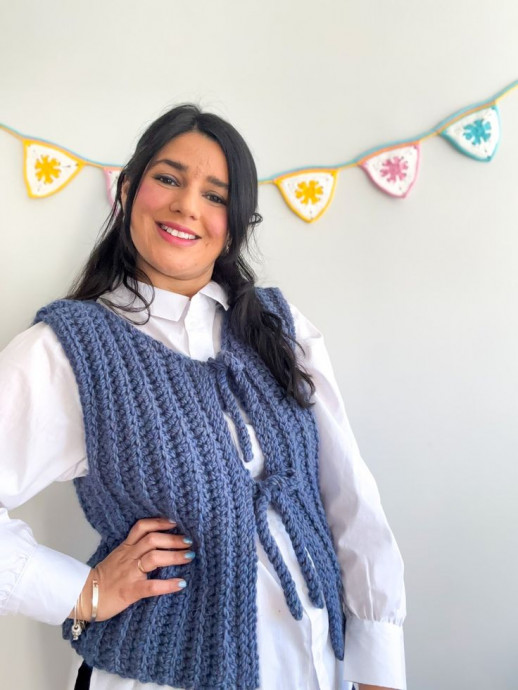
Looking to add a touch of handmade charm to your wardrobe? The Crochet Simple V-neck Vest is the perfect project to get cozy and creative! This versatile vest is not only stylish but also easy to make for crocheters of all skill levels. Whether you're looking to layer it over a blouse or a t-shirt, this V-neck vest will add a trendy and personalized touch to any outfit. Grab your crochet hook and some yarn, and get ready to craft a piece that is as unique as you are! Happy crocheting!
Materials
You will need:
- Any super chunky yarn (I used ANDES by Drops)
- Wool (65%), Alpaca (35%); 100 g (3.5 oz) =90 m (98 yds)
- *Twilight blue (mix 6343) - colour A - 3 (4, 4, 5, 6, 7) balls or
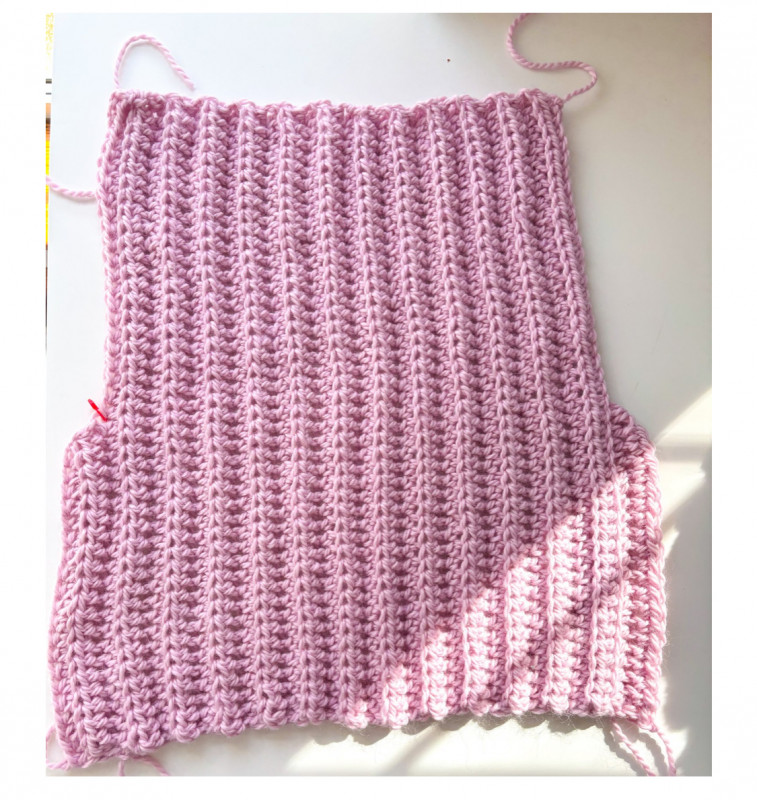
- *Powder Pink (3145)
You can easily substitute with a similar yarn — I recommend Alpacino Merino from Wool and the Gang if you want that same warm, fluffy texture and luxe finish. Just make sure to check your gauge so everything fits just right!
- 9 mm crochet hook or size needed to obtain gauge.
- Tapestry needle
- Scissors and Measuring Tape
Tension
8 sts x 5.5 rows= 10 x 10 cm (4 x 4") in stitch pattern.
Abbreviations
Pattern is written using American terms
- Ch- Chain
- Ch-sp- Chain space
- St/s- Stitch/es
- Beg- Beginning
- Rnd- Round
- RS- Right side
- WS- Wrong side
- Sl st- Slip stitch
- Hdc- Half double crochet
- Hdc BLO- Half double crochet in back loop only.
Pattern Notes
Sizing
This vest is written in 6 different sizes as follows: XS (S, M, L, XL, XXL). Make sure to follow the instructions for your size only. It is recommended that you go through the pattern and highlight the numbers pertaining to your size before beginning.
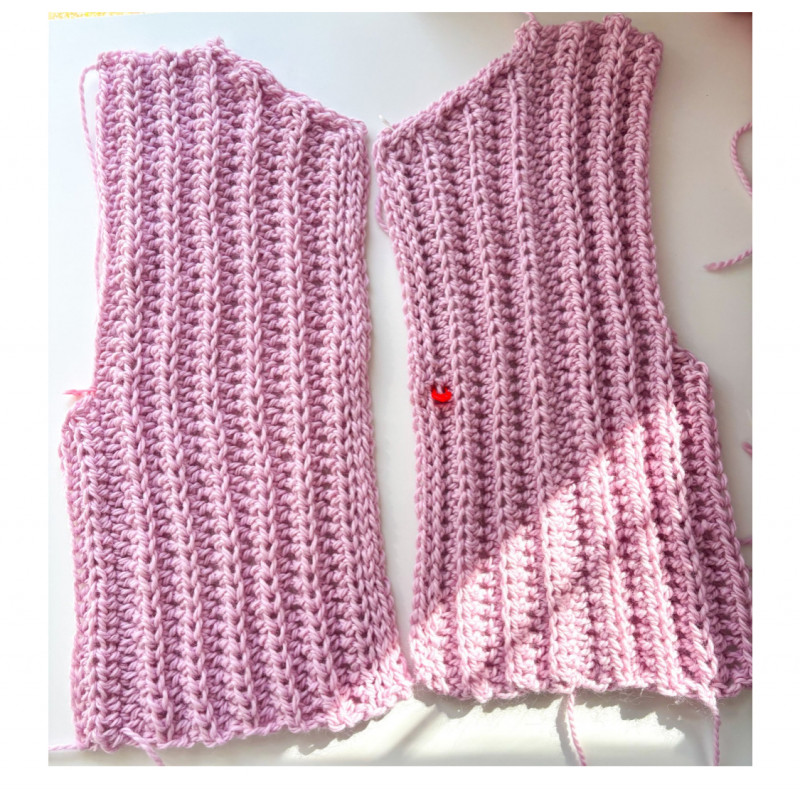
Construction
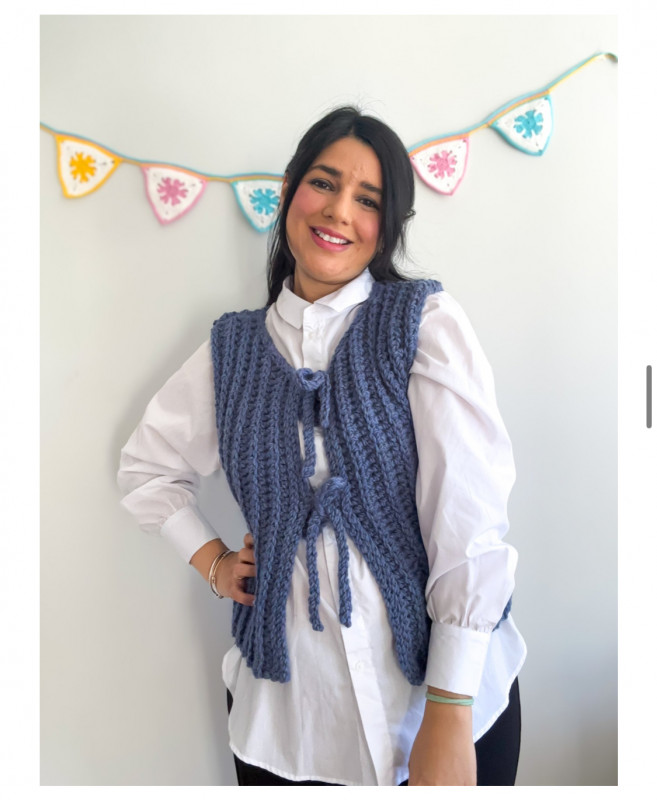
This design is worked in three panels: 2 Fronts + 1 Back. This design is worked side to side, beginning with the first shoulder section. From there, you'll shape the neckline by decreasing stitches and then continue working the main body of the front panel. The Back panel is worked in the same way but without any decreases. You will then sew the three pieces together and work the border. You can add buttons like the pink version or work ties like the blue vest.
Adjustments
If you would like to adjust your pattern, before you begin, check the measurements of each section and adjust them to fit your shape. A couple of easy ways to do this:
- Width - if you think the bust is too large for your size, go down one size or reduce the number of rows for the front and back panel.
- Length - if you’d like the top to be longer just increase the initial number of chains to the body for the front and back panel.
- Armhole Depth: If you prefer a more closed or snug armhole, add a few extra stitches when working the “widening the sides” section. This will reduce the depth and create a more tailored fit.
Note: 1 ch at the beginning of each row does NOT count as a stitch.
Measurements
Finishes Bust Measurement: 87 (94, 102, 110.5, 124, 131) cm // 34 (37, 40, 43.5, 48.5, 51.5) inches.
Vest is designed to be worn with approx. 4-13 cm / 1.5- 5 inches of positive ease. When choosing a size, find the bust measurement in this chart that equals approx. 4-13 cm / 1.5- 5 inches larger than your actual bust measurement and make this size. For example, the model has a 92 cm / 36 inches bust and is wearing a size M with a finished bust measurement of 102 cm / 40 inches.
Start Here
Front Panel
With yarn A and 9 mm crochet hook
Chain 42 (42, 45, 45, 48, 48)
Working in rows:
- Row 1: Starting in 2nd ch from hook, 1 hdc in each ch available until the end, 1 ch and turn. 41 (41, 44, 44, 47, 47) hdc.
- Row 2: 1 hdc BLO in each st across, 1 ch and turn. 41 (41, 44, 44, 47, 47) hdc.
- Rows 3 to 5 (5, 6, 6, 7, 8): Repeat row 2. 41 (41, 44, 44, 47, 47) hdc.
Shaping the Neckline
- Row 6 (6, 7, 7, 8, 9): 1 hdc BLO in each st across until there are 2 hdc left, 1 ch and turn leaving the last 2 hdc unworked. 39 (39, 42, 42, 45, 45) hdc.
- Row 7 (7, 8, 8, 9, 10): 1 hdc BLO in each st across. 39 (39, 42, 42, 45, 45) hdc.
- Row 8 (8, 9, 9, 10, 11): 1 hdc BLO in each st across until there are 2 hdc left, 1 ch and turn leaving the last 2 hdc unworked. 37 (37, 40, 40, 43, 43) hdc.
- Row 9 (9, 10, 10, 11, 12): 1 hdc BLO in each st across. 37 (37, 40, 40, 43, 43) hdc.
- Row 10 (10, 11, 11, 12, 13): 1 hdc BLO in each st across until there are 2 hdc left, 1 ch and turn leaving the last 2 hdc unworked. 35 (35, 38, 38, 41, 41) hdc.
- Row 11 (11, 12, 12, 13, 14): 1 hdc BLO in each st across. 35 (35, 38, 38, 41, 41) hdc.
Border
We’ll now create the border by working rows of sl st BLO.
- Row 1: 1 sl st BLO in each st across the front of the vest, (place a st marker on the last sl st of the edge)
- You will now work 1 sl st in each sp available of the neckline in order to even the sides:
- *1 sl st in next 2 hdc lying horizontally, 1 sl st BLO in next 2 hdc (these will be the 2 hdc left unworked in the previous rows)* repeat from * to 3 times in total, 1 ch and turn - there are 12 sts in the neckline + 35 (35, 38, 38, 41, 41) sts on the edge of the front panel = 47 (47, 50, 50, 53, 53) sts in total.
- Row 2: 1 sl st BLO in each st across the neckline (12 sts) remove st marker and work 1 sl st BLO in each st across the edge of the vest *- 35 (35, 38, 38, 41, 41) sts, 1 ch and turn. 47 (47, 50, 50, 53, 53) sts in total.
- *Place st marker after working the 1st st of the edge.
- Row 3: 1 sl st BLO in each st across the edge, leaving the sts on the neckline unworked, 1 ch and turn. 35 (35, 38, 38, 41, 41) sts.
- Row 4: Repeat row 3. Cut yarn and weave in ends.
After completing the border, evenly distribute 3 buttons along the front edge of the vest. Place one button at the top and another at the very bottom. Next, position the remaining button in between, ensuring the spacing between each button is proportional for a balanced look.
Front 2
With yarn A and 9 mm crochet hook
Chain 42 (42, 45, 45, 48, 48)
Working in rows:
- Rows 1 to 11 (11, 12, 12, 13, 14): Repeat the same steps for Front 1.
Border with Buttonholes
- Row 1: 1 sl st BLO, 1 ch, miss 1 st, *1 sl st BLO in next 15 (15, 16, 16, 18, 18) sts, 1 ch, miss 1 st* repeat from * to * one more time, 1 sl st BLO in the last st of the edge,
- *When working the second repeat for sizes M and L, work 17 sl st BLO instead of 16.
- You will now work 1 sl st in each sp available of the neckline in order to even the sides:
- *1 sl st in next 2 hdc lying horizontally, 1 sl st BLO in next 2 hdc (these will be the 2 hdc left unworked in the previous rows)* repeat from * to 3 times in total, 1 ch and turn - there are 12 sts in the neckline + 35 (35, 38, 38, 41, 41) sts on the edge of the front panel = 47 (47, 50, 50, 53, 53) sts in total.
- Row 2: 1 sl st BLO in each st across the neckline (12 sts) remove st marker and work 1 sl st BLO in each st across the edge of the vest and 1 sl st into each 1ch-sp of the buttonholes *- 35 (35, 38, 38, 41, 41) sts, 1 ch and turn. 47 (47, 50, 50, 53, 53) sts in total.
- *Place st marker after working the 1st st of the edge.
- Row 3: 1 sl st BLO in each st across the edge, leaving the sts on the neckline unworked, 1 ch and turn. 35 (35, 38, 38, 41, 41) sts.
- Row 4: Repeat row 3. Cut yarn and weave in ends.
Using Ties Instead of Buttons
If you prefer to use ties instead of buttons, follow these steps to create them on the border of Front 1:
- Attach yarn to the first stitch along the border edge and chain 31. Starting in 2nd chain from hook, work 1 sl st in each chain across. Sl st into the same stitch where the yarn was originally attached to join the tie, 1 ch and fasten off. Weave in ends.
- Skip the next 17 stitches along the border, then reattach the yarn to the 18th stitch and repeat the steps above to create a second tie.
- Repeat the same process on the opposite side of the garment to create two matching ties.
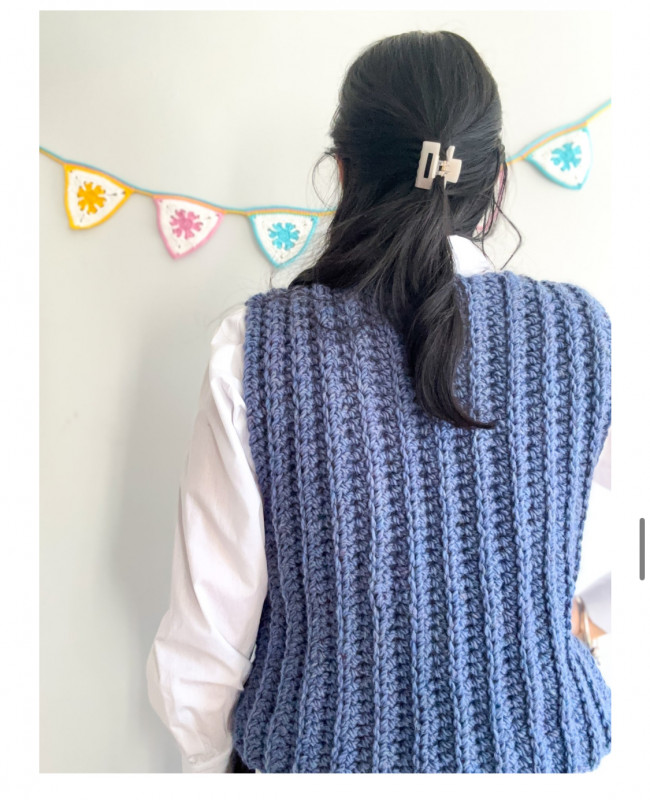
Back Panel
With yarn A and 9 mm crochet hook
Chain 42 (42, 45, 45, 48, 48)
Working in rows:
- Row 1: Starting in 2nd ch from hook, 1 hdc in each ch available until the end, 1 ch and turn. 41 (41, 44, 44, 47, 47) hdc.
- Row 2: 1 hdc BLO in each st across, 1 ch and turn. 41 (41, 44, 44, 47, 47) hdc.
- Rows 3 to 22 (22, 24, 25, 26, 28): Repeat row 2. Cut yarn and weave in ends.
Widening Sides
With yarn A and 9 mm crochet hook, attach yarn to the bottom edge of the vest and work 1 ch.
Working in rows:
- Row 1: (dec) 1 hdc BLO in next 22 (22, 23, 23, 24, 24) hdc, 1 hdc2tog over next 2 sts, 1 ch and turn leaving remaining sts unworked. 23 (23, 24, 24, 25, 25) hdc in total.
- This is the end for size XS. Cut yarn and weave in ends. Repeat the same steps on the opposite side of the back panel. 23 hdc in total.
- Row 2: (dec) Miss 1st hdc, 1 hdc BLO in each st across. Cut yarn and weave in ends.
- This is the end for sizes S and (M). Cut yarn and weave in ends. Repeat the same steps on the opposite side of the back panel. 22 (23) hdc in total.
SIZES L (XL) XXL ONLY
- Row 3: 1 hdc BLO in each st across. 23 (24) 24 hdc in total.
- This is the end for size L. Cut yarn and weave in ends. Repeat the same steps on the opposite side of the back panel. 23 hdc in total.
SIZES XL (XXL) ONLY
- Row 4: 1 hdc BLO in each st across. 24 (24) hdc in total.
- Cut the yarn and weave in the ends. Repeat the same steps on the opposite side of the back panel. Then, following the same instructions used for the back, repeat Rows 1 to 3 (or 4, depending on size) on each front panel.
Making Up
Place your front panel on top of your back panel with the wrong sides touching. Using a yarn needle, whip stitch along shoulder seams using the mattress stitch or invisible vertical seaming. You will be working on the right side of the fabric, but the seam will be on the inside if you use the technique above. Repeat the process for the second front panel.
Fold the sweater along the shoulder edge so that the right sides are touching and whip stitch the underarm and side seams.