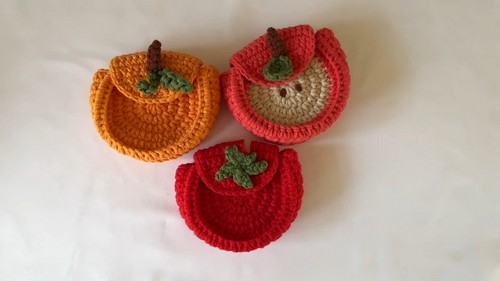
Crochet Fruit Pouches: Patterns and Instructions

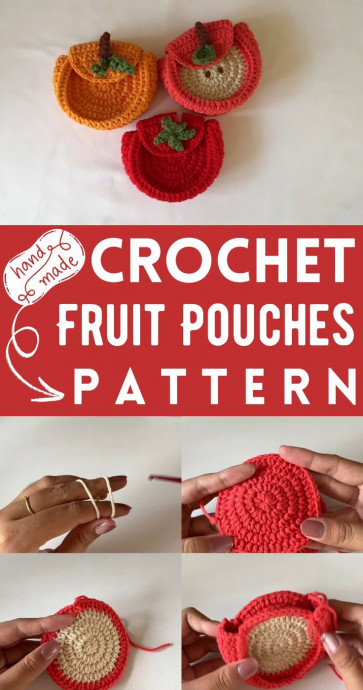
Crochet fruit pouches are not only adorable but also functional! Whether you're looking to add a splash of color to your kitchen or need a cute way to carry your snacks on the move, these fruit pouches are a delightful choice. Plus, they make for fantastic gifts that are sure to bring a smile to anyone's face. Get ready to brighten up your day with these fun and practical crochet fruit pouches!
Materials Needed
Yarn in colors according to the fruit pouch you wish to make (e.g., beige and red for the Apple Pouch).
Crochet hook (size not specified in the scraped text)
Stitch marker
Scissors
Yarn needle
Abbreviations
- ch = chain
- hdc = half double crochet
- inc = increase (two hdc in one stitch)
- sc = single crochet
- sl st = slip stitch
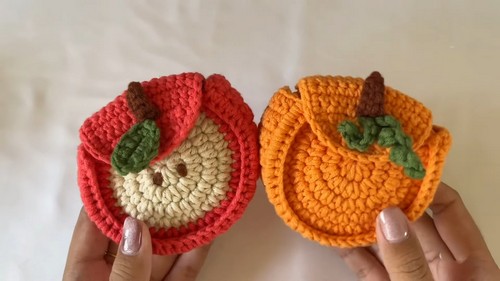
Apple Pouch Pattern

Starting with beige yarn:
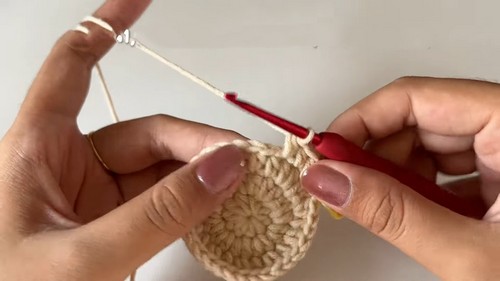
Magic Ring:
- Wrap yarn around your finger to create two loops.
- Pull back loop under the front loop and ch 1 to secure.
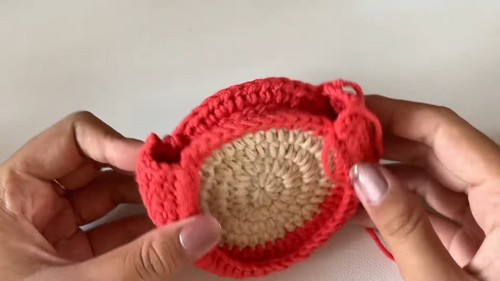
Round 1:
Make 10 hdc inside the magic ring.
Mark the first stitch with a stitch marker and pull yarn tightly to close the ring.
Join with a sl st to the first hdc.
Round 2 (Increasing):
Ch 1, then make an inc in each stitch around (20 hdc total). Join with a sl st to the first hdc of this round.
For Round 3:
Ch 1, hdc in the next stitch, inc in the following stitch. Repeat from * to * around for a total of 10 times. Join with a sl st.
Round 4:
Ch 1, follow the pattern: hdc, inc, hdc in the next stitches. Repeat this sequence around and join with a sl st.
Switch to Red Yarn at the Last Stitch of Round 4:
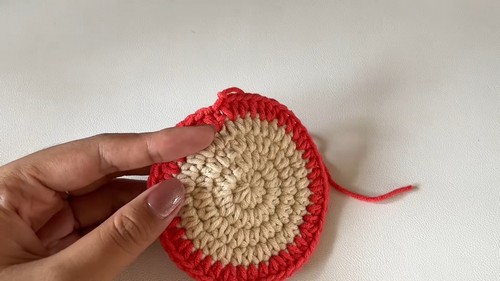
Round 5:
With red yarn, ch 1, 3 hdc, inc. Repeat the sequence around and join with a sl st.
Making Another Circle:
Repeat Rounds 1-5 using only beige yarn for the back part of the pouch.
Creating the Applique:
Row 1:
Start with a slip knot, ch 7.
Starting from the second chain from the hook, sc in each chain (6 sc).
Rows 2-38:
Ch 1, turn your work, sc in each stitch across.
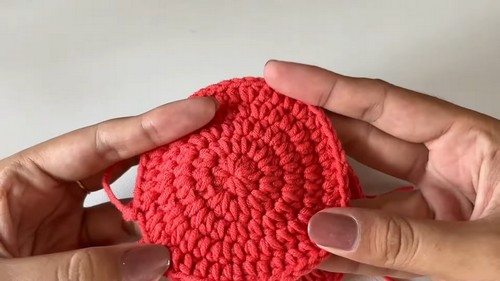
Joining Applique to Circles:
Align the applique with the beige circle, ensuring the right side is facing outward. Join by sc around the perimeter, attaching both circles together.
Adding the Flap (In Beige)
Row 1 of Flap:
Start from one side of the back circle, sc in each of the 12 stitches.
Rows 2-7:
Ch 1, turn, sc in each stitch across.
Row 8 (Shaping):
Decrease, then sc in next 8 stitches, and decrease again.
Row 9:
Decrease, sc in next 6, decrease.
Row 10:
Decrease, sc in next 4, decrease.
Crocheting the Edges for a Smooth Finish:
Work sc along the three sides of the flap to smoothen the edges.
Finishing Touches – Leaves and Stem
Leaf (for Apple and Tomato):
Start with a magic ring.
For the apple leaf, ch 6, sc in 2nd ch from hook, hdc in next, dc, hdc, and 3 sc in last chain, working around to the other side.
Stem:
Ch 6, sl st in 2nd ch from hook, sc in next 4 chains.
Attaching Leaf and Stem:
Sew the stem and leaves to the top side of the pouch.
Suggestions
To make the pouches more functional, consider adding snap buttons for closure.
Decorative seeds for the Apple can be added using brown felt and glue.