Crochet Christmas Wreath Amigurumi: A Delightful Holiday Craft

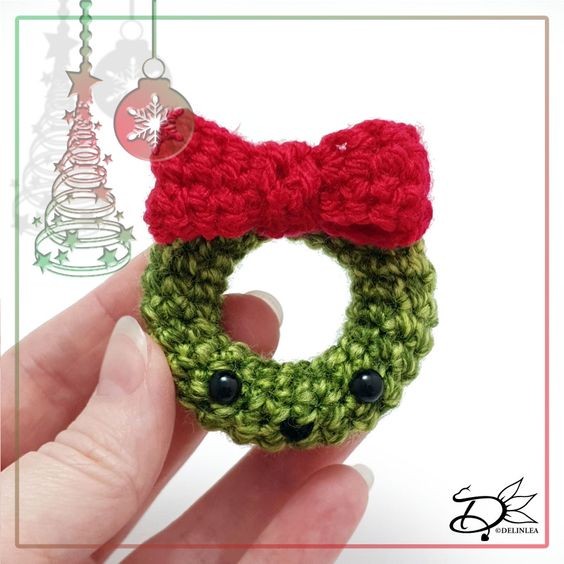
The Crochet Christmas Wreath Amigurumi is a delightful and creative project that adds a charming touch to your holiday decor. This fun and festive craft involves crocheting a cute mini wreath using colorful yarn and detailed stitches. Whether you are a seasoned crocheter or a beginner looking for a new challenge, creating a Crochet Christmas Wreath Amigurumi will surely bring a smile to your face and spread holiday cheer. Imagine the joy of hanging your unique handmade wreath on your door or giving it as a heartfelt gift to a loved one. Get ready to enjoy the cozy and whimsical spirit of the holiday season with this adorable crochet project!
Materials Required
For this pattern you’ll need:
- ♥ Yarn in the colors Red and Green. (I used Stylecraft Special DK)
- ♥ A bit of Black yarn to make his mouth.
- ♥ Crochet hook. (I used 3mm)
- ♥ Stuffing.
- ♥ Yarn Needle.
- ♥ Sewing Pins.
- ♥ Stitch Marker.
- ♥ Safety Eyes, 6mm.
Stitches Used
Stitches used (US Terms):
- Magic Ring.
- CH = Chain.
- SLST = Slip Stitch.
- FSC = Foundation Single Crochet.
- SC = Single Crochet.
- ST = Stitch.
- Inc = Increase.
- Dec = Decrease.
- (…) = Repeat the space in brackets the given number of times.
- […] = Total number of stitches.
This pattern is made with continuous rounds, unless stated otherwise. Use a stitch marker to mark your first/last stitch of your row.
Pattern Instructions
Wreath
Use the color Green.
1: 8SC in a Magic Ring. [8]
2: 8SC. [8]
Repeat row 2 until you have 27 rows total.
Stuff along the way and also place the eyes along the way, 1 eye between row 11 & 12 and 1 between row 17 & 18.
Fasten off and sew the last and the first row together to make a circle.
Bow
Use the color Red.
This part isn’t made with continuous rounds.
1: 20FSC, turn. [20]
2: 20SC, turn. [20]
3: 20SC. [20]
Fasten off and leave a long tail for sewing.
Middle of the Bow
Use the color Red.
This part isn’t made with continuous rounds.
1: 6FSC, turn. [6]
2: 6SC. [6]
Fasten off and leave a long tail for sewing.
Assembling the Wreath
Whenever I start assembling Amigurumi, I’d like to use sewing pins to position all parts first until I’m happy. Then I will sew them on. I recommend you do so as well.
Make a circle of the ‘bow’ part, and sew this. Do the same with the middle part of the bow, but sew it around the ‘bow’. Then sew the bow completed to the top of the wreath. With a bit of Black yarn, create his mouth. If you want to hang it, don’t forget to add a loop to the top.