How to Crochet Thumbless Mittens for Winter Warmth

Crochet thumbless mittens are a delightful and practical addition to anyone's winter wardrobe! These cozy mittens are not only adorable but also functional as they keep your hands warm while allowing for easy movement. Whether you're a seasoned crocheter looking for a new project or a beginner eager to learn a new skill, making thumbless mittens can be a fun and rewarding experience. With a variety of yarn colors and patterns to choose from, you can customize your mittens to match your style and personality. So grab your crochet hook, pick out some soft yarn, and get ready to craft a pair of these cute and comfy thumbless mittens to keep your hands toasty all season long!
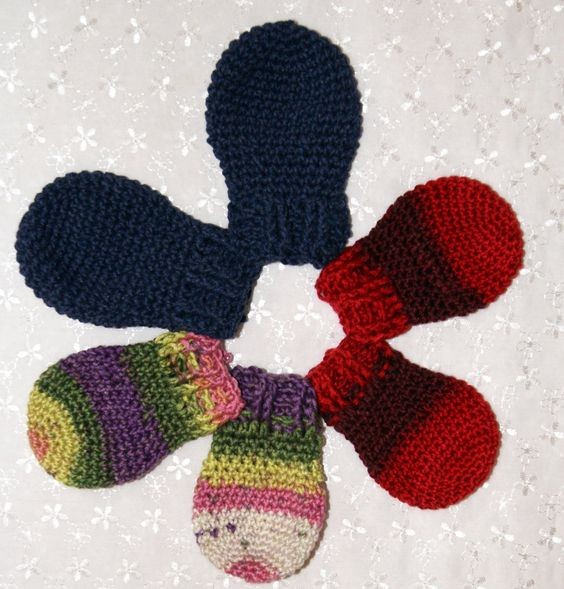
Here’s the scoop: I used a Size F crochet hook for the medium and larger mittens and a Size E hook for the littlest pair. Also, the littlest pair and the medium size were crocheted using a Fingering Weight Sock Yarn, and for the largest pair, I used a DK weight/Light Worsted Yarn. All three pairs were crocheted using the exact same pattern directions. It's important to use a row counter and count your stitches within each row to help with accuracy.
You will need approximately 60 – 80 yards of yarn to complete two mittens.
Essential Techniques
Stitches to know:
- Single Crochet (sc)
- Double Crochet (dc)
- Single Crochet Together (sctog)
- Front Post Double Crochet (fpdc)
- Back Post Double Crochet (bpdc)
- Chain (ch)
- Slip Stitch (sl)
Directions
Begin by creating the “magic loop” technique crocheting 6 sc into a circle.
RND 1: 2 sc into each of your beginning 6 sc for a total of 12 stitches.
RND 2: *1 sc in the first stitch, 2 sc into the next stitch – repeat from * around for a total of 18 stitches.
RND 3: *1 sc in the first stitch, 1 sc in the second stitch, 2 sc in the next stitch – repeat from * around for a total of 24 stitches.
RND 4: *1 sc in the first stitch, 1 sc in the second stitch, 1 sc in the third stitch, 2 sc in the next stitch – repeat from * around for a total of 30 stitches.
RND 5 – 11: One sc in each of your 30 stitches for a total of 7 rounds.
RND 12: Decrease row – *2sctog (1st decrease), 1 sc in the next stitch, 1 sc in the next stitch, 1 sc in the next stitch – repeat from * around for a total of 24 stitches. (Tip: each decrease counts as one stitch)
RND 13: One sc in each of your 24 stitches.
RND 14: Decrease row – *2sctog, 1 sc in each of the next 4 stitches – repeat from * around for a total of 20 stitches.
RND 15 – 17: Complete 1 sc in each of your 20 stitches for a total of 3 rounds.
RND 18: Ch 2, complete 1 dc in each of your 20 stitches. Join with a sl stitch into the top of your 1st dc.
RND 19: Ch 2, *1 fpdc in the next 2 stitches, 1 bpdc in the next 2 stitches, continue from * around for a combined total of 20 fpdc and bpdc. On the last BPDC, wrap your hook around the stitch and the Chain 2 stitch to keep a more uniform looking rib pattern. Join with a sl stitch in top of fpdc.
RND 20 – 21: Repeat round 19 for two more rounds or to your desired length of cuff.
Fasten off and weave in ends at the cuff as well as at the top where you created the magic loop.
Remember, your choice of yarn and hook size will vary the size of the mitten. Be creative by adding appliques, bows, pompoms, stars, hearts, etc. Have fun with this little project and ENJOY!!