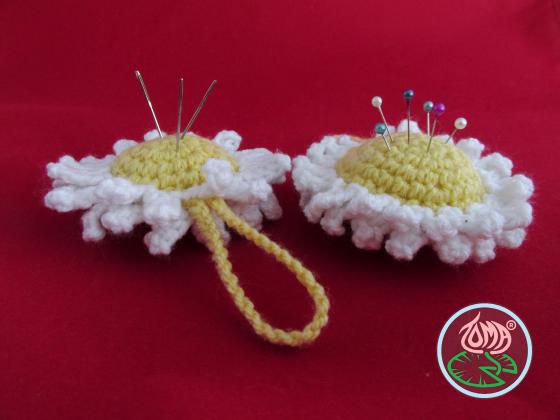
Crochet Amigurumi Daisy Pincushions

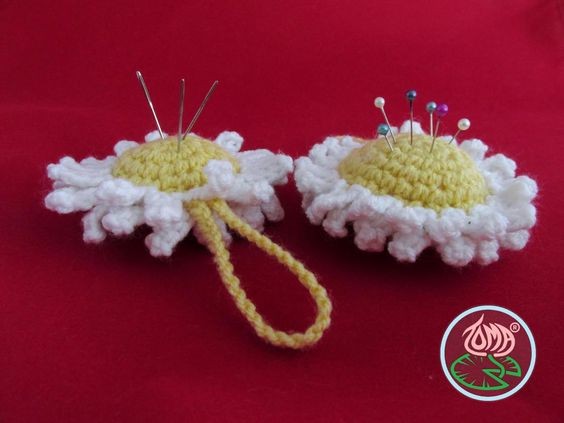
If you're looking to add a touch of charm and functionality to your crafting space, crochet amigurumi daisy pincushions are the perfect choice! These adorable pincushions not only keep your pins organized but also bring a smile to your face with their whimsical design. Whether you're a beginner or a seasoned crocheter, creating these daisy pincushions is a fun and rewarding project that allows you to showcase your creativity. The colorful petals and cute center details make them a delightful addition to your crafting kit or a thoughtful gift for a fellow crafter. So grab your crochet hook, some yarn in cheerful shades, and bring a bit of floral flair to your next crafting session with these charming amigurumi daisy pincushions!
Materials and Tools Needed:
- Acrylic or Cotton yarn e.g. Lane Cervinia Caprice / King Kole Bamboo cotton in Yellow and White colours
- Hook size 2.5mm
- Polyfill
- Stitch marker indicating the end of each Round (Rnd)
- Tapestry needle
- Scissors
- Finished Size: Both daisies have an approximate diameter of 9cm (3 ½ in) including the petals. If you are using a different yarn brand or type, use a hook size at least 0.5mm less than suggested on the yarn label to create tight stitches.
- All instructions and abbreviations are given in American (US) terms.
- Work in continuous rounds without turning unless otherwise specified in the pattern.
- For certain instructions e.g. ‘adjustable ring’ click on the link for detailed ‘how-to’.
Daisy with Small Centre
With Yellow Colour
Rnd 1: sc × 6 into adjustable ring. Total 6sts
Rnd 2: (2sc inc) × 6. Total 12sts
Rnd 3: (2sc inc, sc) × 6. Total 18sts
Rnd 4: (sc × 2, 2sc inc) × 6. Total 24sts
Rnd 5: (2sc inc, sc × 3) × 6, leave the last st incomplete and change the colour to White. Total 30sts
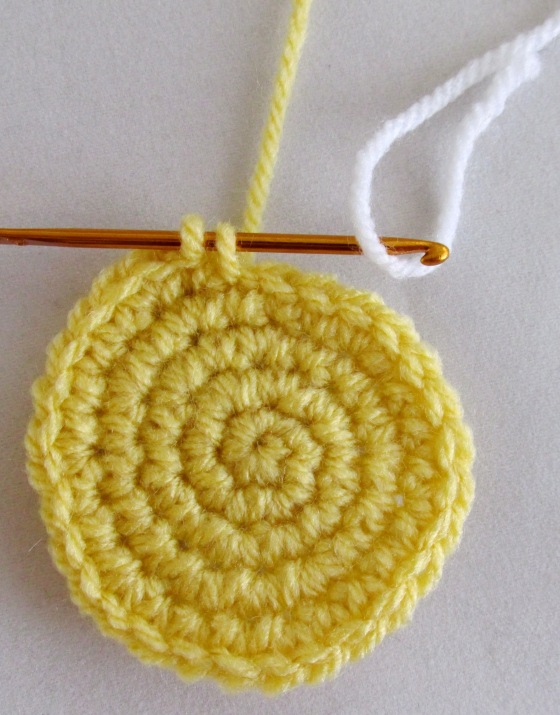
Leaving the last st of Rnd 5 incomplete and changing the colour to White.
Rnd 6: slst, (5ch – sc into 2nd ch from hook – sc into next 2chs, slst into next st of the yellow centre) × 15. Fasten off, secure and hide the tail.
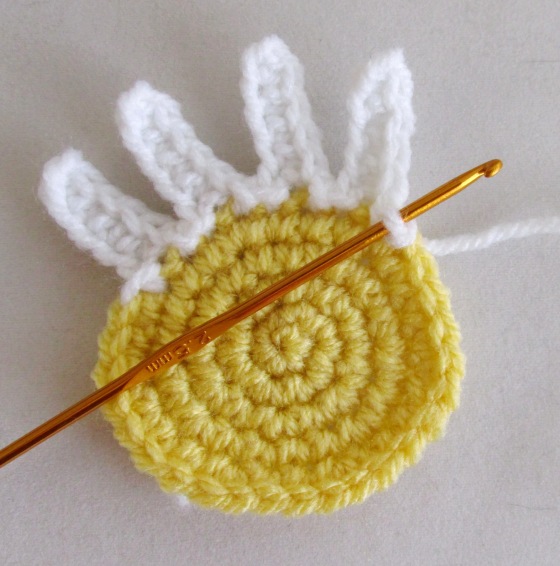
Rnd 6, in progress
Repeat Rnd 1-6 once more to make the second side, leave a tail of 25cm (10 in) of yellow colour at row 5.
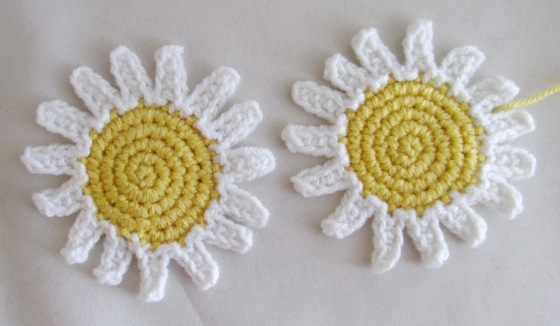
Finished sides, one of the sides has a tail to sew them together
Using the tail left at the second side sew the first side to second stuffing it with polyfill before finishing the connection.
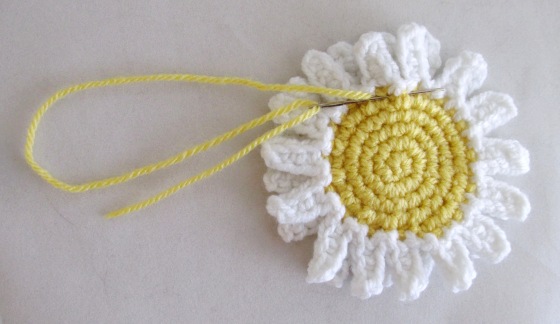
Sewing the two sides together
To add a hanging string, with Yellow colour ch x 30, fasten off leaving a tail of 15cm (6 in) and attach it between the petals.
Daisy with Large Centre
With Yellow Colour
Rnd 1: sc × 6 into adjustable ring. Total 6sts
Rnd 2: (2sc inc) × 6. Total 12sts
Rnd 3: (2sc inc, sc) × 6. Total 18sts
Rnd 4: (sc × 2, 2sc inc) × 6. Total 24sts
Rnd 5: (2sc inc, sc × 3) × 6. Total 30sts
Rnd 6: sc, (2sc inc, sc × 4) × 5, 2sc inc, sc, leave the last st incomplete and change the colour to White. Total 36sts
Rnd 7: slst, (4ch – sc into 2nd ch from hook – sc into next ch, slst into next st of the yellow centre) × 18. Fasten off, secure and hide the tail.
Repeat Rnd 1-7 once more to make the second side, leave a tail of 25cm (10 in) of yellow colour at row 6.
Using the tail left at the second side sew the first side to second stuffing it with polyfill before finishing the connection.
To add a hanging string with Yellow colour ch x 25, fasten off leaving a tail of 15cm (6 in) and attach it between the petals.