Easy Crochet Adorable Monkey Pattern

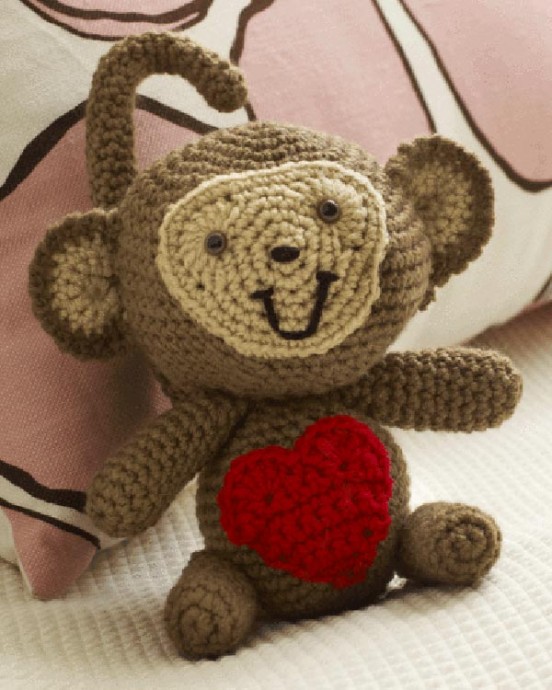
Get ready to go bananas for this adorable Crochet Adorable Monkey! This sweet stuffed toy is handcrafted from soft, cuddly yarns and features intricate details like a little nose and ears, making it a delightful companion for any little one. The monkey's oversized arms and legs allow for snuggles and hugs, while its soft, chunky body makes it perfect for cuddling. With its bright, cheerful colors and endearing expression, this crochet monkey is sure to become a beloved friend for any child.
Skill Level
Easy
Supplies
RED HEART® Super Saver®: 1 skein each of 360 Café Latte (A), 334 Buff (B), 319 Cherry Red (C), 312 Black (D)
Susan Bates® Crochet Hook: 5mm [US H-8]
Yarn needle, stitch marker, one pair 9–12mm safety eyes, floral stem wire (optional – to stabilize neck and for pose-able tail), fiberfill.
Size
The monkey measures about 7½” (19 cm) tall.
Gauge
16 sts = 4” (10 cm); 16 rounds = 4” (10 cm) in single crochet. Check your gauge. Use any size hook to obtain the gauge.
Special Stitches
Reverse sc (reverse single crochet) = Work single crochet in opposite direction from which you would usually work (left to right if you are right-handed and right to left if you are left-handed). This stitch is also known as crab stitch. It creates a rope-like twisted single crochet edging.
sc2tog = [Draw up a loop in next st] twice, yarn over and draw through all 3 loops on hook.
Note: Gauge is not critical for this project. Work tightly so stuffing will not show through stitches.
Head
Beginning at the top of the head with A, ch 2.
Round 1 (right side): Work 6 sc in 2nd ch from hook—6 sc. Do not join. Work in continuous rounds (spirals). Place a marker for the beginning of the round. Move the marker up as each round is completed.
Round 2: Work 2 sc in each sc around—12 sc.
Round 3: [Sc in next sc, 2 sc in next sc] 6 times—18 sc.
Round 4: [Sc in next 2 sc, 2 sc in next sc] 6 times—24 sc.
Round 5: [Sc in next 3 sc, 2 sc in next sc] 6 times—30 sc.
Round 6: [Sc in next 4 sc, 2 sc in next sc] 6 times—36 sc.
Round 7: [Sc in next 5 sc, 2 sc in next sc] 6 times—42 sc.
Round 8: [Sc in next 6 sc, 2 sc in next sc] 6 times—48 sc.
Rounds 9–16: Sc in each sc around.
Round 17: [Sc in next 6 sc, sc2tog] 6 times—42 sc.
Round 18: [Sc in next 5 sc, sc2tog] 6 times—36 sc.
Round 19: [Sc in next 4 sc, sc2tog] 6 times—30 sc.
Round 20: [Sc in next 3 sc, sc2tog] 6 times—24 sc.
Round 21: [Sc in next 2 sc, sc2tog] 6 times—18 sc.
Round 22: [Sc in next sc, sc2tog] 6 times—12 sc.
Fasten off, leaving a long tail for sewing the head to the body.
Face
Beginning at the top of the body, with B, ch 2.
Rounds 1–4: Work the same as Rounds 1–4 of the head—24 sc.
Round 5: Skip next 2 sc, 9 dc in next sc, skip next 2 sc, sc in the next 3 sc, skip next 2 sc, 9 dc in next sc, skip next 2 sc, [sc in next 3 sc, 2 sc in next sc] twice, sc in the next 3 sc—34 sts.
Round 6: 2 sc in next sc, [sc in next 3 sc, 2 sc in next sc] 8 times, sc in the last sc—43 sc.
Fasten off, leaving a long tail for sewing face to head. Attach eyes at the base of 9-dc groups on Round 5. With D and using a photograph as a guide, embroider a straight stitch mouth and nose. Sew face to head, sewing around the outer edges of the face. Stuff head.
Ears (Make 2)
Inner Ear
With B, ch 2.
Row 1: Work 5 sc in 2nd ch from hook; do not join, work back and forth in rows, turn—5 sc.
Row 2: Ch 1, 2 sc in each sc across, turn—10 sc.
Row 3: Ch 1, [sc in next sc, 2 sc in next sc] 5 times, turn—15 sc. Fasten off.
Outer Ear
With A, work the same as inner ear through Row 3—15 sc. Do not fasten off.
Row 4: Ch 1, hold one inner ear and one outer ear together with stitches of last rows matching; working through both thicknesses, sc in each sc across, do not turn.
Row 5: Ch 1, reverse sc in each sc across. Fasten off, leaving a long tail for sewing ear to head. Using a photograph as a guide for placement, sew one ear to each side of the head.
Body
Beginning at the bottom of the body, with A, ch 2.
Rounds 1–6: Work the same as Rounds 1–6 of the head—36 sc.
Rounds 7–14: Sc in each sc around. Begin stuffing body. Continue to stuff as work progresses.
Rounds 15–18: Work the same as Rounds 19–22 of the head—12 sc.
Fasten off and weave in ends.
Tummy Heart
With C, ch 2.
Row 1: Sc in 2nd ch from hook, turn—1 sc.
Row 2: Ch 1, 3 sc in the sc, turn—3 sc.
Row 3: Ch 1, 2 sc in first sc, sc in next sc, 2 sc in last sc, turn—5 sc.
Row 4: Ch 1, 2 sc in first sc, sc in next 3 sc, 2 sc in last sc, turn—7 sc.
Row 5: Ch 1, sc in each sc across, turn.
Row 6: Ch 1, 2 sc in first sc, sc in next 5 sc, 2 sc in last sc, turn—9 sc.
Row 7: Ch 1, sc in each sc across, turn.
Row 8: Skip the first 2 sc, 6 dc in the next sc, skip the next sc, slip st in the next sc, skip the next sc, 6 dc in the next sc, skip the last 2 sc, sl st in the beginning ch-1—13 sts.
Fasten off, leaving a long tail for sewing heart to tummy. Sew heart to the front of the body. Stuff body. For additional stability, cut a 10″ (25.5 cm) length of floral stem wire and fold it in half. Insert wire into the center of the body, allowing about 2″ (5 cm) to extend from the top. Place head on top of the body, inserting the remainder of wire into the center of the neck. Sew head to the top of the body.
Arms and Legs (Make a Total of 4 Pieces - 2 for Arms and 2 for Legs)
With A, ch 2.
Rounds 1 and 2: Work the same as Rounds 1 and 2 of the head—12 sc. No marker is needed for the beginning of the round.
Rounds 3–10: Sc in each sc around.
Round 11: [Sc in next 4 sc, sc2tog] twice—10 sc.
Round 12: Sc in each sc around.
Round 13: [Sc in next 3 sc, sc2tog] twice—8 sc.
Fasten off, leaving a long tail for sewing limb to body. Stuff limbs lightly and sew to body.
Tail
With A, ch 2.
Round 1 (right side): Work 6 sc in 2nd ch from hook—6 sc. Do not join. Work in continuous rounds (spirals). No marker is needed for the beginning of the round.
Round 2: Sc in each sc around.
Repeat Round 2, working until the tail measures about 15″ (38 cm) from the beginning or the desired length. Fasten off, leaving a long end for sewing the tail to the body. Stuff the tail lightly and sew it to the back of the body. Note: If a pose-able tail is desired, do not stuff the tail. Wrap stuffing around the wire, taking special care to wrap around the tip of the wire, and insert the wrapped wire into the tail. Leave about 2″ (5 cm) of unwrapped wire extending out of the open end of the tail. Insert the 2″ (5 cm) end into the body before sewing the tail in place.
Finishing
Weave in any remaining ends.
Abbreviations
A, B, C, and D: Color A, B, C, and D
ch: chain
sc: single crochet
st(s): stitch(es)
[ ]: work directions in brackets the number of times specified