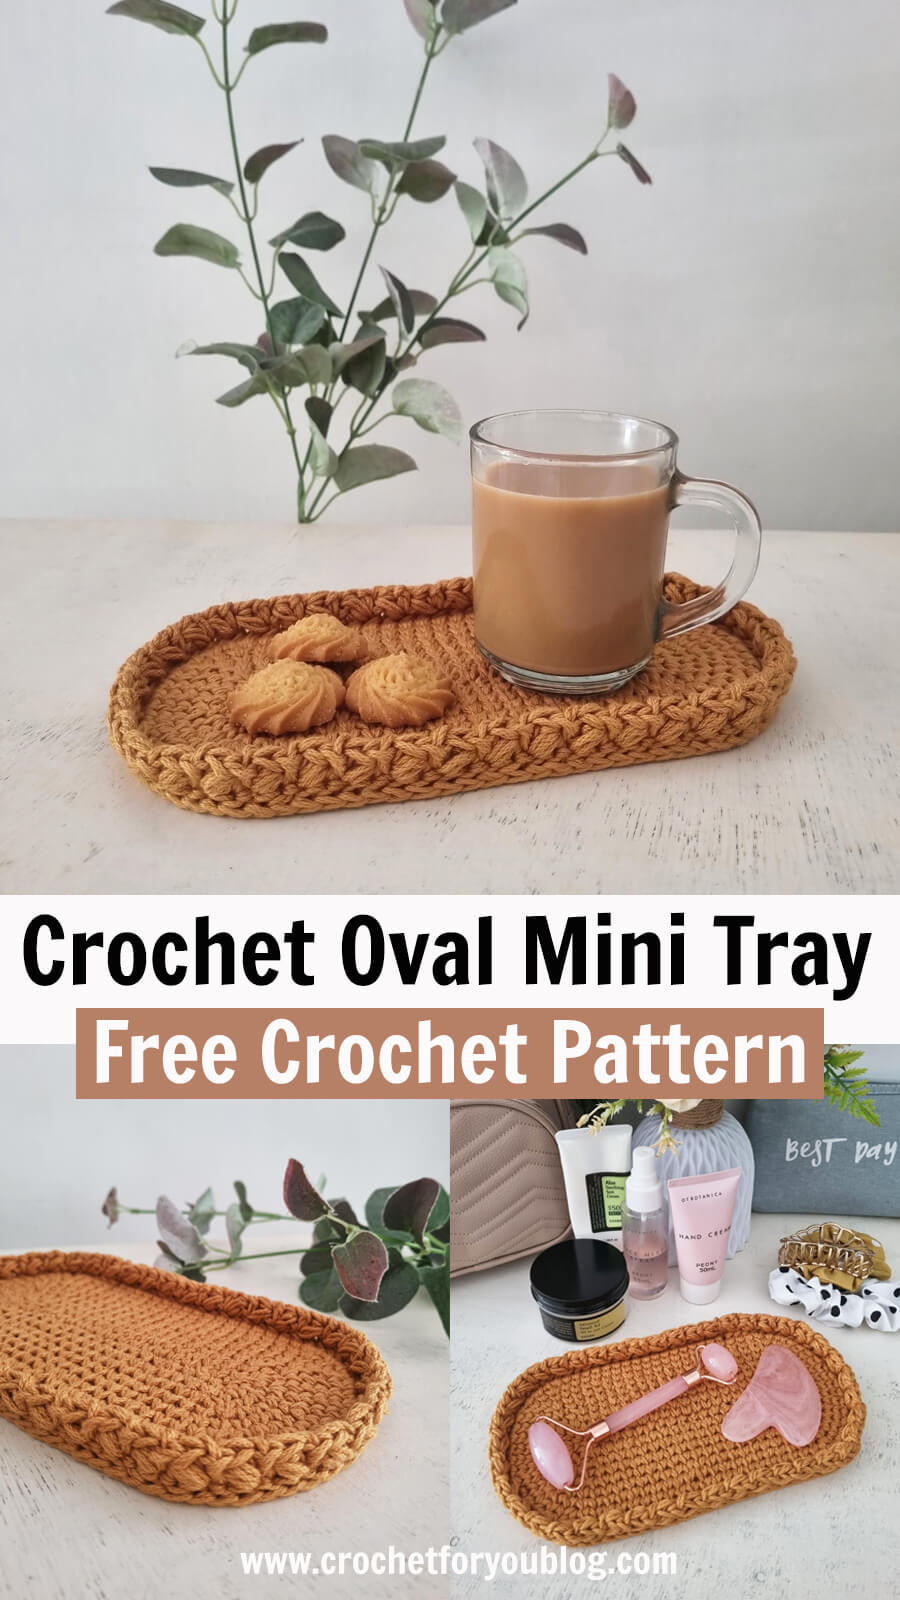
DIY Modern Oval Crochet Tray

Create a Chic and Contemporary Oval Mini Tray
Create a chic and contemporary oval mini tray using crochet techniques with a modern twist. This stylish piece will add a touch of elegance to any room in your home. The oval shape provides a unique and eye-catching design that is perfect for displaying small items or serving snacks in a trendy way. The modern style of this crochet tray will make it a standout piece in your decor, whether you use it in the living room, bedroom, or kitchen. Handcrafted with care and attention to detail, this oval mini tray is a versatile and functional accessory that can be used in various ways. The intricate crochet pattern adds texture and visual interest to the tray, making it a decorative accent as well as a practical item. Whether you're looking to organize your space or simply add a touch of style to your home, this modern crochet tray is the perfect choice for those who appreciate handmade craftsmanship and contemporary design.
Project Details
Skill Level
Intermediate
Finished Size
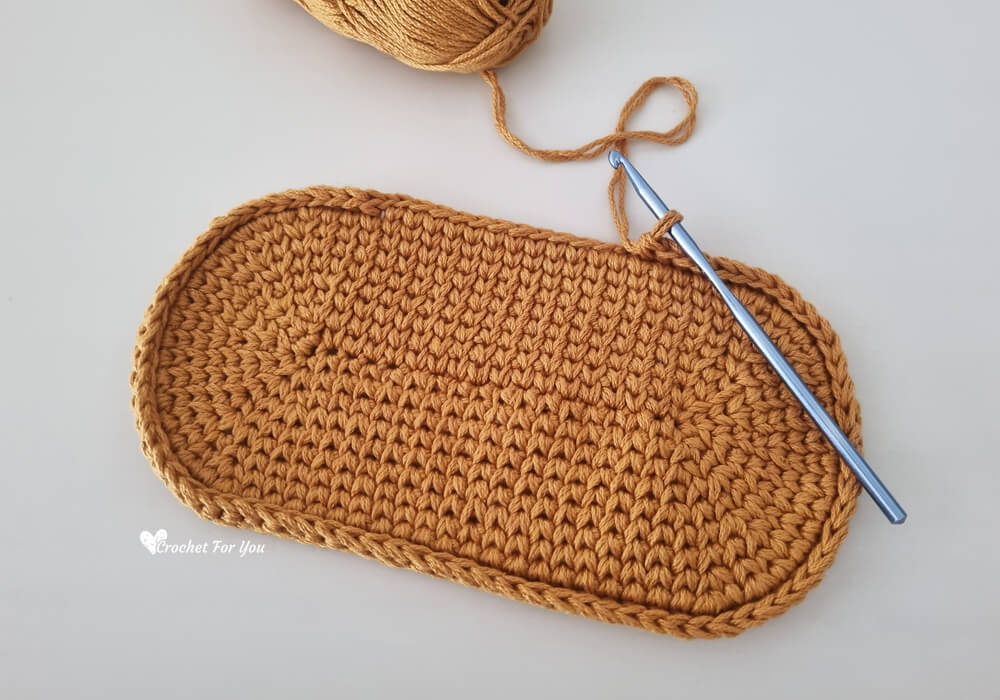
9.25″ x 4.75″
Materials
#4-Medium / Worsted / 100% Mercerized Cotton / Approx: 200 yards
I used:
- One skein of Lion Brand 24/7 Cotton (100% Mercerized Cotton, 180 yd [170m] / 3.5 ounce [100g]) Color: Camel, 2 strands held together.
- US H/8, 5mm crochet hook
- Stitch markers
- Tapestry needle for weaving ends
- Scissors
Abbreviations (US Terms)
- Ch = chain
- Sl st = slip stitch
- Sc = single crochet
- Yo = yarn over
- Center sc = center single crochet / waistcoat stitch
- FPsc = front post single crochet
- * to ; = repeat * to the instructions.
- [ ] work instructions within brackets as many times as directed
Gauge
14 hdc x 12 rows = 4″ with US H-8 (5 mm) crochet hook
Special Stitches
- Puff Stitch = yo, insert the hook in indicated st, yo, pull up a loop, yo, insert the hook in same st, yo, pull up a loop 2 times, yo, (7 loops on the hook) pull back all the loops on the hook.
Notes
- I used a larger hook instead of the recommended hook size for this project because of the stitch pattern and 2 strands held together.
- From Round 1 to 9, do not join after each round. Always attach the stitch markers on the first stitch in each round.
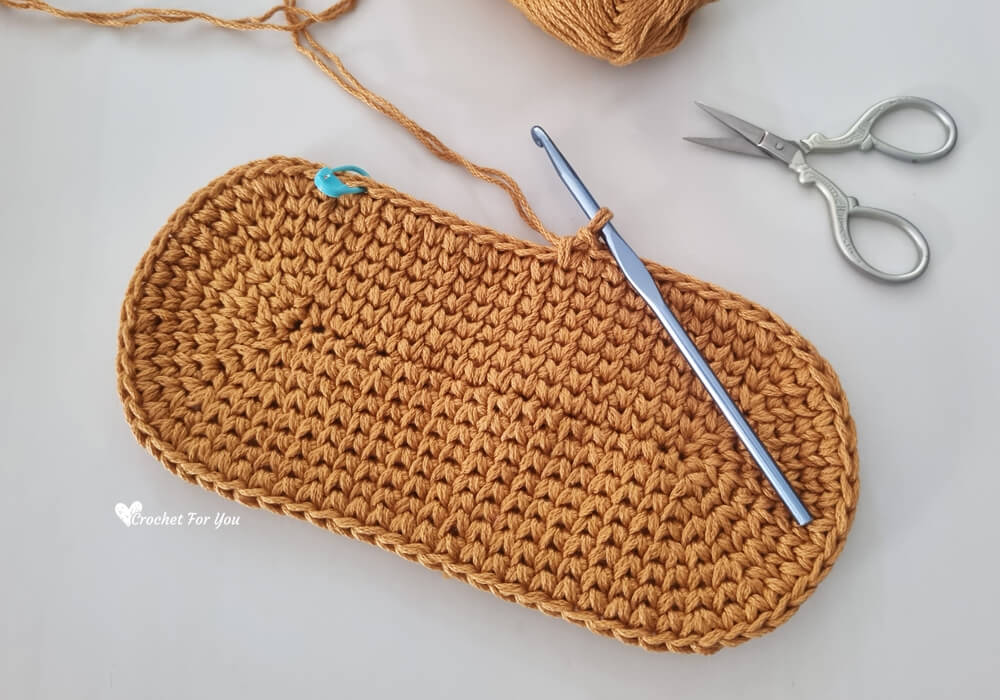
Pattern
Ch 19
Round 1: 3 sc in 2nd ch from the hook, sc in each of next 16 ch, 3 sc in last ch, working on the opposite side of the foundation chain, sc in each of next 16 ch. (38 sts total)
Round 2: 2 sc in first st and each of next 2 sts, sc in each of next 16 sts, 2 sc in each of next 3 sc, sc in each of next 16 sts. (44 sts total)
Round 3: 2 sc in first st, sc in next st, [2 sc in next st, sc in next st] 2 times, sc in each of next 16 sts, [2 sc in next st, sc in next st] 3 times, sc in each of next 16 sts. (50 sts total)
Round 4: sc in first st and next st, 2 sc in next st, [sc in each of next 2 sts, 2 sc in next st] 2 times, sc in each of next 16 sts, [sc in each of next 2 sts, 2 sc in next st] 3 times, sc in each of next 16 sts. (56 sts total)
Round 5: 2 sc in first st, sc in each of next 3 sts, [2 sc in next st, sc in each of next 3 sts] 2 times, sc in each of next 16 sts, [2 sc in next st, sc in each of next 3 sts] 3 times, sc in each of next 16 sts. (62 sts total)
Round 6: sc in first st and each of next 2 sts, 2 sc in next st, [sc in each of next 3 sts, 2 sc in next st] 2 times, sc in each of next 3 sts, sc in each of next 16 sts, sc in each of next 3 sts, [2 sc in next st, sc in each of next 3 sts] 3 times, sc in each of next 16 sts. (68 sts total)
Round 7: sc in first st and each of next 3 sts, 2 sc in next st, sc in each of next 8 sts, 2 sc in next st, sc in each of next 4 sts, sc in each of next 16 sts, sc in each of next 4 sts, 2 sc in next st, sc in each of next 8 sts, 2 sc in next st, sc in each of next 4 sts, sc in each of next 16 sts. (72 sts total)
Round 8: sc in first st and next st, 2 sc in next st, sc in each of next 14 sts, 2 sc in next st, sc in each of next 2 sts, sc in each of next 16 sts, sc in each of next 2 sts, 2 sc in next st, sc in each of next 14 sts, 2 sc in next st, sc in each of next 2 sts, sc in each of next 16 sts. (76 sts total)
Round 9: sc in first st and next st, 2 sc in next st, sc in next st, 2 sc in next st, sc in each of next 12 sts, 2 sc in next st, sc in next st, 2 sc in next st, sc in each of next 2 sts, sc in each of next 16 sts, sc in each of next 2 sts, 2 sc in next st, sc in next st, 2 sc in next st, sc in each of next 12 sts, 2 sc in next st, sc in next st, 2 sc in next st, sc in each of next 2 sts, sc in each of next 16 sts. sl st to the first st. (84 sts total)
Edging
Round 10: ch 1, fpsc in each st around, join with sl st in first st. (84 sts total)
At this point, add a stitch marker in the last st of round 10. Because we are going to turn the work.
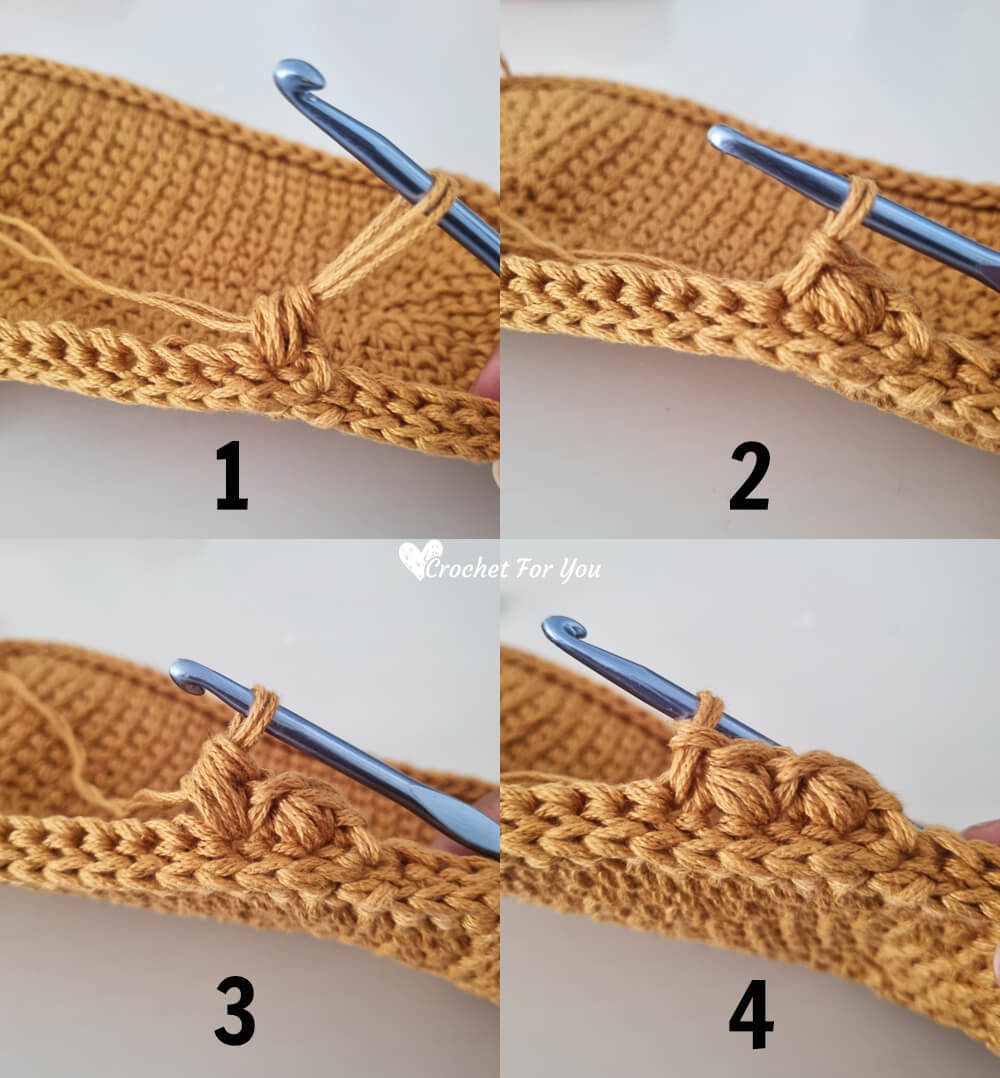
Slanted Puff Stitch Edging
Round 11: ch 2, turn the work and start at the last st in the previous round.
Puff st (see special stitch) in first st (marked stitch), sk next st, sl st to the next st, *ch 2, puff st in the same st that crocheted sl st previously, sk next st, sl st to the next st; repeat * around.
Fasten off and weave the end.