Create Your Own Charming Crocheted Pine Tree

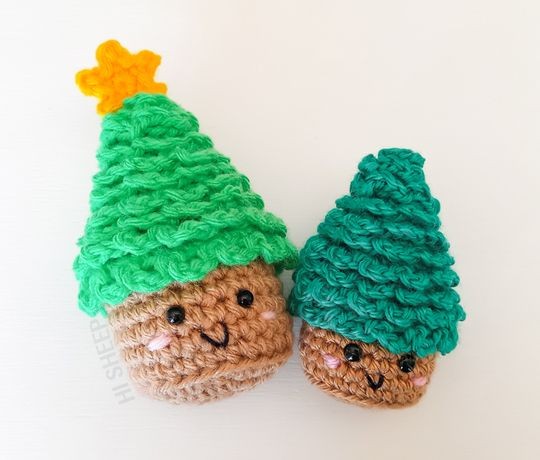
Create a charming pine tree using the art of crocheting. Crafted with yarn and a crochet hook, this handmade decoration will add a cozy and festive touch to your home during the holiday season. The intricate stitches and patterns will mimic the look of a real pine tree, complete with branches and a trunk. You can customize the size and colors of your crocheted pine tree to match your existing decor or create a unique piece that stands out. Whether you are a beginner or an experienced crocheter, this project offers a great opportunity to practice different techniques and experiment with various yarn textures. Once completed, your crocheted pine tree can be displayed on a mantel, shelf, or as part of a festive centerpiece. It also makes a thoughtful handmade gift for friends and family members who appreciate the beauty of handmade decor. Get started on your crocheted pine tree today and enjoy the process of bringing a touch of nature indoors through your own handmade creation.
Materials Needed
For the bigger tree I used worsted weight yarn and a 4.5 mm hook, and for the smaller one, DK yarn and a 3 mm hook. We'll need the following materials:
- Yarn in green - 12 g
- Brown yarn - 5 g
- Yellow yarn for the star (optional)
- Pink yarn for cheeks
- Embroidery floss
- 6 mm safety eyes
- Stuffing
- Tapestry needle
Size Information
The little pine (without the star) will be about 8 cm / 3.15 inches and the big pine about 10 cm / 3.93 inches.
Abbreviations
(U.S.):
- R: round
- mr: magic ring
- ch: chain
- sl st: slip stitch
- sc: single crochet
- inc: increase
- **: repeat to the end of round
- (...) x...: repeat the inside of parentheses according to the indicated number, example: (...) x2
- [...] total stitches at the end of round
Instructions
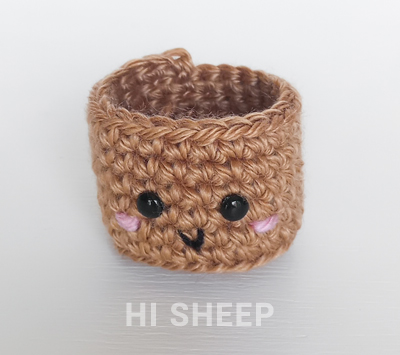
Trunk
With brown yarn:
R1: 6 sc in mr
R2: *sc inc* [12]
R3: *1 sc, sc inc* [18]
R4: *2 sc, sc inc* [24]
R5: back loop only 24 sc [24]
R6-10: 24 sc [24]
Break yarn leaving a short tail, tie off.
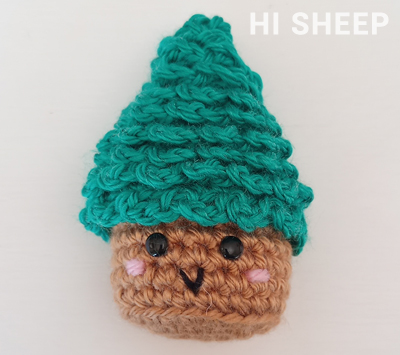
Place the eyes between R7-8 about two stitches apart. For the cheeks, with pink yarn, make a horizontal line to the side of each eye between R6-7 and with embroidery floss make a little mouth between R5-7.
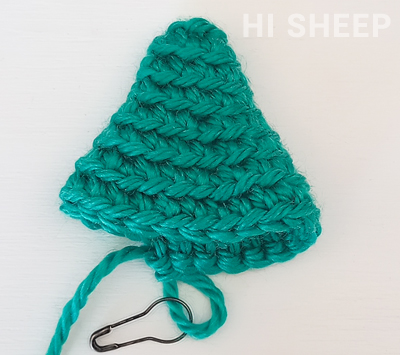
Tree
With green yarn:
After R1, work every round on the back loop.
R1: 6 sc in mr
R2: *1 sc, sc inc* [9]
R3: *2 sc, sc inc* [12]
R4: 12 sc [12]
R5: *1 sc, sc inc* [18]
R6: 18 sc [18]
R7: *2 sc, sc inc* [24]
R8: 24 sc [24]
We'll work R9 attaching to the trunk, so align the last stitch of the trunk with the first stitch of the tree round and work R9 inserting the hook on both the back loop of the tree piece and the front loop of the trunk piece. Before finishing the round, make sure to stuff.
R9: *3 sc, sc inc* [30]
Work the next round as you usually would, remembering to keep working on the back loops.
R10: 30 sc [30]
Now to make the little ruffles for the leaves:
3 ch, turn your work, skip the last stitch you worked and place a sl st on the front loop of the next stitch, then repeat 3 ch, skip 1 stitch, and sl st on the next front loop all around the piece until you reach the top of the tree.
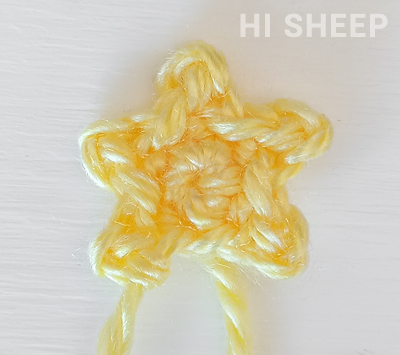
Star
With yellow yarn:
R1: 5 sc in mr, sl st on first stitch
R2: (2 ch, 1 sl st on chain, 1 sl st on next st of the mr) x5
Break yarn leaving enough for sewing.