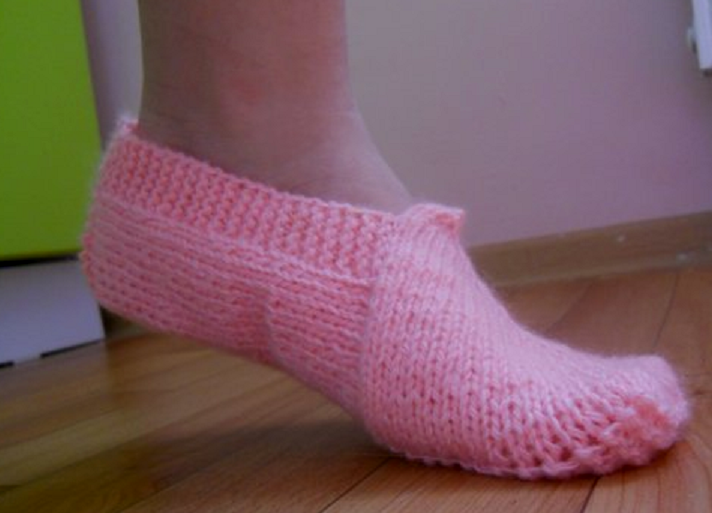
How to Knit a Cozy Slipper


You Will Need:
Any type of yarn – about 100g (120 m/50g);
Knitting needles size 3.5.
Density:
22 stitches and 22 rows = 10cm x 10cm.
Description
Start by casting on 5 stitches onto the needles.
Row Instructions
1st Row: Front part of the work. 1 edge stitch, 1 knit stitch, 1 yarn over (yo), 1 knit stitch (this stitch will be central; it can be marked in any convenient way), 1 yo, 1 knit stitch, 1 edge stitch.
Total: 7 stitches;2nd Row and all even rows: Purls. Do not knit the central stitch; just slip it while keeping the thread in front of your work.
3rd Row: 1 edge stitch, 2 knit stitches, 1 yo, 1 central knit stitch, 1 yo, 2 knit stitches, 1 edge stitch. Total: 9 stitches;
5th Row: 1 edge stitch, 3 knit stitches, 1 yo, 1 central knit stitch, 1 yo, 3 knit stitches, 1 edge stitch. Total: 11 stitches;
Make a yarn over next to the central stitch, alternating directions: place the working thread in front of the back stitch, and behind the back stitch after the central stitch.
Continue this pattern until you get to 41 stitches. As you increase the number of stitches, it may be more convenient to switch to working with three knitting needles.
Knitting the Bottom
Now proceed to knit the bottom. Start according to the pattern used for knitting the heel of the socks. To do this, divide all the stitches (41 pcs.) into three unequal parts - 15, 11, 15.
Garter Stitch Pattern
1st Row: 15 knit stitches, take a new needle, 10 knit stitches, 2 knit stitches – knit together in 1 stitch, turn the work;
2nd Row: 10 knit stitches, 2 knit stitches – knit together in 1 stitch, turn the work.
Continue as on the heel of the toe, knitting the central stitches and grabbing one stitch from the edging part at the end of each row. As a result, you will have only 11 stitches in the center.
Side Stitching
Cast on 15 side stitches on the new needle (the same way as for a sock). Since this side of the work is purl, knit it in the same manner:
1st Row: 9 purls, 5 knit stitches, 1 edge stitch;
2nd Row: All knit stitches;
Without breaking the thread, knit the 11 stitches from the sole. Add one more knitting needle to the work and collect 15 stitches on it for the second side of the slipper.
Final Rows
1st Row: Knit 11 stitches of the sole and the first 5 stitches of the edging element together, followed by 9 purls and end with 1 edge stitch;
2nd Row: Turn the work and knit according to the ornament – garter stitch.
At this stage, the work can be tried on to determine the length. For various sizes, no specific schemes are needed: the toe remains the same, just adjust the length of the lower and side elements. Once the desired length is achieved, begin to form a heel in the same way as for socks. In each row, knit the central section – 11 stitches of the base. Knit the last chain, capturing 1 stitch from both side parts. This is necessary to prevent the slippers from slipping off your feet, so ensure a gradual decrease in the center of the heel (the previously knitted loop of the base) by knitting 2 stitches together into 1 stitch.
After closing the side parts, complete the work by entirely closing all remaining stitches. If you desire a snugger fit for the slipper on your leg, consider knitting additional rows of a 1x1 rib along the edge or using crochet techniques for a decorative finish.


