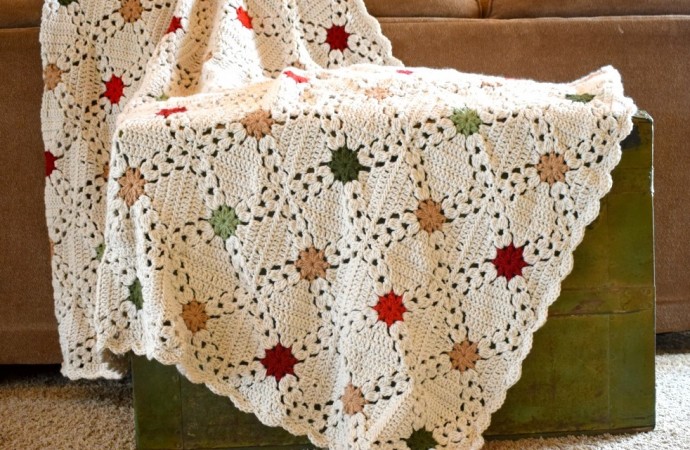
How to Create a Cozy Crochet Blanket with Granny Squares


You’ll Need:
6 skeins of I Love This Yarn (worsted weight) in Linen color;
1 skein each of Cranberry, Red, Mid Green, Dark Olive, and Toasted Almond (1 shade of brown and 2 shades of red and green);
Crochet hook 6.0 mm;
Yarn needle;
Scissors.
Special Stitches
2 Dc Cluster
*yarn over, insert hook into stitch, pull up a loop, yarn over, pull through 2 loops* repeat from * to * 1 more time, yarn over, pull through loops on hook3 Dc Cluster
*yarn over, insert hook into stitch, pull up a loop, yarn over, pull through 2 loops* repeat from * to * 2 more times, yarn over, pull through loops on hookSize:
60” x 48”Instructions
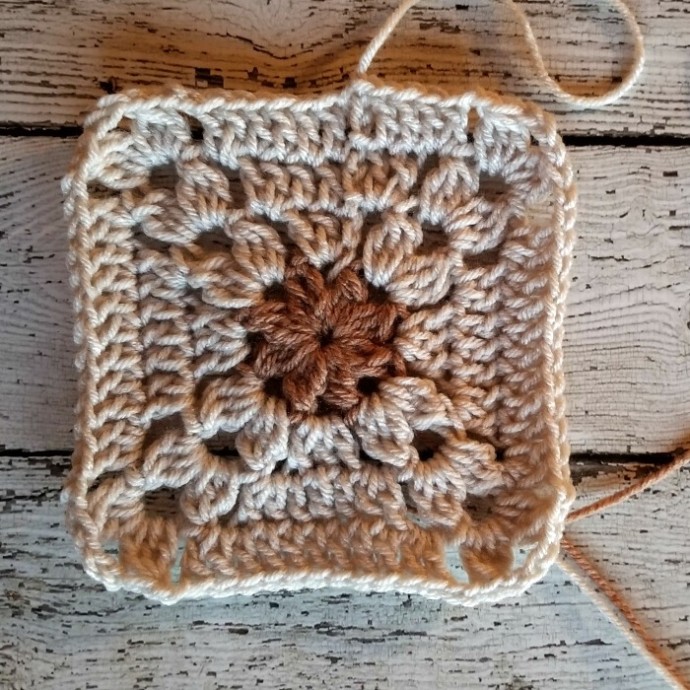
Granny Square
Ch 3 counts as dc
All squares are made with Linen as the main color
Make 63 squares total. For the center color make 31 with Toasted Almond, 10 Cranberry, 10 Dark Olive, 6 Red, 6 Mid Green
For best results, wet block finished squares
Finished square approx. 6.5” x 6.5”
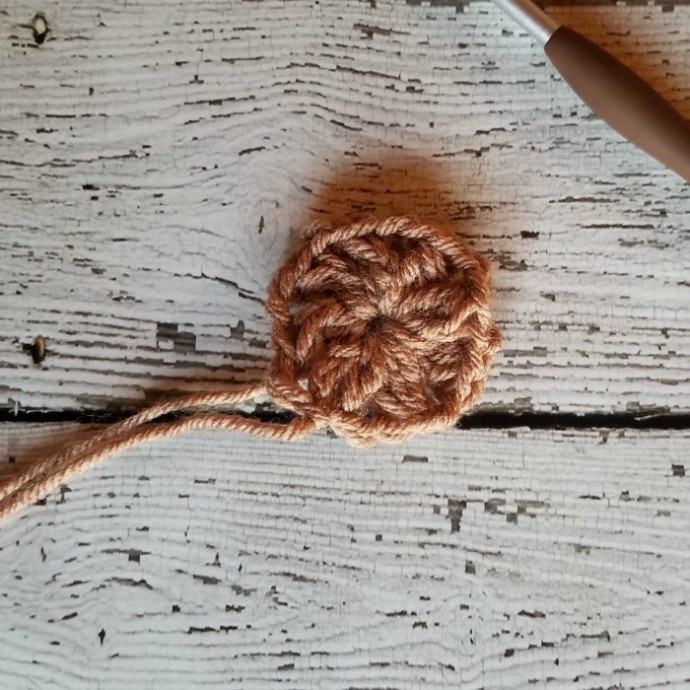
With center color, make a magic ring
Round 1:
ch 3, 2 dc cluster, ch 2, * 3 dc cluster, ch 2* repeat from * to * 6 more times, join to first cluster with sl st (8 clusters) Fasten off.Round 2:
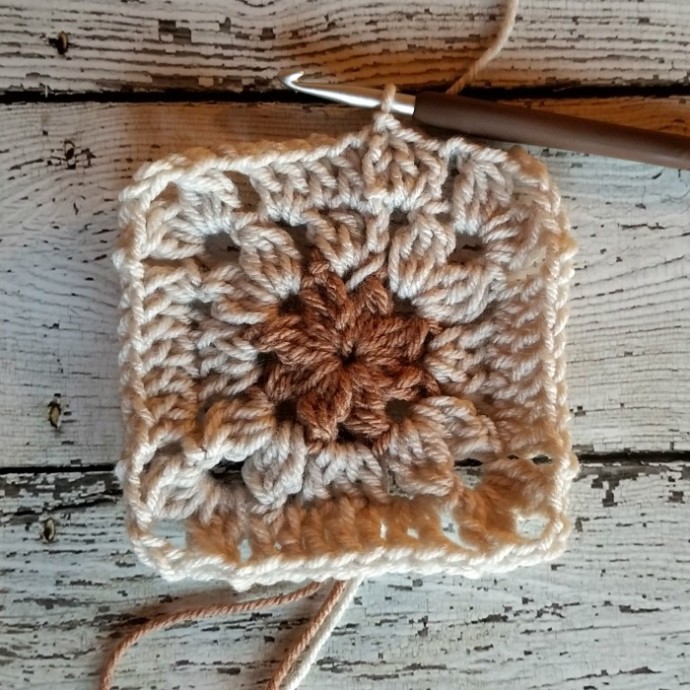
Join main color to any ch 2 space, ch 3, 2 dc in same ch 2 space, ch 2, (3 dc cluster, ch 3, 3 dc cluster) all in next ch 2 space, ch 2, *3 dc in next ch 2 space, ch 2, (3 dc cluster, ch 3, 3 dc cluster) all in next ch 2 space, ch 2* repeat from * to * 2 more times, join to ch 3 with sl st (12 dc, 8 clusters)Round 3:
ch 3, dc in each dc to ch space, 2 dc in ch 2 space, ch 2, (3 dc cluster, ch 3, 3 dc cluster) all in ch 3 space, ch 2, *2 dc in ch 2 space, dc in each dc, 2 dc in ch 2 space, ch 2, (3 dc cluster, ch 3, 3 dc cluster) all in ch 3 space, ch 2* repeat from * to * 2 more times, 2 dc in ch 2 space, join to ch 3 with sl st (28 dc, 8 clusters)Round 4:
ch 3, dc in each dc to ch space, 2 dc in ch 2 space, ch 2, (3 dc cluster, ch 3, 3 dc cluster) all in ch 3 space, ch 2, *2 dc in ch 2 space, dc in each dc, 2 dc in ch 2 space, ch 2, (3 dc cluster, ch 3, 3 dc cluster) all in ch 3 space, ch 2* repeat from * to * 2 more times, 2 dc in ch 2 space, dc in next 2 dc, join to ch 3 with sl st (44 dc, 8 clusters)Fasten off, weave in all ends.
I recommend wet blocking the squares before joining them.
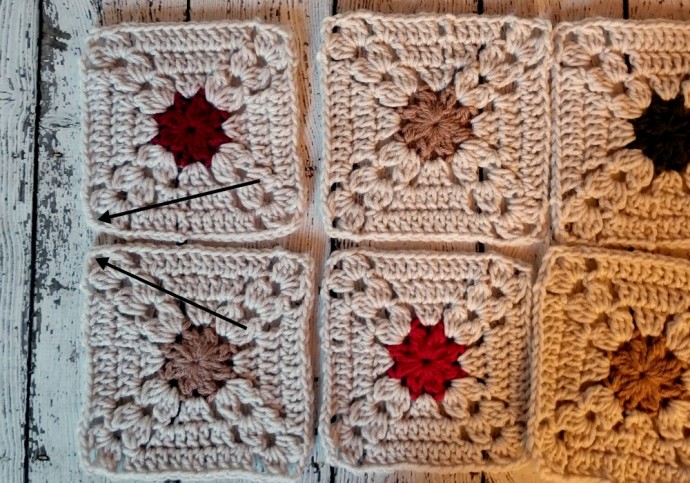
Sewing
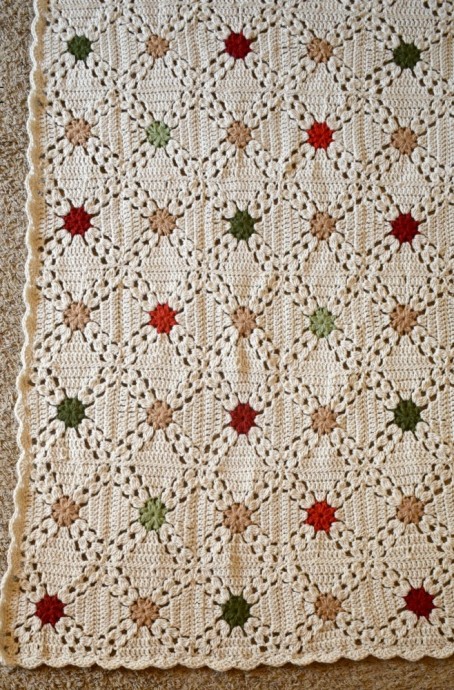
Lay your squares out in 9 rows of 7
If you want the same color order as pictured, this is the order I used—
Row 1:
dark red, brown, dark green, brown, dark red, brown, dark greenRow 2:
brown, red, brown, green, brown, red, brownRow 3:
dark green, brown, dark red, brown, dark green, brown, dark redRow 4:
brown, green, brown, red, brown, green, brownRepeat the color pattern for rows 1 – 4 to row 9
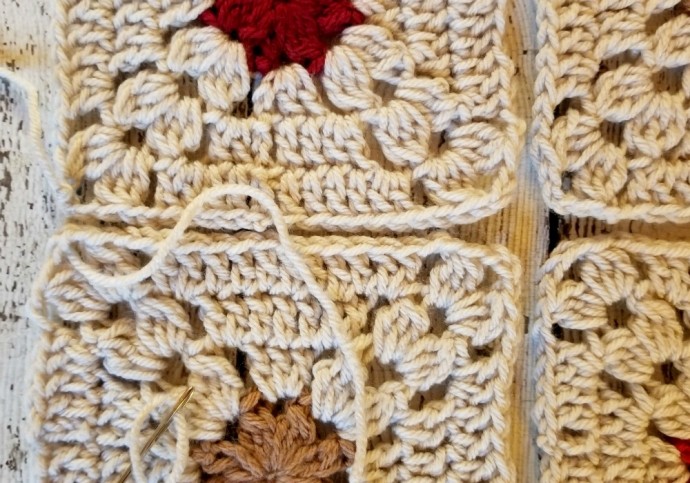
Use the main color (Linen) to whip stitch the squares together. I did every row horizontally and then did every row vertically.
Join a long piece of yarn (about 48”) to the outside corners of two squares. Join in the middle ch of the ch 3 corner space.
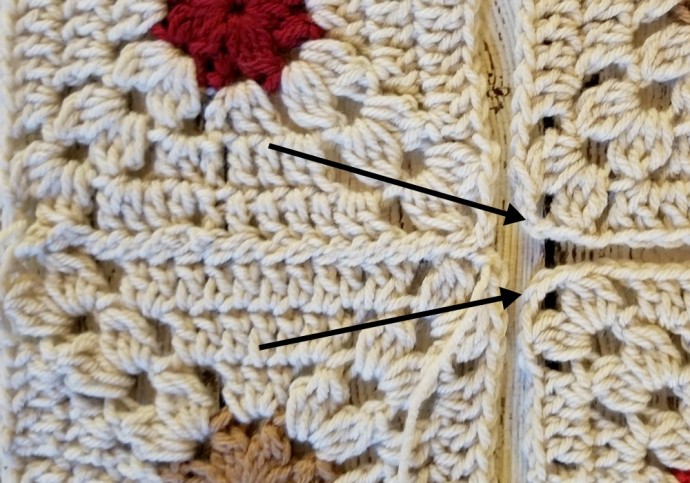
Whip stitch the two squares together. When you reach the end of the squares, don’t cut yarn, continue by joining the next two squares in the center of the corner ch 3.
Continue for the entire row. Do all the rows horizontally and then vertically.
Weave in all the ends.
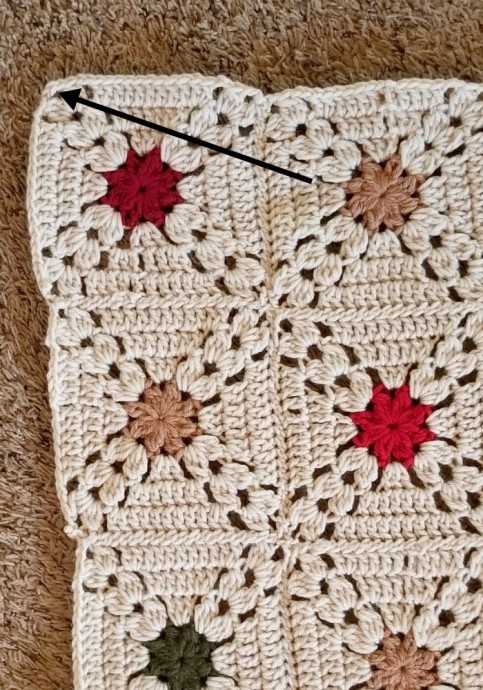
Border
Join main color to any corner ch 3 space.
Row 1:
ch 1, *3 sc in corner space, sc in each stitch to next corner* repeat from * to * around, join to first sc with sl stRow 2:
ch 1, sc in same stitch, *skip 2 stitches, 5 dc in next, skip 2 stitches, sc in next* repeat from * to * around, join to first sc with sl st (the repeat may not work out perfectly, that’s ok, make adjustments as needed)Fasten off, weave in the ends.
This is really neat. With the way the design is it doesn't look like granny squares. When I first looked at it I thought they were diamonds. Bookmarked to make.
I'm glad, that you like it