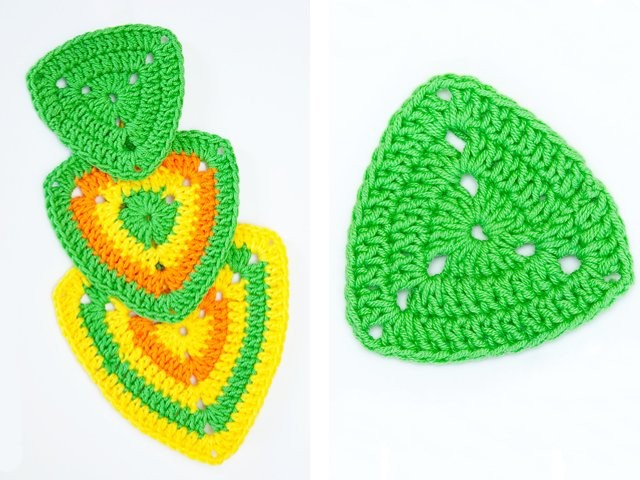
Step-by-Step Amigurumi Triangle Crochet Instructions


Row Instructions
1st Row: Make an amigurumi ring, followed by 3 chain stitches to increase. Then, work 4 double crochets in the ring, followed by 2 chain stitches, 5 double crochets, and another 2 chain stitches. Next, add 5 double crochets followed by 2 chain stitches, tighten the loop, and connect the row with a slip stitch.
Insert the crochet hook into the upper stitch of the increase.2nd Row: Start with 3 chain stitches to increase, followed by 1 double crochet in every crochet of the previous row (totaling 4 double crochets). Then, work 2 double crochets in the arch of the chain stitches, followed by 2 double crochets, 2 chain stitches, and another 2 double crochets. Finish by adding a double crochet in each double crochet of the previous row (totaling 5 double crochets).
Continue with 2 double crochets in the arch, then 2 chain stitches, 2 double crochets, 5 double crochets, 2 double crochets in the arch, 2 chain stitches, 2 double crochets, and finally slip stitch in the upper chain stitch increase.
3rd Row: Begin with 3 chain stitches to increase. Next, work 1 double crochet in the next 6 stitches, followed by 2 double crochets in the arch, 2 chain stitches, and 2 double crochets. Repeat the following: *1 double crochet in every double crochet of the previous row (totaling 9 double crochets), 2 double crochets in the arch, 2 chain stitches, and 2 double crochets*. Repeat from * to * once, and finish by working 1 double crochet in the double crochet of the previous row (totaling 2 double crochets), and slip stitch in the upper chain stitch increase.
Repeat the 1st to 3rd rows, increasing 4 double crochets for each side of the triangle.
