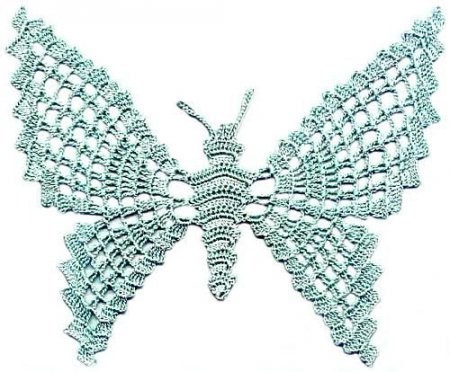
How to Crochet a Beautiful Butterfly

Starting Your Crochet Butterfly
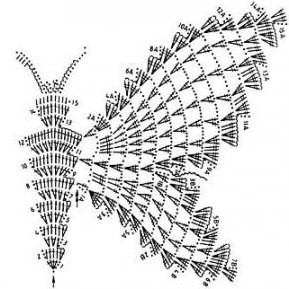
Start your work from the central part of your butterfly. This place is marked with an arrow on the scheme.
Creating the Base
Make 1 chain stitch + 3 initial chain stitches and crochet to the 15th row of the scheme. It's necessary to replace the 1st stitch of each row with the quantity of chain stitches increase, which is stated on the scheme.
Making the Antennae
Make antennae in the 15th row with the help of chain and other stitches. Then, turn to making wings.
Forming the Wings
For this, fasten the yarn in the places which are marked with a double arrow on the scheme. After that, make rows from 1A to 5A according to the scheme.
Completing the Upper Part of the Wing
Finish the 6A row before the wavy line. Turn your work and make the rows for the upper part of the wing (7A-17A).
Working on the Lower Part of the Wing
Turn to the lower part of the wing. Fasten the yarn at the end of the 6A row and make rows 1B-7B.
Creating the Second Pair of Wings
Make the second pair of wings in the same way.
Final Steps
Cut and fasten the yarn.