How to Crochet a Beautiful Daisy Flower

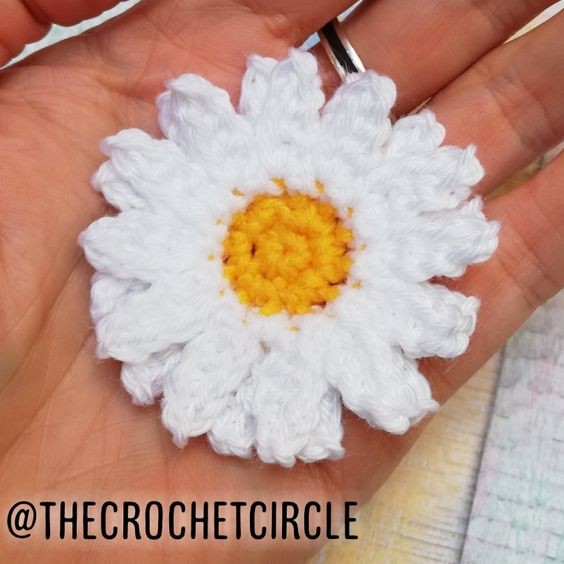
Unleash your creativity and embark on a delightful journey into the world of crochet with the mesmerizing crochet daisy flower. This enchanting craft allows you to transform a simple ball of yarn into a stunning floral masterpiece that will captivate all who lay eyes upon it. With just a crochet hook and a few basic stitches, you can create a vibrant and lifelike daisy that will add a touch of elegance to any project.
This exquisite craft allows you to transform a simple strand of yarn into a breathtaking floral masterpiece that will leave everyone in awe. With just a crochet hook and a few basic stitches, you can create a stunning daisy that radiates elegance and charm.The Stitches Used in This Pattern
- magic ring
- sl st – slip stitch
- ch – chain stitch
- sc – single crochet stitch
- hdc – half double crochet stitch
- dc – double crochet stitch
Materials Needed
- crochet hook (3mm)
- yarn (appropriate size for the crochet hook and color, I am using white and yellow)
- scissors
- needle
Pattern for the Center Piece – Yellow
magic ring
- R1: 6sc – 6st
- R2: 6inc – 12st
You can make another round to make the center a bit bigger with a (sc, inc) x6, so you get 18 stitches at the end.
Cut yarn, join invisibly.
Pattern for the Flower Petals
- R1: back loops only
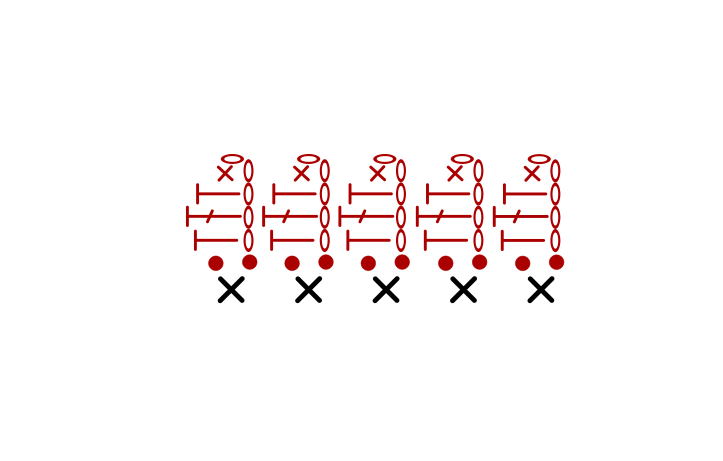
(sl st, ch5, in the 2nd stitch from the hook, sc, hdc, dc, hdc, sl st in the same back loop) repeat 12 times
- R2: front loops only
(sl st, ch5, in the 2nd stitch from the hook, sc, hdc, dc, hdc, sl st in the same front loop) repeat 12 times
The diagram for the petals:


Pattern for the Crochet Leaf
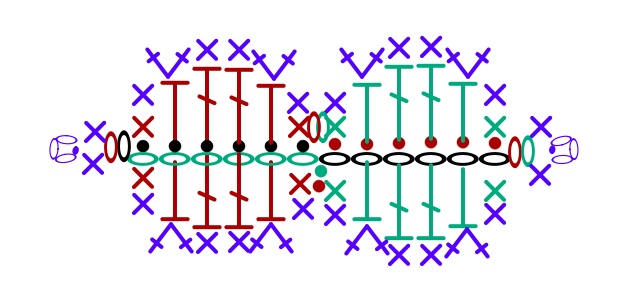
I colored the rows in the diagram and connected the colors with the rows.
Leaf 1
- R1: ch6 - black
- R2: ch1, 6 sl st in the 6 chains - red
- you work this round around the slip stitches and the chains: ch1, sc, hdc, dc, dc, hdc, sc, ch1, sc, hdc, dc, dc, hdc, sc - green
- join with the sl st and continue, DO NOT CUT THE YARN - green
Leaf 2
- R1: ch6 - green
- R2: ch1, 6 sl st in the 6 chains - black
- you work this round around the slip stitches and the chains: ch1, sc, hdc, dc, dc, hdc, sc, ch1, sc, hdc, dc, dc, hdc, sc - red
- join with the sl st - red
To make the border around the leaf, you make in each stitch the next stitches (a stitch in a stitch from the previous row)
- sc, inc, sc, sc, inc, sc (one side of the leaf) - blue
- sc, picot, sc (in the ch1 space) - blue
- sc, inc, sc, sc, inc, sc (second side of the leaf) - blue
And repeat the same on the other leaf. Join in the end with a slip stitch, where you pinch together where the two leaves join and do the chains for the length of the bookmarker.

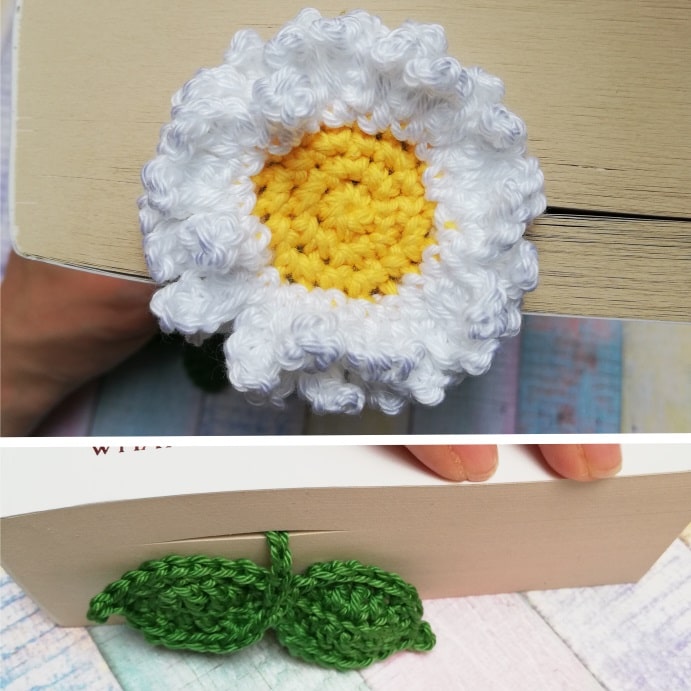
The Backside of the Flower
- 6sc
- 6inc
- (sc, inc) x6
- (sc, ch2) x18
Join with a slip stitch and sew the flower with the bottom part of the bookmark together.
Happy Crafting!
