Crochet Handmade Leaf

Oh, The Charm of a Crochet Handmade Leaf
Oh, the charm and beauty of a crochet handmade leaf! It's like a little piece of nature crafted with love and skill. The intricate details and delicate stitches bring such a cozy and whimsical touch to any project or space. Whether you're adding it to a blanket, scarf, or even a decorative wall hanging, a crochet handmade leaf is sure to bring a touch of warmth and handmade charm wherever it goes. It's the perfect way to add a hint of nature and creativity to your day in the most adorable way possible!
Materials and Preparation
To create beautiful crochet leaves, you will need:
- Yarn: Medium-weight yarn (recommend green for realism, but any color works).
- Hook: Crochet hook size 4.0 mm (G/6) or as recommended for your chosen yarn.
- Additional Tools: Scissors, tapestry needle for weaving in ends.
- Optional: Stitch markers for keeping track of rows.
Abbreviations and Notes
Here are the abbreviations used in this pattern:
- CH – Chain
- SC – Single Crochet
- DC – Double Crochet
- HDC – Half Double Crochet
- SL ST – Slip Stitch
Pattern Notes:
- Beginners are encouraged to practice these basic stitches beforehand.
- Keep your tension consistent to ensure a smooth and even leaf design.
- The leaves can be modified in size by increasing or decreasing the number of stitches according to your preference.
Gauge, Approximate Size, and Pattern Notes
Gauge: Gauge is not critical for this project as leaves can vary in size. However, if you want a specific size, do a gauge swatch of 10 SC x 10 rows to match your yarn and hook.
Finished Size: Approximate size is 3–5 inches long, depending on stitch count and yarn choice.
Techniques: No special techniques are used beyond basic crochet stitches.
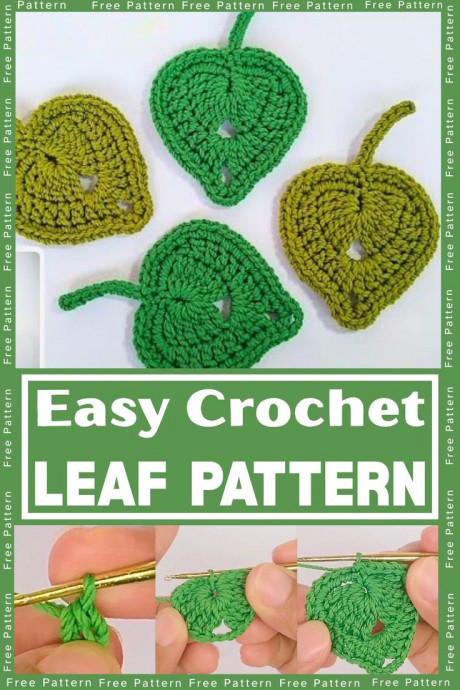
Step-by-Step Pattern
Foundation: Start with Base Chain
Begin by making a foundation chain of 10 CH. This will form the spine of your leaf.
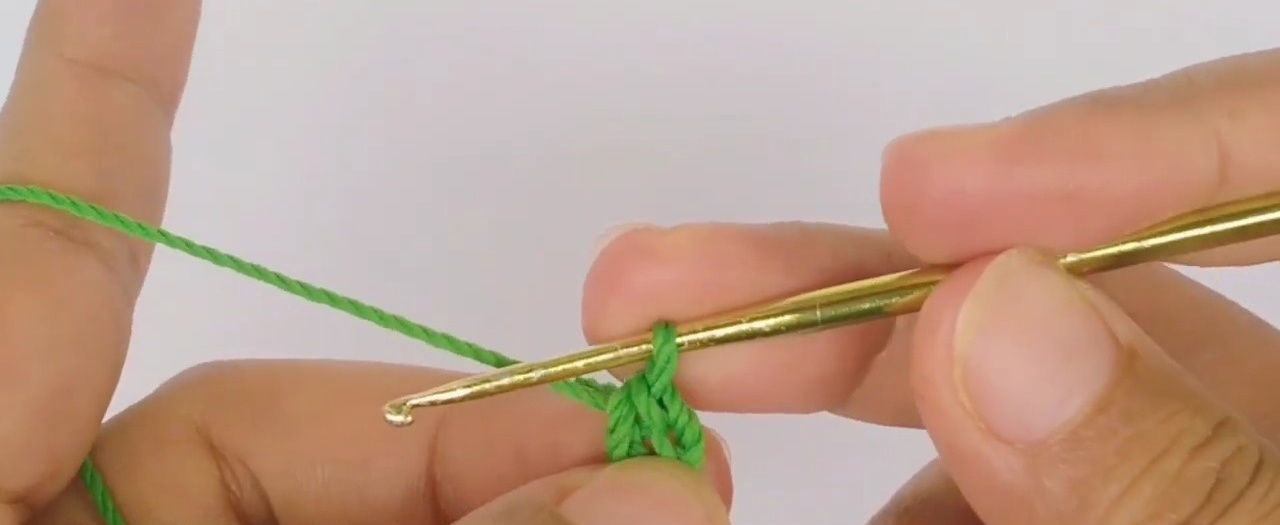
Row 1: Working Up One Side
- SC into the second CH from the hook.
- HDC into the next CH.
- DC into the next 4 CH stitches.
- HDC in the next CH.
- SC in the last CH.
Row 2: Turning and Working Down the Other Side
- Turn your work upside down to work along the opposite side of the chain.
- SC into the first CH.
- HDC into the next CH.
- DC into the next 4 stitches.
- HDC in the next CH.
- SC in the final CH.
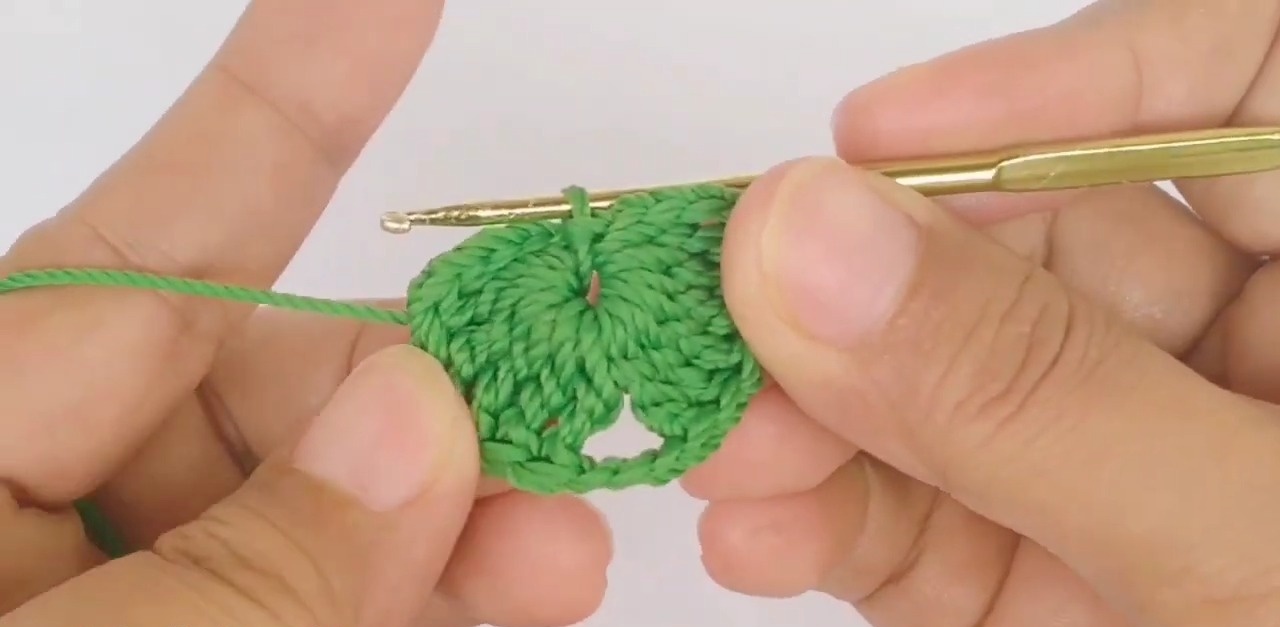
Row 3: Tip of the Leaf
In the last CH (leaf tip), work 3 DC to create a rounded edge for the leaf tip.
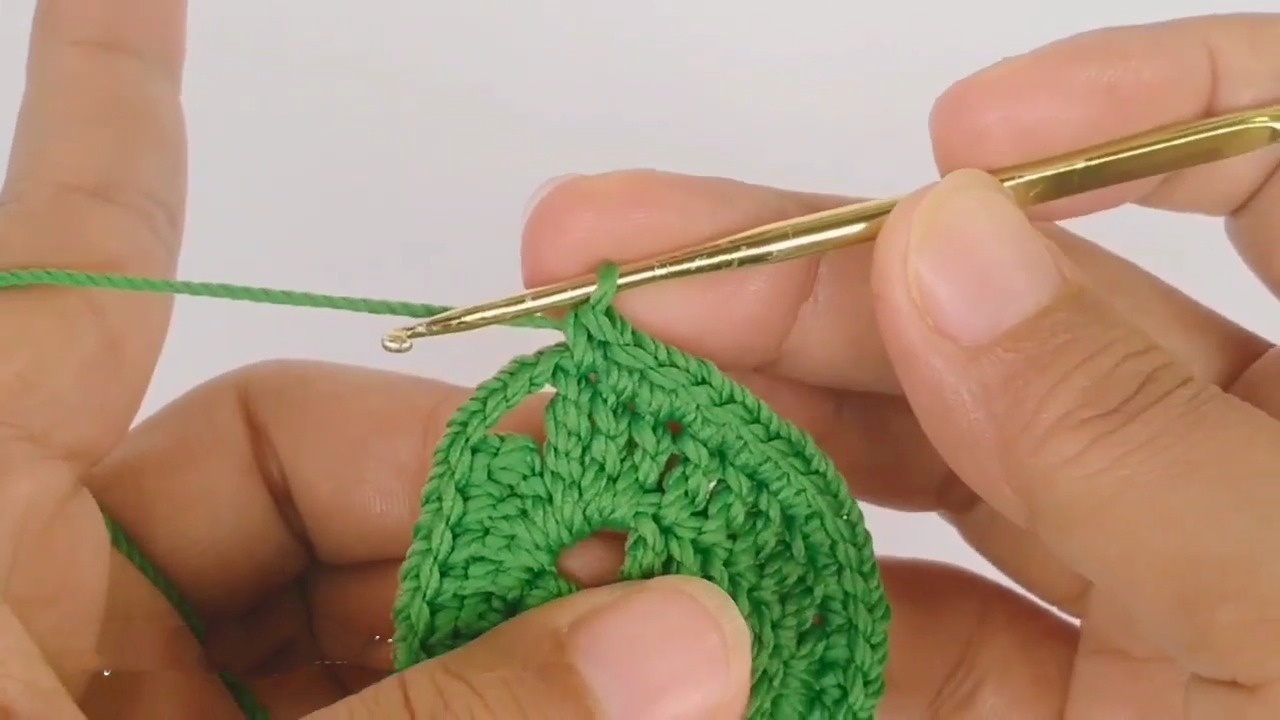
Row 4: Add Texture to Edges
- Go back and work SL ST along the outer edges of the leaf to give it a defined border.
Finishing Touches
Tie off the yarn and leave a long tail for sewing or attaching the leaf.
Weave in all loose ends using a tapestry needle.
- Funny Pictures
-
 Hilarious Memes for Those Bored to Tears
-
 Weekly Treat of Funniest Parenting Memes for Good Laugh out Loud Right Now
-
 Really Funny Pics to End These Weekend Perfectly
- Recipes
-
 Crispy Baked Avocado Fries
-
 Scrambled Chickpea and Spinach Pitas
-
 Cinnamon Pancakes
- Lifehacks
-
 Crochet Basics: Aligned Cobble Stitch
-
 Brick Stitch Crochet Tutorial
-
 Crochet Basics: Wattle Stitch
- Crochet Ideas
-
 Crochet Snorlax Plushie Doll
-
 Crochet Beautiful Penguin Toy
-
 Crochet Tiny Snowman
- DIY
-
 DIY Santa Craft For Kids
-
 Paper Plate Angel Craft
-
 Upcycled Mason Jar Chicken Vase
- Knitting Ideas
-
 Knitted Bridger Cowl
-
 Knitted Keepsake Bag
-
 Knitted Cutie Cupcake Dolls