Crochet Blossom Ridge Scarf

Penelope
Jun 23, 2025 09:22 AM
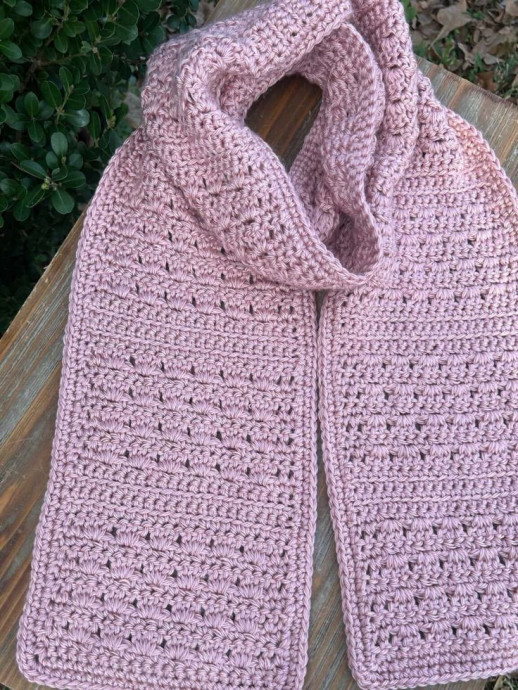
The Crochet Blossom Ridge Scarf is an absolute delight to make and wear! With its lovely floral design and cozy texture, this scarf is sure to brighten up any outfit and keep you warm on chilly days. Whether you're a crochet beginner or a seasoned pro, this project is a fun and rewarding way to add a touch of handmade charm to your wardrobe. So grab your yarn and hook, settle in with your favorite show or podcast, and let the relaxing rhythm of crocheting create something beautiful for you to enjoy or gift to a loved one. Happy crocheting!
Pattern Details
Skill Level
Easy
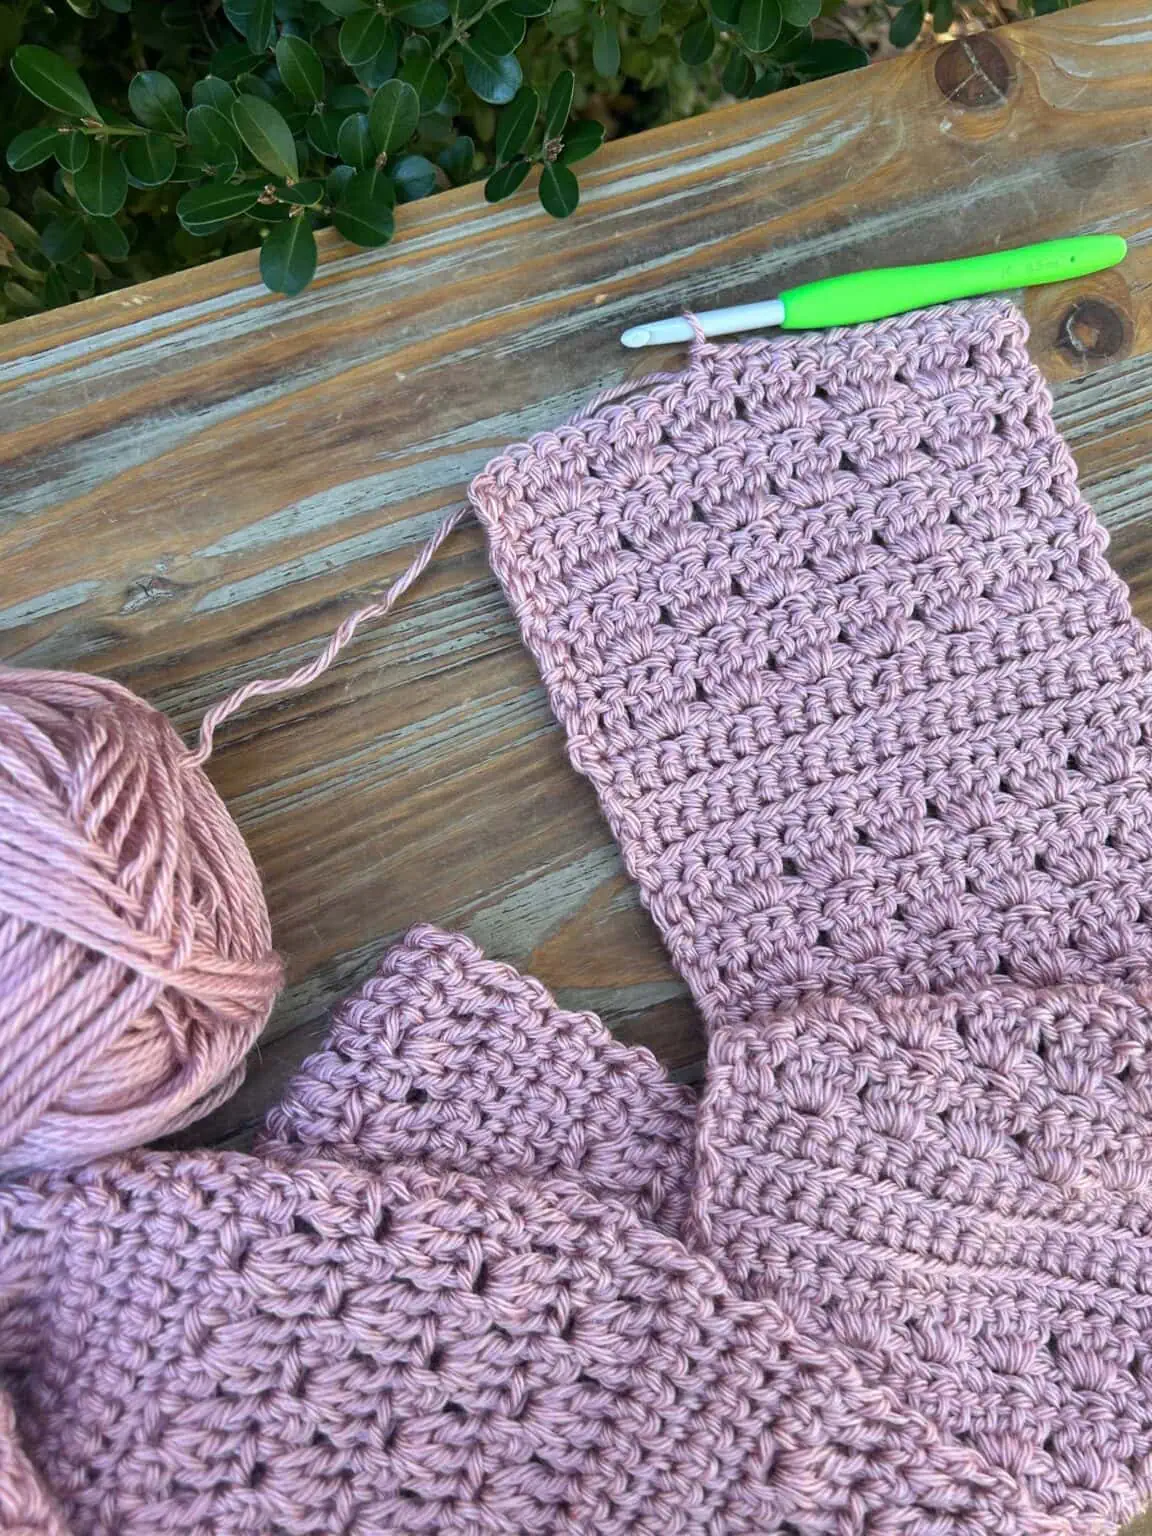
Materials
415 yds size 4 medium worsted weight yarn. I used 2 skeins Lion Brand Heartland <5 oz/142 gm><251 yds/230 m> in the Capitol Reef colorway.
US size K/10.5 crochet hook (6.50 mm)
Scissors
Yarn needle
Gauge
13 stitches x 10 rows = 4″ square
Pattern used for gauge: alternating rows of sc and dc
Finished Size
Approximately 7″ w x 62″ l
Stitch Abbreviations
US Crochet Terminology
ch – chain
dc – double crochet
FLO – front loop only
sc – single crochet
sk – skip
sl st – slip stitch
sp – space
st(s) – stitch(es)
stsc – stacked single crochet
yo – yarn over
Special Stitches
Shell
Shell – 3 dc in same sp
Single Crochet Front Loop Only (sc FLO)
Sc FLO- work 1 sc in the front loop of the indicated st
Stacked Single Crochet (stsc)
stsc – sc into indicated st, insert hook under the vertical bar on the left side of the sc, yo and pull up a loop, yo and draw through both loops on hook.
Pattern Notes
The ch 1 at the beginning of a row does not count as a stitch.
The stsc at the beginning of a row counts as 1 dc.
A ch 2 can be substituted for the stsc if desired. If this substitution is used, the last stitch of the row following the use of the ch 2 will be placed in the top of the turning ch.
How to Make This Easy Shell Stitch Scarf
Part 1: Scarf Body
Ch 23
Row 1: sc in 2nd ch from hook and in each ch across, turn <22 sc>
Row 2: ch 1, sc in 1st st and in each of the next 2 sts, [ch 1, sk next st, sc in each of next 2 sts] 5 times, ch 1, sk next st, sc in each of next 3 sts, turn <16 sc, 6 ch-1 sp>
Row 3: stsc in 1st st, dc in next st, sk next st, [Shell in ch-1 sp, sk next 2 sts] 5 times, shell in ch-1 sp, sk next st, dc in each of next 2 sts, turn <4 dc, 6 Shells>
Rows 4 – 9: repeat Rows 2 – 3 3 times
Row 10: ch 1, sc in 1st st and in each st across, turn <22 sc>
Row 11: ch 1, scFLO in 1st st and in each st across, turn <22 scFLO>
Row 12: ch 1, sc in 1st st and in each st across, turn <22 sc>
Row 13: ch 1, scFLO in 1st st and in each st across, turn <22 scFLO>
Row 14: ch 1, sc in 1st st and in each of the next 2 sts, [ch 1, sk next st, sc in each of next 2 sts] 5 times, ch 1, sk next st, sc in each of next 3 sts, turn <16 sc, 6 ch-1 sp>
Row 15: stsc in 1st st, dc in next st, sk next st, [Shell in ch-1 sp, sk next 2 sts] 5 times, shell in ch-1 sp, sk next st, dc in each of next 2 sts, turn <4 dc, 6 Shells>
Rows 16 – 21: repeat Rows 14 – 15 3 times
Rows 22 – 153: repeat Rows 10 – 21 11 times
Row 154: ch 1, sc in 1st st and in each st across <22 sc>
At the end of Row 154, do not fasten off. Proceed to border.
Part 2: Border
Notes:
The border is worked in Rounds. The side you’re working in is clearly identified in the instructions for Rnd 1 as you lay the foundation for the border.
The ch-2 at the end of each side of Rnd 1 will be referred to as the corner sp in Rnd 2
Rotate 90 degrees.
Rnd 1:
Left side: ch 1, work 206 sc evenly along the left side of the scarf by placing 1 sc in the end of each sc row and 2 sc in end of each dc row, ch 2, rotate 90 degrees. <206 sc>
Bottom: 1 sc in each of next 22 chs, ch 2, rotate 90 degrees. <22 sc>
Right side: work 206 sc evenly along the right side of the scarf by placing 1 sc in the end of each sc row and 2 sc in end of each dc row, ch 2, rotate 90 degrees. <206 sc>
Top: 1 sc in each of next 22 sts, ch 2, sl st in top of sc to join. <22 sc>
Rnd 2: ch 1, sc in same st and in each of next 205 sts, 3 sc in corner sp, sc in next 22 sts, 3 sc in corner sp, sc in next 206 sts, 3 sc in corner sp, sc in next 22 sts, 3 sc in corner sp, sl st in top of sc to join. <468 hdc>
Fasten off and weave in ends.
No comments
Write a comment
- Funny Pictures
-
 Cute Cat Memes That Will Make Your Day Brighter
-
 Spot-on and Funny Memes About Introverts Struggles
-
 Top Wonderful Cat Memes on Their Way to Better Your Day
- Recipes
-
 Creamy Old Fashioned Rice Pudding
-
 Russian Tea Cakes (Snowball Cookies)
-
 Rigatoni with Sausage, Tomatoes, and Zucchini
- Lifehacks
-
 How to Crochet a Harlequin Stitch
-
 Removing The Toughest Stains
-
 Crochet Basics: Crumpled Griddle Stitch
- Crochet Ideas
-
 Crochet Christmas Tree
-
 Crochet Goblet of Fire
-
 Crochet Adorable Ammonite
- DIY
-
 DIY Snowman Wreath
-
 Mini Santa Sleigh Ornament
-
 Crochet Gingerbread House Blanket
- Knitting Ideas
-
 Knitted Easter Bunny
-
 Knitted Mobile Phone/Glasses Case
-
 Knitted Cabled Wallet