Crochet Puff Flower Cardigan

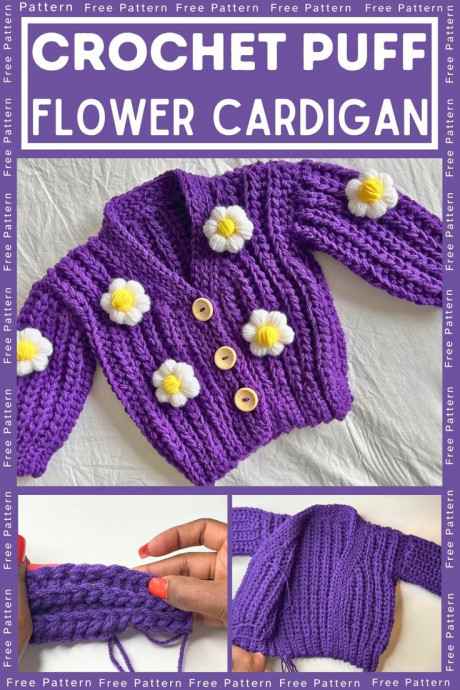
The Crochet Puff Flower Cardigan is a delightful and charming addition to any wardrobe, perfect for adding a touch of whimsy and warmth to your outfit. With its intricate puff flower designs, this cardigan exudes a cozy and stylish vibe that is sure to make you stand out in a crowd. Whether you're dressing up for a special occasion or simply looking to add a pop of color to your everyday look, this cardigan is a versatile piece that is bound to bring a smile to your face whenever you wear it.
Materials Needed
Yarn: Two strands of medium-weight yarn (originally uses Miller Volley yarn recommended for 3.5–4.5 mm hooks).
Hook Size: 6.0 mm crochet hook.
Tools: Scissors, measuring tape, stitch markers, and buttons (e.g., handmade buttons from Amazon).
Optional Embellishments: Six puff daisy flowers.
Abbreviations and Notes
Abbreviations
- SC – Single Crochet
- HDCSS – Half Double Crochet Slip Stitch
- SL ST – Slip Stitch
- CH – Chain
- YO – Yarn Over
Notes
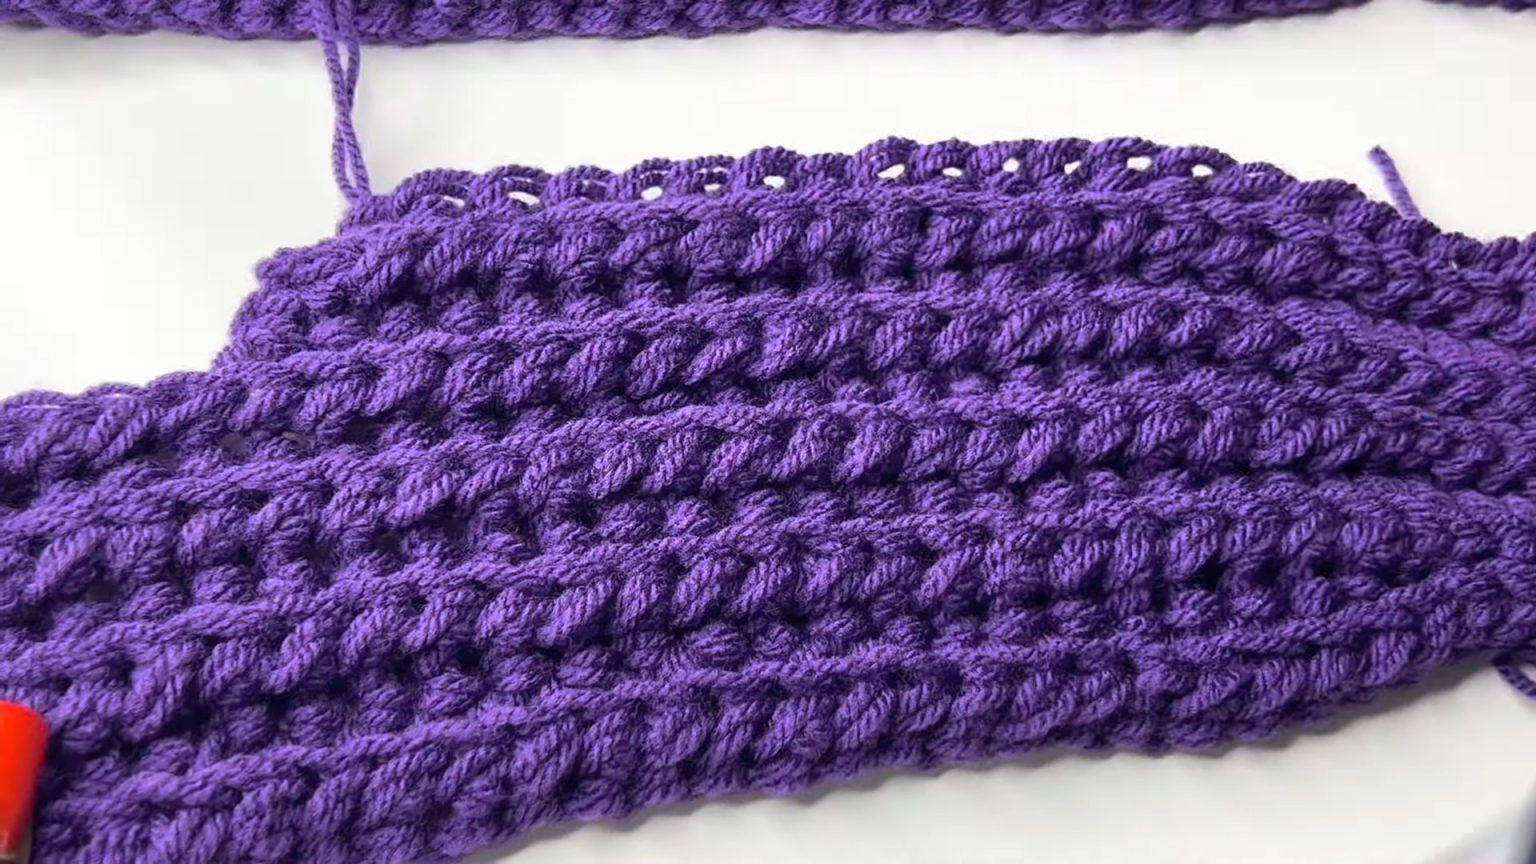
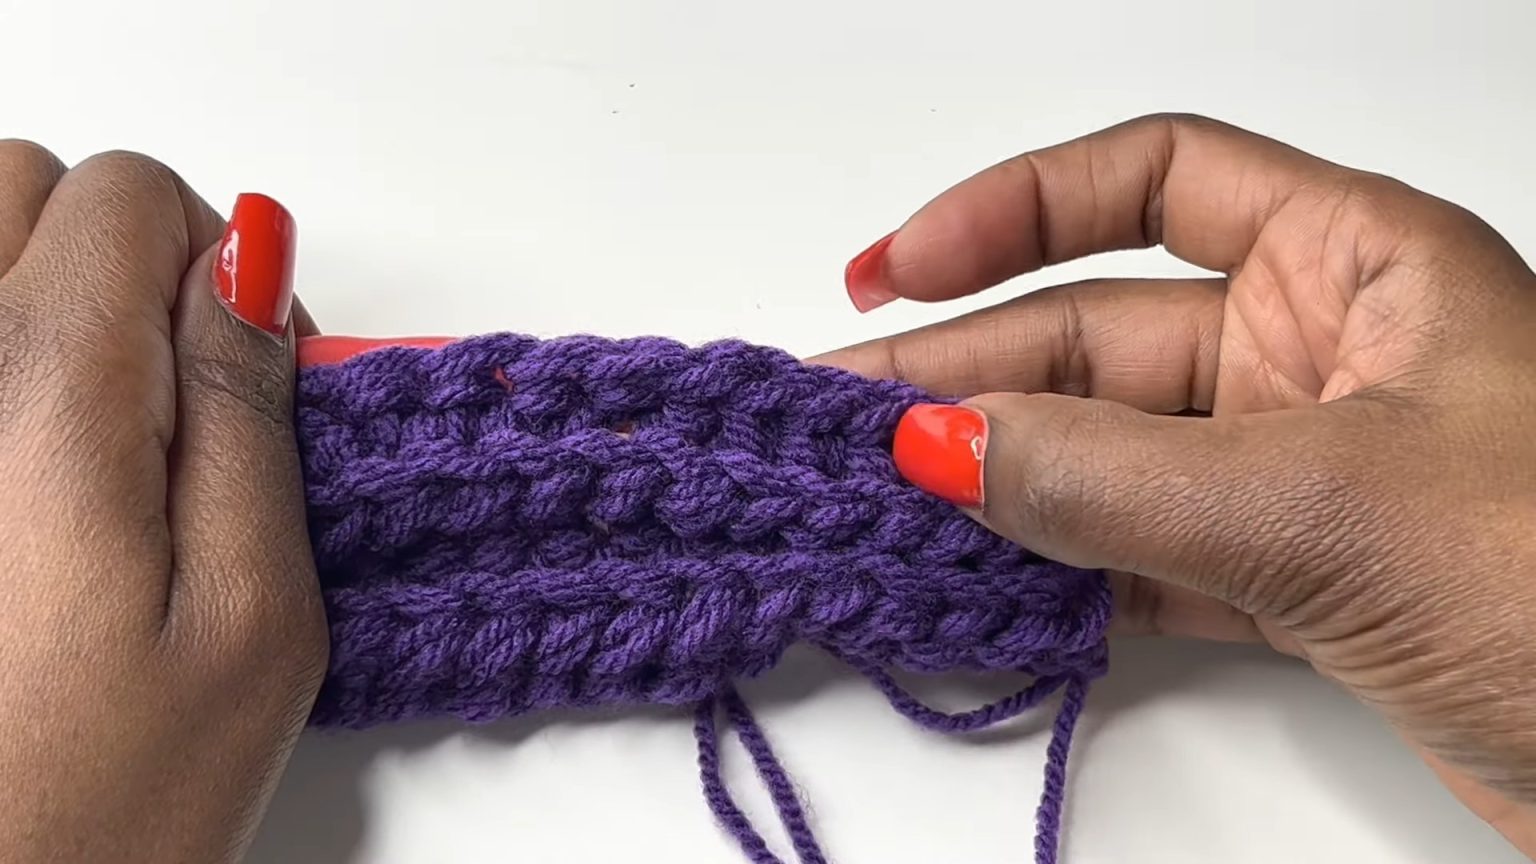
- The cardigan uses the half double crochet slip stitch (HDCSS), creating a knit-like effect.
- Work each row into the back loop only unless specified.
- The ribbing involves alternating slip stitches and single crochet rows.
- The cardigan is assembled by joining the panels and sleeves on the wrong side for clean finishing.
Gauge, Approximate Size, and Pattern Notes
Gauge
Comparable to 11 stitches per 4 inches in HDCSS when using two strands of yarn and a 6.0 mm hook.
Approximate Size
- Back Panel: 11.5 inches long and 11 inches wide.
- Front Panels: Each measures 4.5 inches wide (leaving 2 inches for neckline).
- Sleeves: 8 inches wide and 8.5 inches long.
Special Techniques
- Use slip stitch joining for assembly on the wrong side.
- Puff daisy flowers are crafted separately and attached.
Step-by-Step Pattern
Step 1: Back Panel
Foundation Chain: Make a slip knot and chain until your piece measures approximately 11.5 inches in length.
Row 1:
YO, skip the first stitch, insert hook into the next stitch, YO, pull through (3 loops on the hook). Pull through two remaining loops for HDCSS.
Continue HDCSS until 5 stitches remain. Switch to SL ST (no YO), working these 5 stitches for bottom ribbing.
Row 2:
Chain 1, turn work, and SL ST into the back loop of the first 5 stitches for the ribbing. Continue HDCSS (back loop only) for the remainder of the row.
Row 3:
Chain 1, turn work, and repeat as previous, working ribbing in the last 5 stitches.
Row 4:
Chain 1, turn work, and substitute SC for SL ST in the first 5 stitches (for ribbing width stability). Continue HDCSS for the remainder of the row.
Repeat rows 1–4 until the back panel measures 11 inches wide.
Step 2: Front Panels
Divide the back panel width minus 2 inches (neckline) by 2: 4.5 inches per panel.
Create two identical front panels (each measuring 10 rows and 4.5 inches wide):
Create foundation chains as needed. Maintain the established pattern (HDCSS with ribbing) for 7 rows.
Rows 8–10: Decrease stitches by skipping the first stitch in each row.
Step 3: Sleeves
Using the same stitch pattern (HDCSS), chain approximately 8.5 inches in length for the foundation. Work evenly in HDCSS across the rows for a total width of 8 inches.
Add ribbing with 5 SL ST at the bottom of the sleeve (optional: omit SC rows here). Create two identical sleeves.
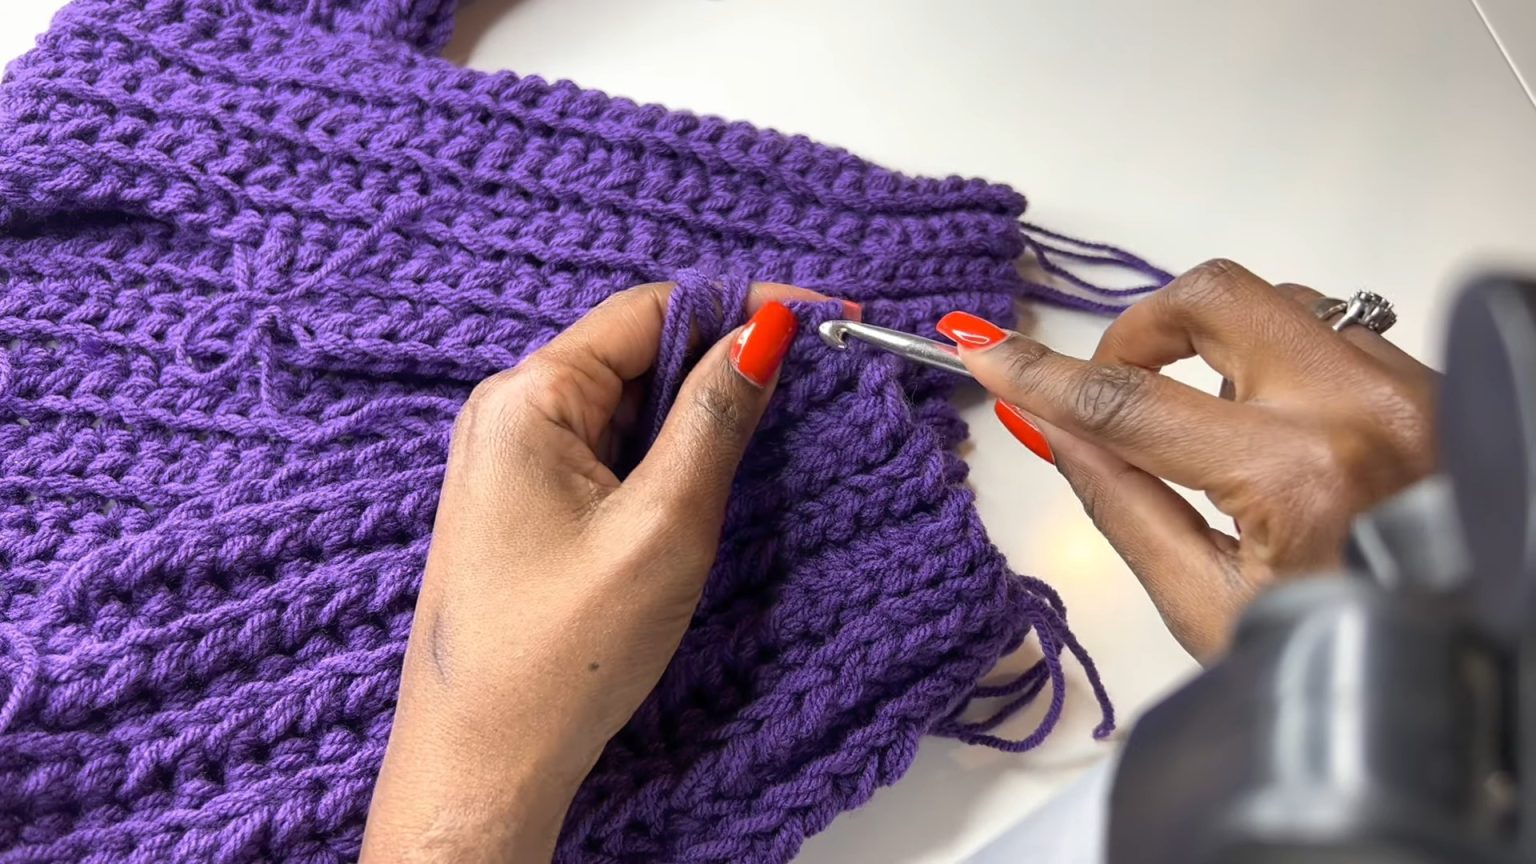
Step 4: Assembly
Lay the pieces on the wrong side.
Joining the Front and Back Panels:
Using a smaller hook or needle, attach yarn and work SC stitches joining the panels at the sides.
Attaching the Sleeves:
Align the sleeve midpoint to shoulder seam using stitch markers. Work SC stitches to join along sleeve opening.
Final Assembly:
Fold sleeves in half and use SL ST on the outer loops to join the underarm seam to the bottom cardigan edge.
Step 5: Neckline Ribbing and Buttonholes
Reattach yarn along neckline and front panel edges. Work SL ST in back loops only to form ribbing.
On the fifth row of ribbing, create buttonholes: SC for first 4 stitches, CH 2, skip 2 stitches, SC in the third stitch, repeat for desired buttonhole placement.
Step 6: Decorating with Puff Daisy Flowers
Craft 6 puff daisy flowers. Attach flowers using the yarn tails—chain through fabric surface and securely knot. Adjust positioning as desired.
Step 7: Final Touches
Sew buttons opposite the buttonholes. Check all seams and finish off loose ends for a neat look.
Turn the cardigan to the right side and admire your handmade creation!
- Funny Pictures
-
 Pics to Get the Excitement Today
-
 Funny Christmas Meme Dump
-
 Funniest Relatable Felines in the Form of Memes
- Recipes
-
 Cappuccino Brownies
-
 Chicken Mushroom Tortellini Bake
-
 Spinach Pie
- Lifehacks
-
 8 Necessary Tips for Baking Bread
-
 Tips & Hacks for Clean Carpets
-
 10 Uses For Old TV Armoires
- Crochet Ideas
-
 Crochet Watermelon Amigurumi
-
 Crochet Shark Applique
-
 Crochet Pineapple Amigurumi
- DIY
-
 Yarn Wrapped Christmas Wreath Ornaments
-
 Egg Carton Snowman Ornament
-
 Stick Peppermint Candy Ornament
- Knitting Ideas
-
 Knitted Star Square Dishcloth
-
 Knitted Free 2025 Year Dishcloth
-
 Knitted Ribbed Adult Hat