Learn How to Do a Back Post Double Crochet

Introduction to Back Post Double Crochet
Making a Back Post Double Crochet is a fun and versatile stitch that adds texture and depth to your crochet projects. By working around the post of the stitch instead of the top, you create a raised ribbed effect that looks intricate but is surprisingly simple to achieve. This stitch is great for creating cozy scarves, blankets, or even intricate sweater designs. Give it a try and have fun experimenting with different patterns and color combinations to add a unique touch to your crochet creations!
Back Post Double Crochet Stitch - Step-by-Step
Step 1 - Yarn Over Hook
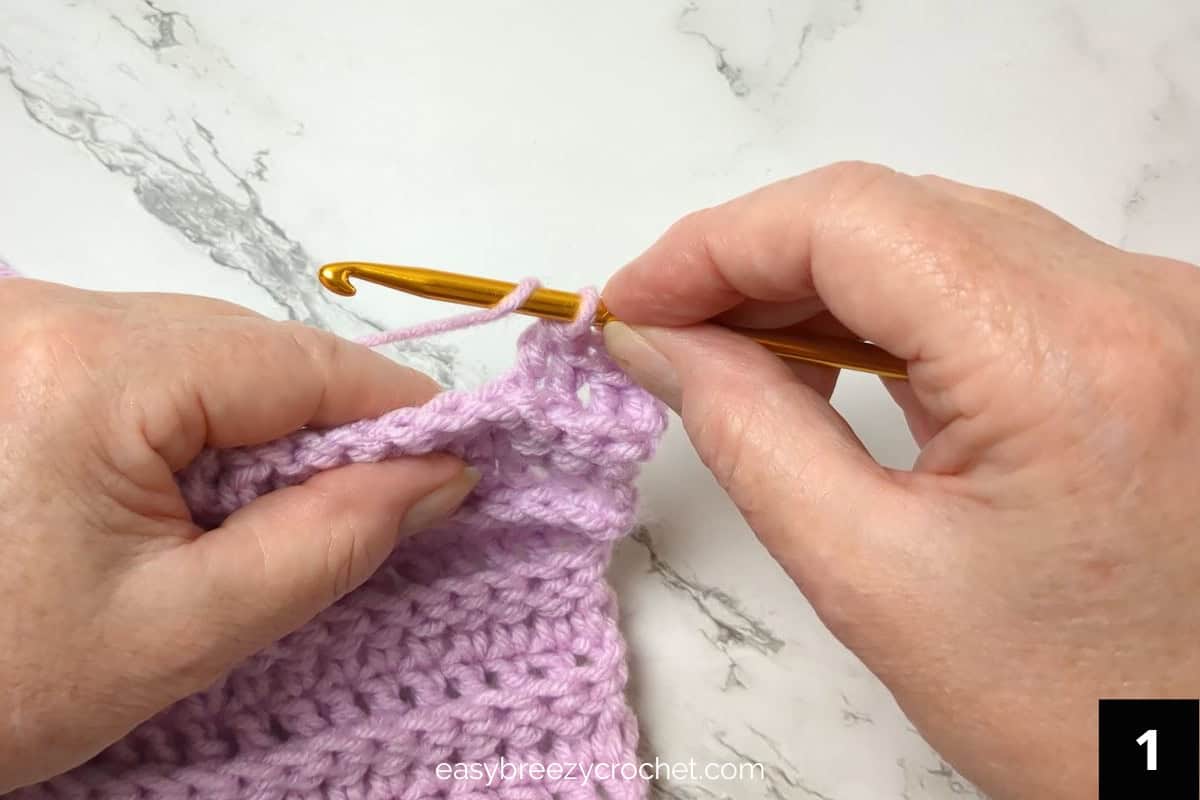
Step 2 - Insert Your Hook
Insert your hook from the back right of the stitch post to the front of the work, then insert the hook around the left side of the post and into the back of the work.
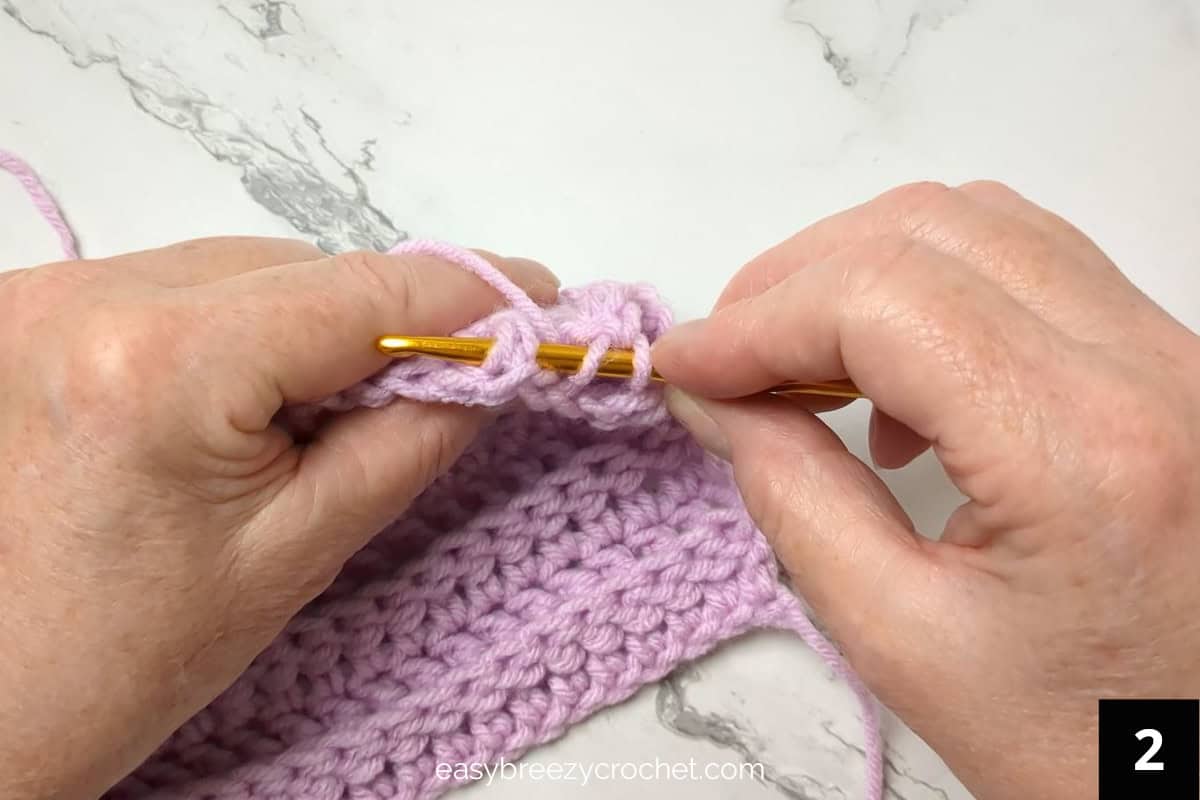
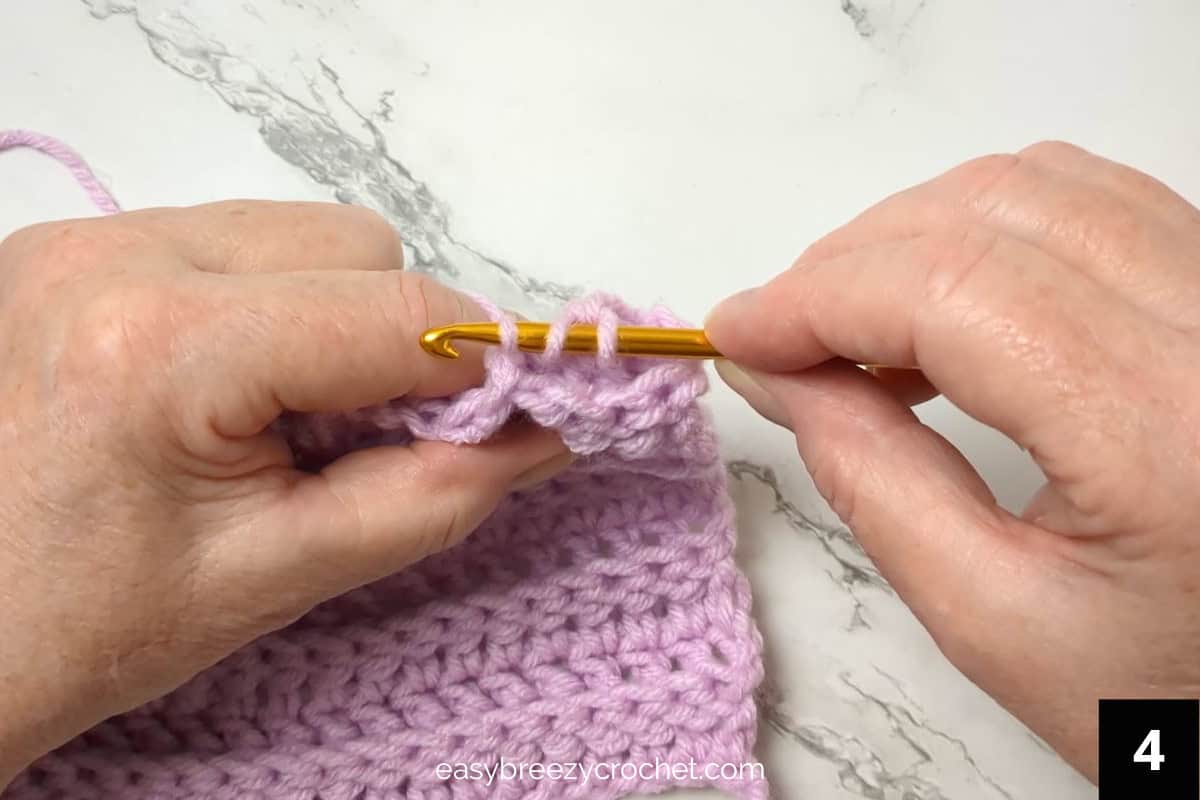
Step 3 - Yarn Over Hook Again
Step 4 - Pull Through a Loop
You will have three loops on the hook.
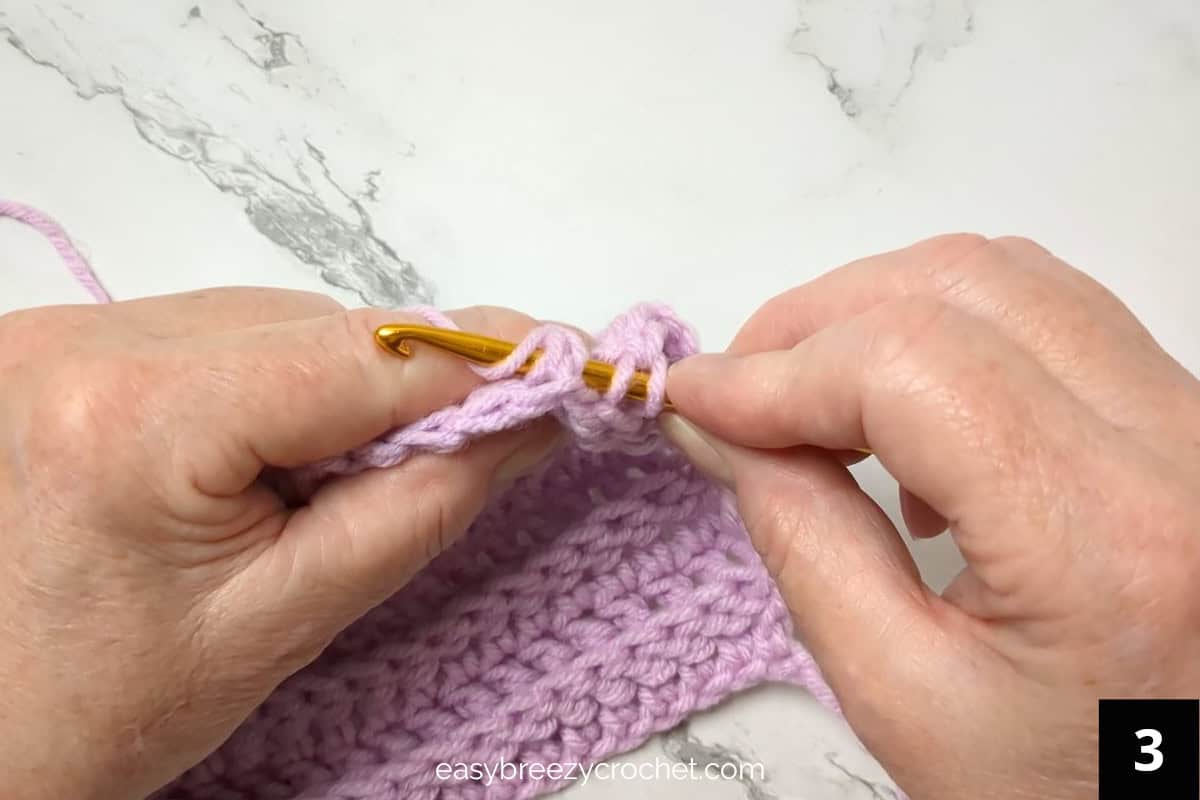
Step 5 - Yarn Over Hook
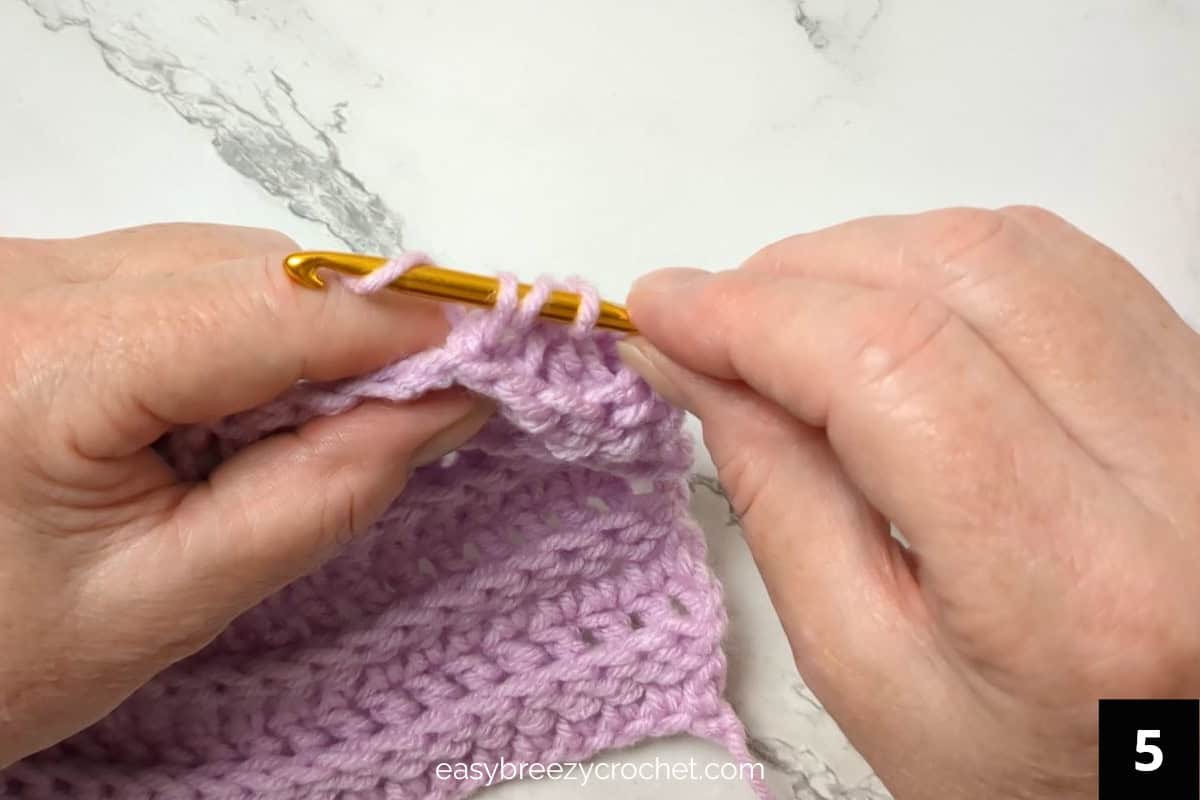
Step 6 - Pull Through Two Loops
Yarn over hook.
Step 7 - Yarn Over Hook Again
Pull yarn through two loops on the hook. You will have one loop on the hook.
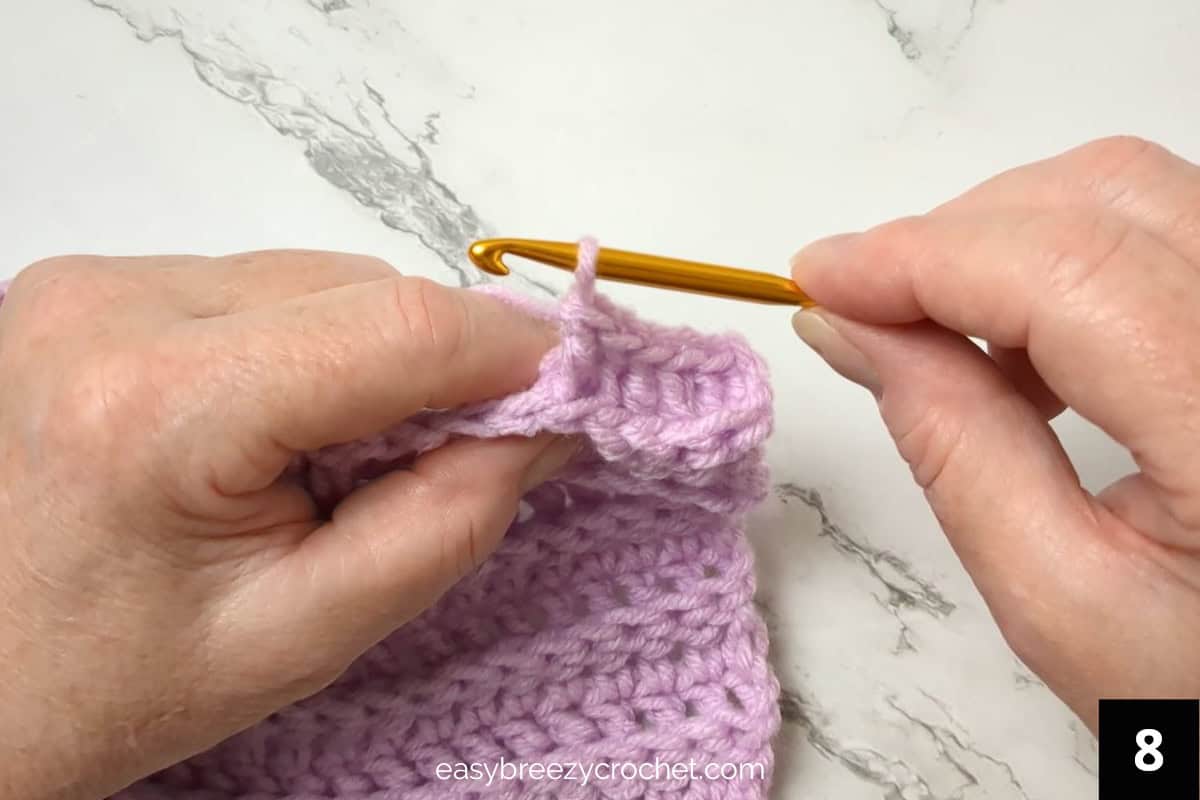
Conclusion
You have completed a back post double crochet stitch! Enjoy incorporating this technique into your crochet projects for added texture and complexity.
- Funny Pictures
-
 These are the Pics That Simply Describe Your Life
-
 Hilariously Accurate Parenting Memes That Show the Other Side of Parenthood
-
 Great Pics That Just Depict Our Lives
- Recipes
-
 Crispy Baked Avocado Fries
-
 Baked Beans and Hot Dogs with Biscuit Topping
-
 Roasted Rosemary Lemon Chicken Breasts
- Lifehacks
-
 Crochet Basics: Twisted Fringe
-
 7 Crochet Tips And Tricks
-
 How To Work Crochet Into Denim
- Crochet Ideas
-
 Crochet Snorlax Plushie Doll
-
 Crochet Cat in 1 Row
-
 Crochet Beautiful Penguin Toy
- DIY
-
 Popsicle Stick and Jingle Bell Christmas Tree Ornament
-
 Upcycled Mason Jar Chicken Vase
-
 Crochet Namaste Stephanie Doll
- Knitting Ideas
-
 Knitted Keepsake Bag
-
 Knitted Textured Heart Dishcloth
-
 Knitted Snowfall Dishcloth