Crochet Lacy Cardigan Guide

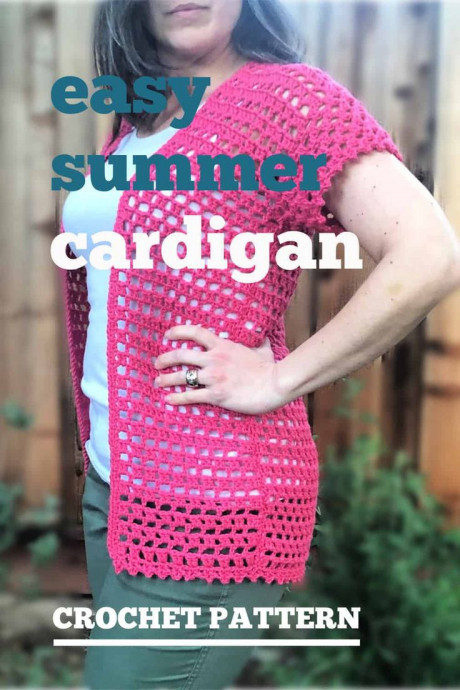
The Crochet Lacy Cardigan
The Crochet Lacy Cardigan is a charming addition to any wardrobe, perfect for adding a touch of elegance to your outfit. Its delicate lace pattern adds a lovely feminine touch, making it ideal for both casual and more dressed-up occasions. The airy feel of the cardigan makes it a versatile piece that you can wear all year round. Whether you're looking to stay cozy on a cool evening or add a stylish layer to your ensemble, this cardigan is sure to become a staple in your collection. So, grab your crochet hook and some yarn, and get ready to create a beautiful and timeless piece that you'll love to wear!
Materials
- #4 medium worsted weight yarn, pictured in Comfy Worsted in Zinnia;
- (S) 34″ / 86.5 cm approximately 763 yds / 698 m
- (M) 37″ / 94 cm approximately 872 yds / 797 m
- (L) 41″ / 104 cm approximately 981 yds / 897 m
- (XL) 46″ / 117 cm approximately 1090 yds / 997 m
- (2X) 50″ / 127 cm approximately 1199 yds / 1096 m
- (3X) 54″ / 137 cm approximately 1308 yds / 1196 m
- (4X) 58″ / 147.5 cm approximately 1417 yds / 1296 m
- (5X) 62″ / 157.5 cm approximately 1526 yds / 1395 m
Tools
- 4 mm/US size G-6 hook, or hook needed to meet gauge.
- Yarn needle
- Measuring tape
- Scissors
Instructions
Back Panel
Make 1
Ch 83 (89, 101, 110, 122, 128, 140, 149)
Continue repeating Rows 2-3 until your panel is to 55 (55, 57, 57, 59, 59, 61, 61) rows long or 24”/61.5 cm (24”/61.5 cm, 25”/63.7 cm, 25”/63.7 cm, 26”/66 cm, 26”/66 cm, 26.8”/68 cm, 26.8”/68 cm) in length.
*If you change the number of rows, I recommend stopping after a Row 3 repeat.
Front Panels
Make 2
Ch 35 (38, 41, 47, 50, 56, 59, 62 sts)
Continue repeating Rows 2-3 until your panel is equal to your back panel in length. Cut yarn, love long tail for seaming.
Block
Block panels separately before seaming together.
Sewing Your Pieces Together
Sew where indicated using a yarn needle and length of yarn. You may use either the whip stitch or mattress stitch.
Lay panels on top of one another inside out, so front panels are on top of the back panel, and RS are touching. Line up outside edges, leaving center open for neck.
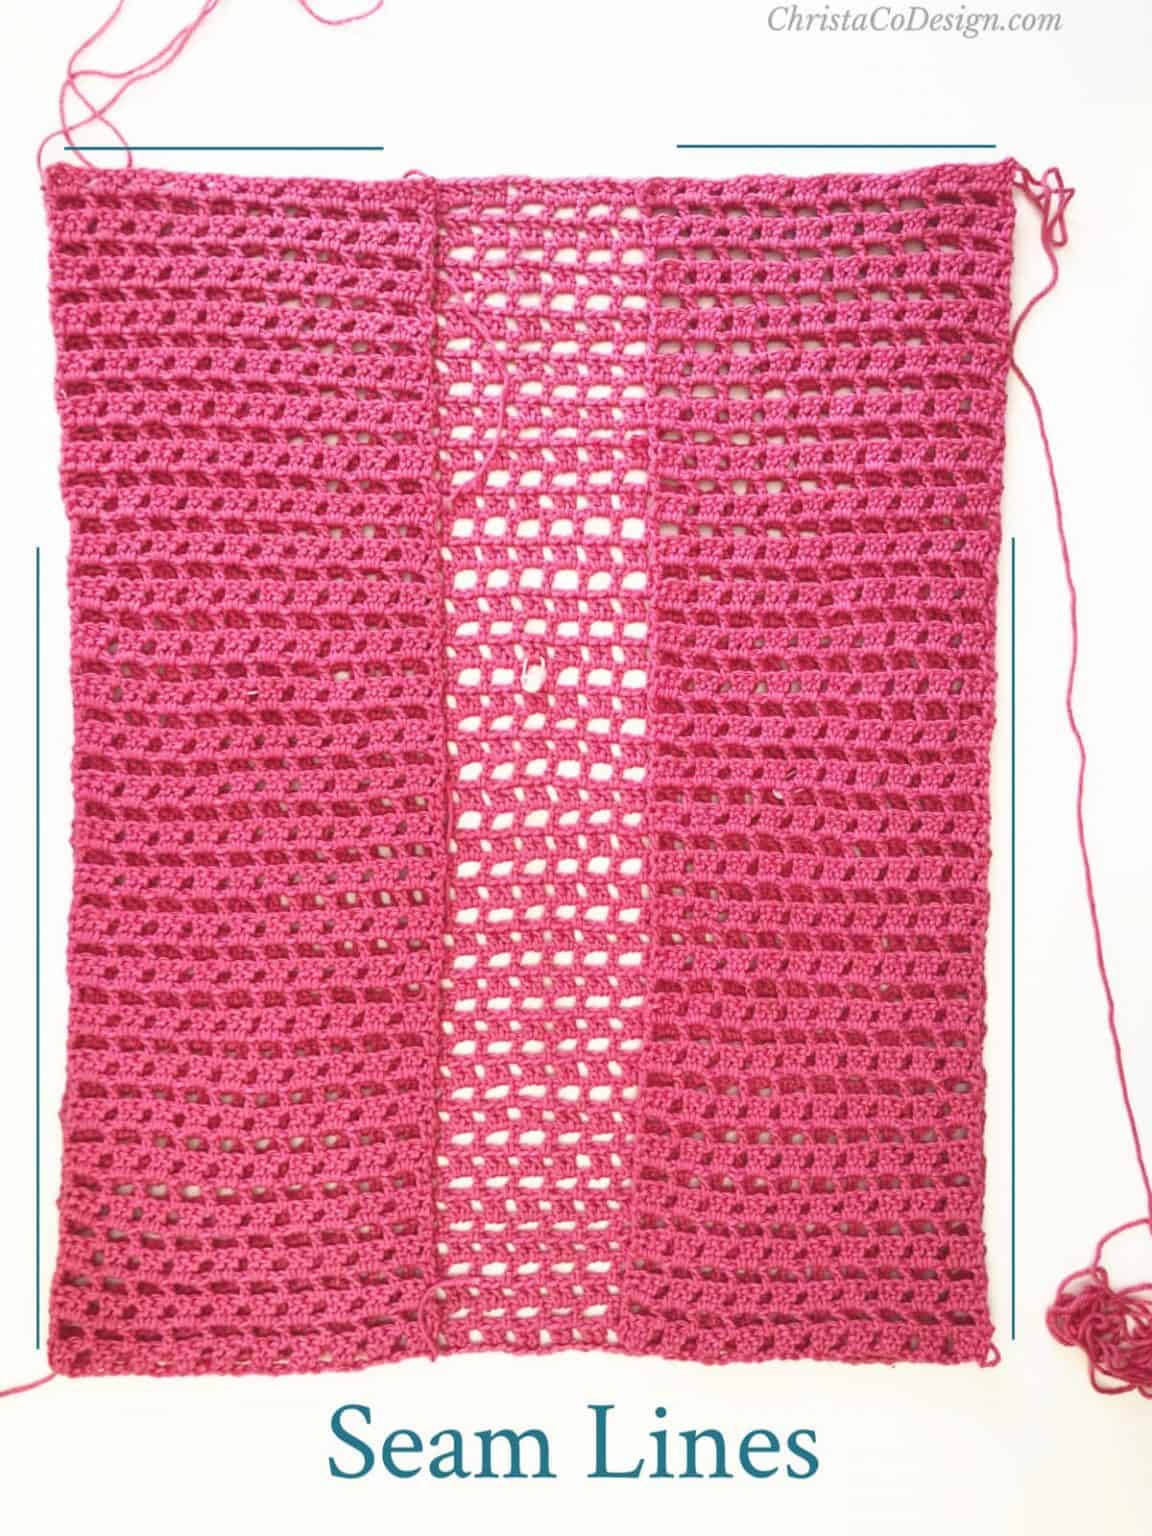
Sew shoulders together.
Sew sides together. Start at the bottom and sew up, leave unseamed the last 18 (18, 20, 22, 22, 24, 26, 26) rows = 7.9”/20 cm (7.9”/20 cm, 8.8”/ 22.4 cm, 9.7”/24.6 cm, 9.7”/24.6 cm, 10.6”/26.8 cm, 11.4”/29 cm, 11.4”/29 cm) at the top of the panels for the armholes.
Sleeves Notes
Sleeves are worked in the round, but turned after each round so you’ll work on both sides of the fabric.
For the first round work into the sides of the panel, skipping the dc blocks and working into the spaces.
Sleeves
On RS, join yarn with a sl st under arm.
Rnd 1. In first ch sp Ch 3, dc in same, ch 2, *{sk the dc sts, place 2 dc in the next ch sp, ch 2} rep from * around, when you get to the shoulder seam add a (2 dc + ch 2) in the center and continue with the repeat, ch 2 join to first st, turn. (76, 76, 84, 92, 92, 100, 108, 108) sts
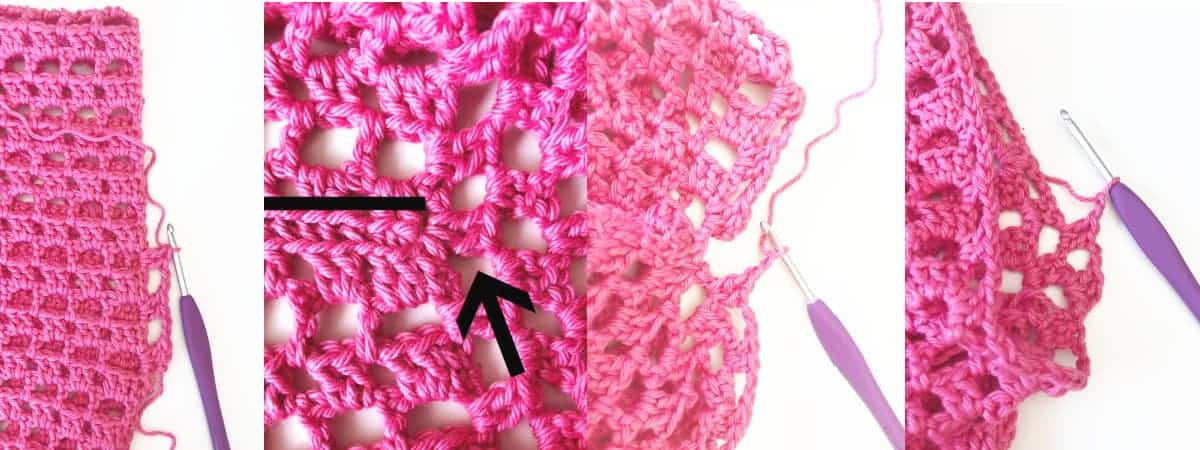
Left to right image shows: Join underarm and first few stitches of round 1. Shoulder seam with 2 dc for sleeve. End round 1 ready to join. Beginning of round 2.
Rep Rnd 1 5 (6, 6, 7, 7, 8, 8, 9) more times, or to desired sleeve length. sleeve measures = 3.5”/9 cm (4/10 cm, 4/10 cm, 4.5”/11.4 cm, 4.5”/11.4 cm, 5”/12.7 cm, 5/12.7 cm, 5.5”/14 cm)
Cut yarn and weave in ends. Rep on other sleeve.
Hem
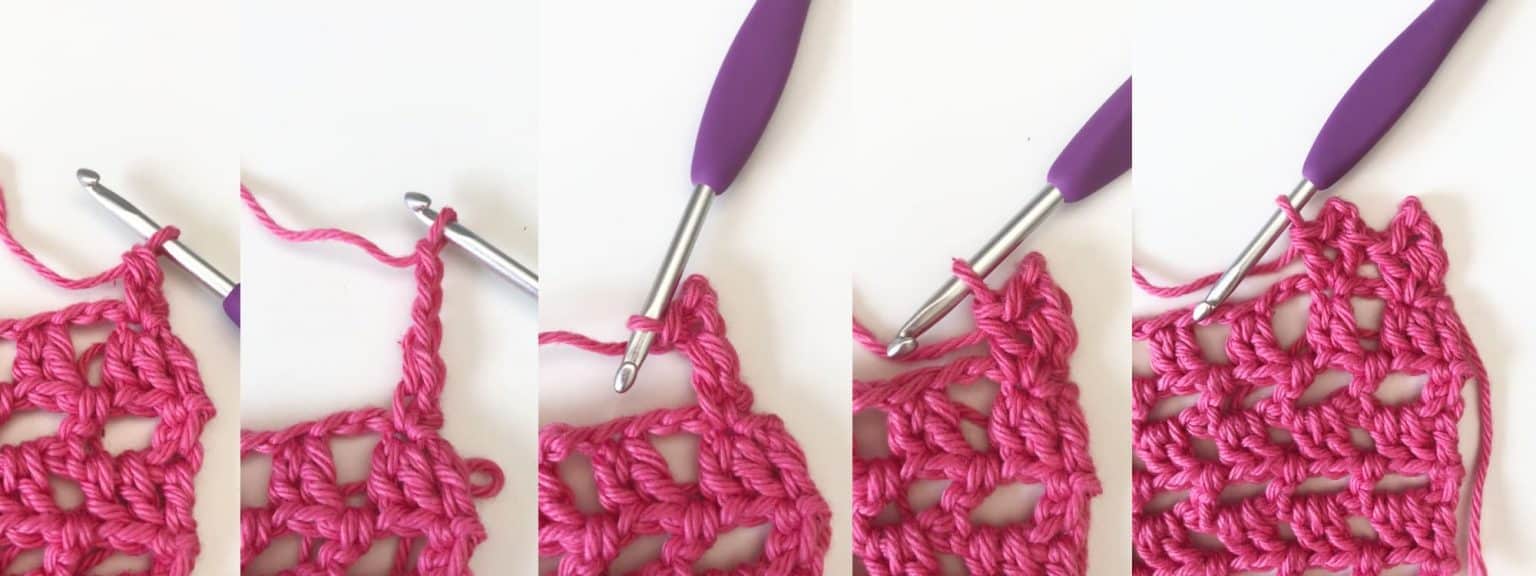
Join on RS of bottom edge with sl st.
Ch 3, picot, dc in same st, *{sk 2 chs, (dc, picot, dc) all in bottom of 2 dcs} rep from * across, when you come to the side seams add a (dc, picot, dc) to the center also. Do not cut yarn, continue from here.
Front Edge/Collar
Continuing from bottom hem,
Row 1. Ch 1, sc evenly (place 2 sc in side of each row to keep edges straight) up the front panel, around the neck and back down the opposite front panel, sl st to first hem st.
Cut yarn and weave in ends.
- Funny Pictures
-
 Hilarious Memes for Those Bored to Tears
-
 Weekly Treat of Funniest Parenting Memes for Good Laugh out Loud Right Now
-
 Really Funny Pics to End These Weekend Perfectly
- Recipes
-
 Crispy Baked Avocado Fries
-
 Scrambled Chickpea and Spinach Pitas
-
 Cinnamon Pancakes
- Lifehacks
-
 Crochet Basics: Aligned Cobble Stitch
-
 Brick Stitch Crochet Tutorial
-
 Crochet Basics: Wattle Stitch
- Crochet Ideas
-
 Crochet Snorlax Plushie Doll
-
 Crochet Beautiful Penguin Toy
-
 Crochet Tiny Snowman
- DIY
-
 DIY Santa Craft For Kids
-
 Paper Plate Angel Craft
-
 Upcycled Mason Jar Chicken Vase
- Knitting Ideas
-
 Knitted Bridger Cowl
-
 Knitted Keepsake Bag
-
 Knitted Cutie Cupcake Dolls