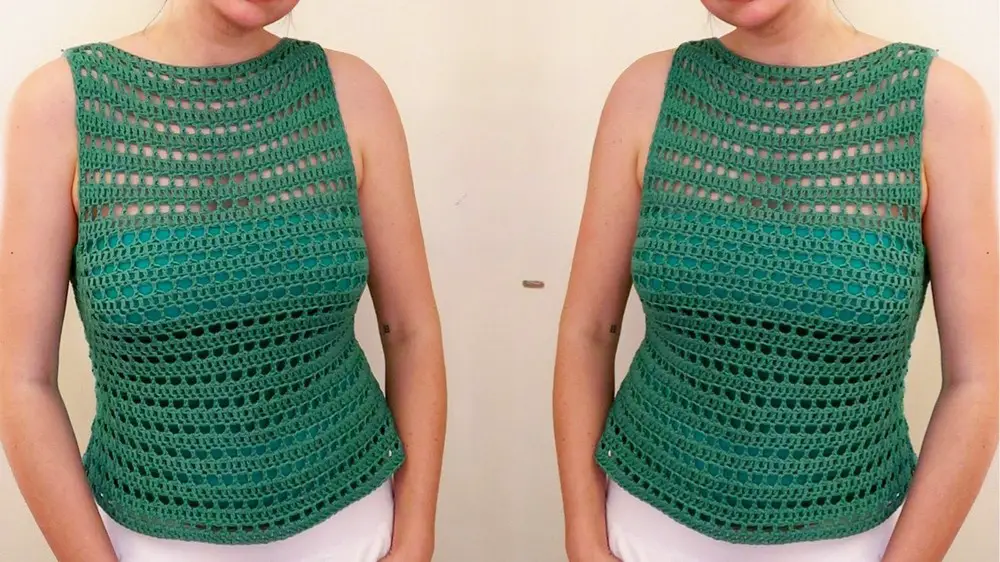
How to Make a Crochet Tank Top for Summer

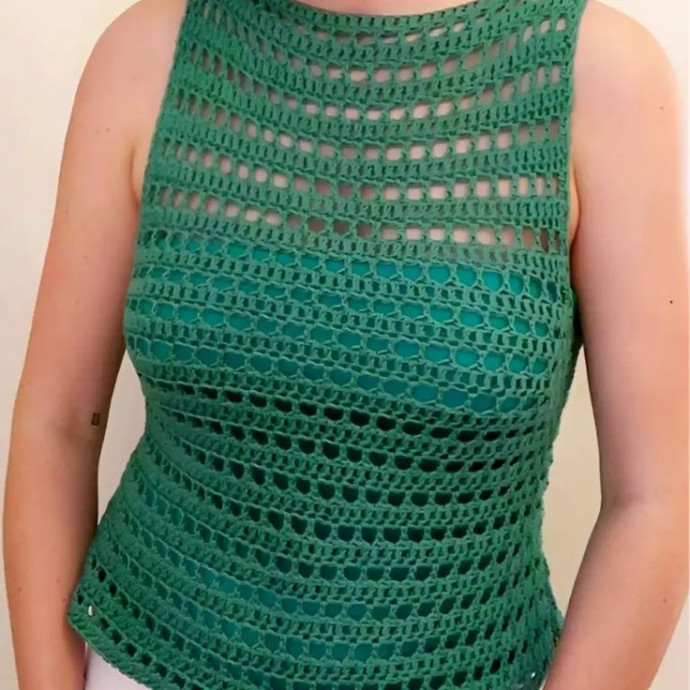
Crochet tank tops are the perfect blend of style and comfort for warmer days! They offer a delicate and feminine touch to any outfit, making them ideal for both casual outings and dressier occasions. The intricate crochet designs create a unique and eye-catching look that is sure to turn heads. Whether you pair it with shorts for a relaxed vibe or dress it up with a skirt for a chic ensemble, a crochet tank top is a versatile and charming wardrobe essential that you'll love to wear time and time again!
Materials Needed
- Cotton yarn (Modern Cotton by Baroko – Weight 4, Color: Warf)
- 5mm crochet hook
- Scissors
- Yarn needle
- Stitch markers
- Tight-fitting shirt for measurements
Abbreviations
- ch: chain
- dc: double crochet
- st: stitch
Instructions
Step 1: Introduction
The project is a beginner-friendly open mesh stitch tank top made from cotton yarn for breathability.
The pattern involves making two panels, then connecting them.
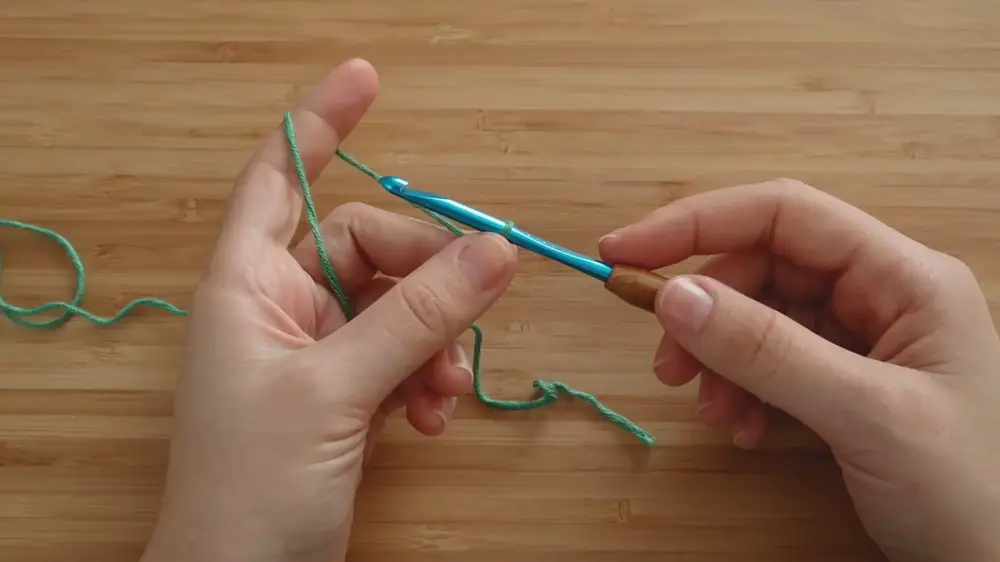
Step 2: Foundation Chain
Starting Point:
Measure from bra strap to bra strap across your chest.
Create a slip knot and place it on your hook.
Chain (ch) the required number of stitches to reach the measurement. Ensure the count is an even number.
Example: Chain 44 stitches, then add 2 additional chains for the turning chain.
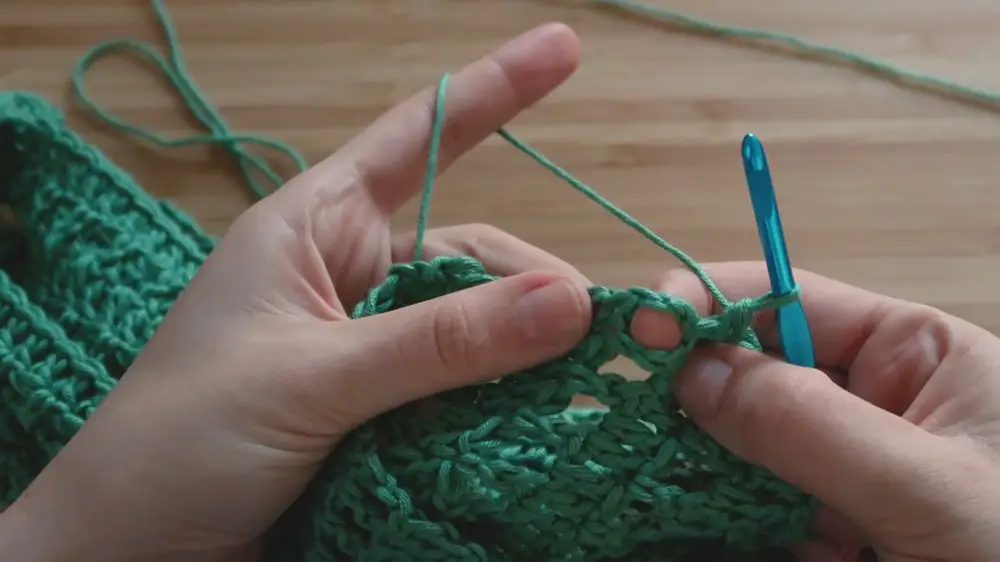
Step 3: Row 1 – Double Crochet (dc)
Work in Foundation Row:
Yarn over, insert hook into the third chain from the hook (bump in the back), pull up a loop.
Yarn over, pull through two loops, yarn over, pull through the remaining two loops (this makes a dc).
Repeat dc across the entire row.
End of Row:
At the end of Row 1, you should have a total of 44 dc (plus your turning chain).
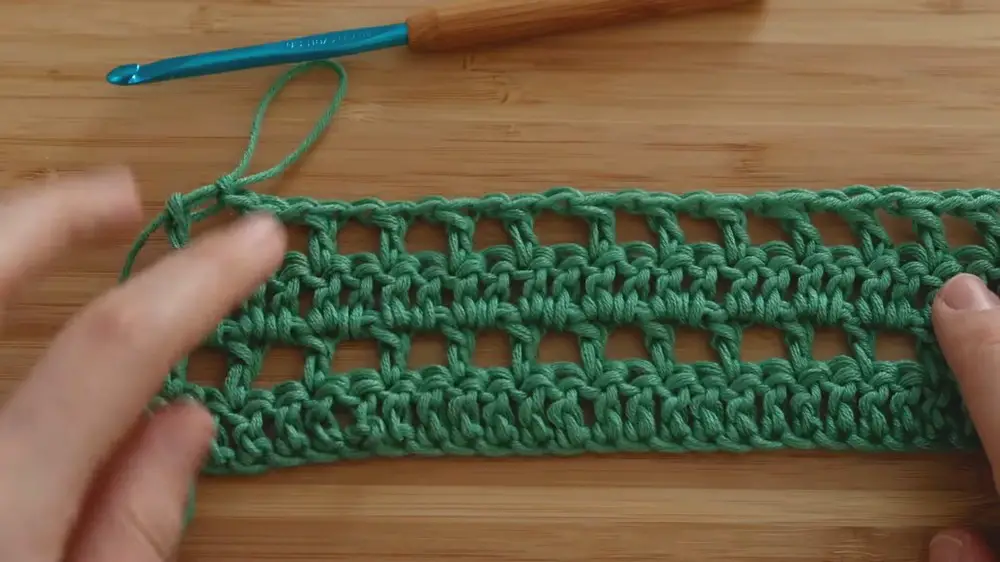
Step 4: Row 2 – Start Mesh Stitch
Mesh Stitch Pattern:
Chain 3 (counts as 1 dc and ch-1), turn your work.
Skip next st, dc into the following st, ch 1. Repeat from * to end across the row.
Ensure Correct Ending:
You should have 2 stitches left at the end, finish with dc in the last st.
Marking:
Place a stitch marker in the turning chain (third chain).
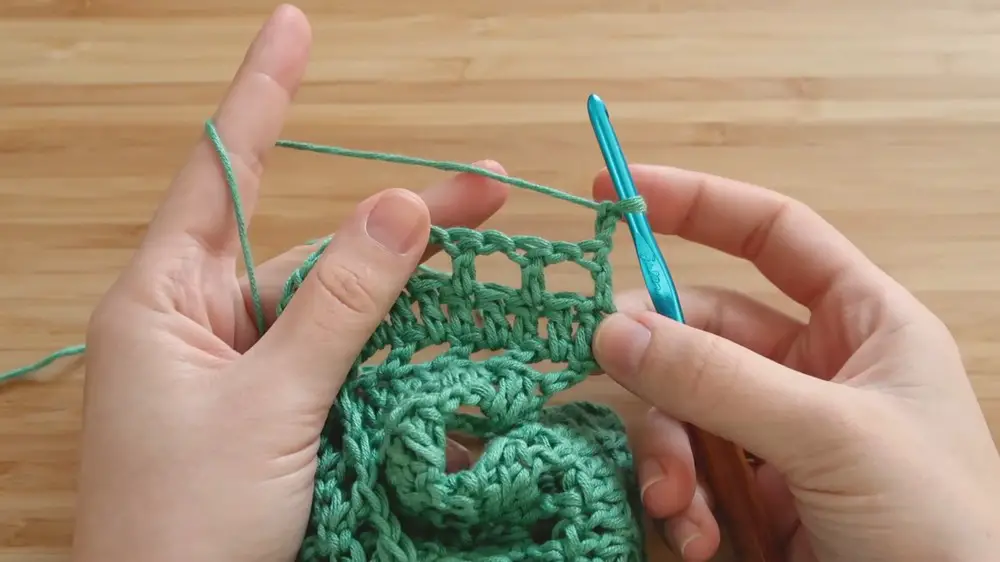
Step 5: Alternating Rows
Row 3 (Repeat of Row 1):
Ch 2, turn.
Dc into each dc and ch-1 space from the previous row.
Do not work into the actual chain stitch to ease further working.
Row 4 (Mesh Row):
Ch 3, turn.
Skip next dc, dc into the following st, ch 1. Repeat across the row.
Finish with dc in the last st.
Repeat Alternating Rows:
Continue alternating Row 3 and Row 4 until you reach the desired length from shoulders to underarm.
Step 6: Joining the Panels
Increase Rows (If Needed):
End with a mesh row before starting increases.
Increase row: Ch 2, turn, dc twice into the first dc, and once into each dc and ch space across.
Finish with two dc in the last two sts.
Follow the increase row with a mesh row.
Repeat to reach required width around the body.
Connect Panels:
Pin and seam the panels together at the sides.
Work slip stitches to seam from the armpit to the bottom.
Add a single crochet border around the armholes and neck (optional for structure).
Step 7: Bottom Hem
Continue with Increases:
If you wish to flare out the bottom, start increases again for the last few rows.
Work in the pattern by increasing two dc every few rows.
Finishing:
Ensure the bottom hem matches your desired length.
Break yarn and weave in the ends securely.
Blocking (Optional)
Steam Blocking:
On a foam board or suitable blocking material, pin your tank top to the desired measurements.
Use a steamer to evenly steam the top, ensuring it stretches to your preferred size.
Allow it to cool and dry completely before unpinning.
- Funny Pictures
-
 These are the Pics That Simply Describe Your Life
-
 Hilariously Accurate Parenting Memes That Show the Other Side of Parenthood
-
 Great Pics That Just Depict Our Lives
- Recipes
-
 Crispy Baked Avocado Fries
-
 Baked Beans and Hot Dogs with Biscuit Topping
-
 Roasted Rosemary Lemon Chicken Breasts
- Lifehacks
-
 Crochet Basics: Twisted Fringe
-
 7 Crochet Tips And Tricks
-
 How To Work Crochet Into Denim
- Crochet Ideas
-
 Crochet Snorlax Plushie Doll
-
 Crochet Cat in 1 Row
-
 Crochet Beautiful Penguin Toy
- DIY
-
 Popsicle Stick and Jingle Bell Christmas Tree Ornament
-
 DIY Santa Craft For Kids
-
 Paper Plate Angel Craft
- Knitting Ideas
-
 Knitted Bridger Cowl
-
 Knitted Keepsake Bag
-
 Knitted Cutie Cupcake Dolls