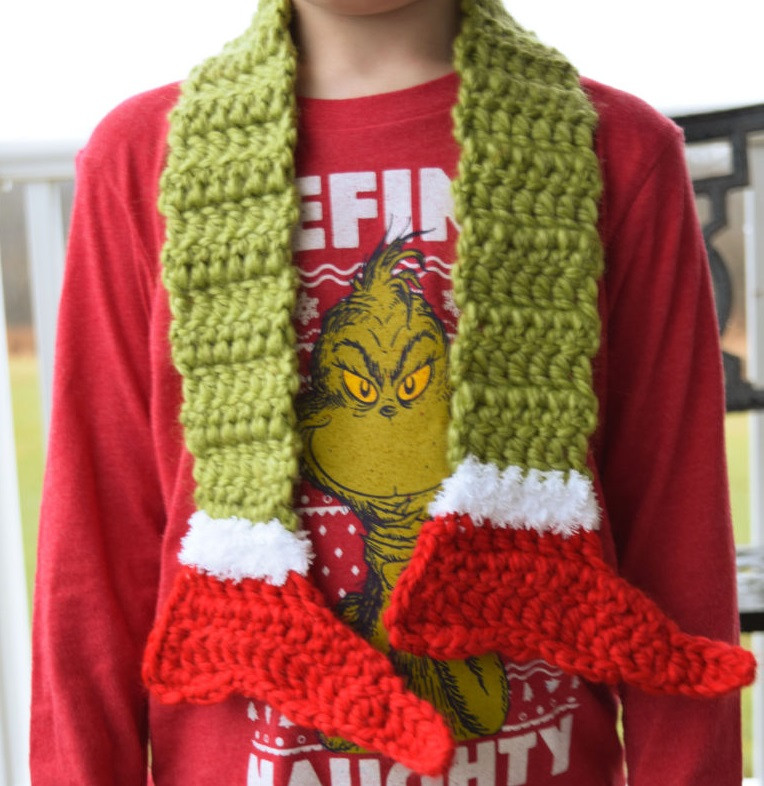
Crochet Grynch Scarf

My son asked to make him a funny Christmas scarf, so Grynch was the first who comes into my mind.
Below you can find the instructions
You'll need:
Super Bulky weight (6) yarn in Green (I used Loops & Threads Cozy Wool yarn in Sweetgrass.);
Super Bulky weight (6) yarn in Red (I used Loops & Threads yarn in Claret.);
Bulky weight (5) fuzzy yarn in white (I used Bernat Pipsqueak yarn in Whitey White.);
Crochet hook 6,5 mm;
Scissors;
Tapestry needle for weaving in ends;
Stitch markers;
Measuring tape.
Stitches control: 5 sts x 3 rows = 2” x 2”.
Instructions
Green Body of Scarf
Row 1: With your green super bulky weight yarn, ch 11[8], dc in 3rd ch from hook, dc in next 8[5] chs. (9[6] dc)
Rows 2-46 [2-36]: Ch 2, turn, dc in first st, dc in next 8[5] sts. (9[6] dc)
**At the end of Row 46[36] (the last row), fasten off.
Shoe 1
Cuff of Shoe
* Attach the bulky white fuzzy yarn to the side where the first chain was made for Row 1 of the green scarf body. The toe of the shoe will end up pointing to the same side as you attach your yarn to the scarf. After attaching your yarn, follow the directions for Row 1 below.
Row 1: With your white fuzzy yarn, ch 2, dc in the first ch, and in the next 8[5] chs across the edge of the scarf, fasten off after completing the last dc. (9[6] dc)
**Turn your work and attach your red super bulky weight yarn to the last dc completed with your white fuzzy yarn and then begin Row 2.
Row 2: With your red yarn, Ch 2, dc in first st, dc in next 7[4] sts, 2 dc in last st. (10[7] dc)
Row 3: Turn work, ch 8[6], dc in 3rd ch from hook and in next 5[3] chs, dc in next st (which is the last dc made in Row 2), dc in the next 9[6] sts across. (16[11] dc)
Row 4: Ch 2, turn, 2 dc in first st, dc in next 14[9] sts, 2 dc in next st, ch 8[6], sc in 2nd ch from hook, hdc in next ch, dc in next 5[3] chs, slst to the space created by the 7th/8th[5th/6th] chs and first dc made in Row 3, fasten off, weave in end. (23[16] dc, 1 sc, 1 hdc, 1 slst; total of 26[19] sts)
**Hold your work so the heel side of the shoe is on your right. Attach red yarn to the first st made in Row 4. Follow the directions below for the last row of the shoe (Row 5).
Row 5: After attaching your red yarn to the first st of Row 4 (on the heel side of shoe), ch 2[1], 2 dc[sc] in first st, 2 dc[sc] in next st, dc[sc] in next st, hdc[slst] in next st, sc[slst] in next st, slst in next 4[2] sts, sc in next 2 sts, hdc[slst] in next 2 sts, [fasten off and weave in end here for child size], sc in next 5 sts, slst in next 2 sts (which are the first two chains made from the ch-8 in Row 4), fasten off, weave in end. (5[0] dc, 3[0] hdc, 8[7] sc, 6 slst; total of 22[13] sts)
Shoe Finishing/Edging
We are only going to put a finishing trim on the heel side of the shoe. Attach your red yarn to the top corner of the heel side, ch 1, sc evenly down the side of the shoe. When you reach the corner at the heel, sc in the top ch (the 2nd[only] ch of the ch-2[1] at the start of Row 5), sc in the first st of Row 5, slst to second st of Row 5, fasten off and weave in loose ends.
**Shoe 1 is now complete. Follow the below directions to begin Shoe 2.
Shoe 2
***You need to decide which side of the scarf to attach the white fuzzy yarn for the cuff of Shoe 2. The toe of the shoe will point to whichever side you attach it. If you want the “tip-toe” effect as shown in the main picture where both shoes point in the same direction, you would attach it to the same side as you fastened off in Row 46[36]. If you made your scarf longer or shorter than 46[36] rows, it depends on if you have an even number or an odd number of rows. If you have an even number, you would attach it to the same side as you fastened off in your last row, but if you have an odd number of rows, it would be on the opposite side as you fastened off in your last row.
Cuff of Shoe
* Attach the bulky white fuzzy yarn to the side of the last row of your scarf where you want the toe of your shoe to point (if you have been following the exact pattern for the scarf shown in the main picture, it will be attached to the last stitch of Row 46[36]. The toe of the shoe will end up pointing to the same side as you attach your yarn to the scarf. After attaching your yarn, follow the same directions/pattern as you did for Shoe 1 starting at Row 1.
thanks
can't wait to make this