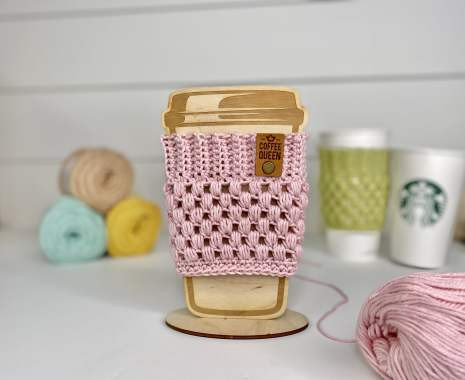
How to Crochet a Dust Pink Cup Cozy with Puff Stitches

You’ll Need:
100g of Dishie Cotton Yarn in Dust Pink color;
Crochet hook 4.5 mm;
Tapestry needle;
Scissors.
Used Patterns:
Puff Stitch:
YO, insert hook into next stitch and pull up a loop. Now you have 3 loops on your hook. YO insert hook into the same space and pull up another loop (5 loops). Repeat two more times (for a total of 4 times) until you have 9 loops on your hook. YO then pull through all loops. Secure with a CH stitch.
Puff Stitch Decrease:
YO, insert hook into stitch and pull up a loop. Repeat two more times until you have 7 loops on your hook. YO, insert hook into next stitch and pull up a loop. Repeat two more times until you have 13 loops total on your hook. YO and pull through all 13 loops. Secure with a CH stitch.
Back Loop Only:
When you are looking on top of your work, you will see a SC stitch makes a V shape. Put your hook under only the loop furthest away from you, and make your SC there. Instead of under both loops with a normal SC.
Increase:
Put two stitches in the same space. In this case, it will be two SC stitches.
Stitch Control:
15 sts x 15 rows = 10 x 10 cm.
Instructions:
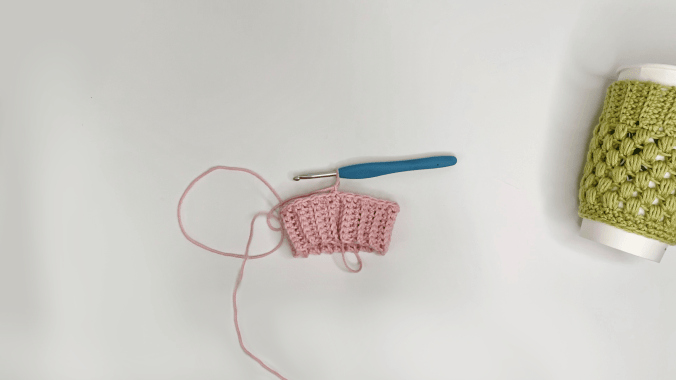
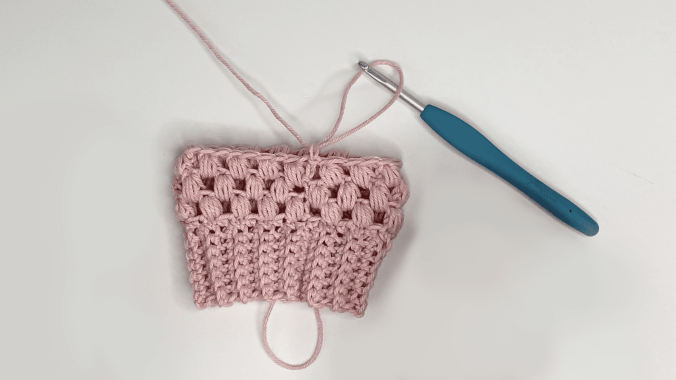
Brim:
Make a slip knot and chain 8.
1st row: Skip the chain closest to your hook and SC 7 back down the chain.
2nd-32nd rows: SC 7 in the back-loop-only, CH 1. Turn (7)
This will create the brim of your crochet cup cozy. Now it’s time to join to the beginning of the brim so your work creates a circle.
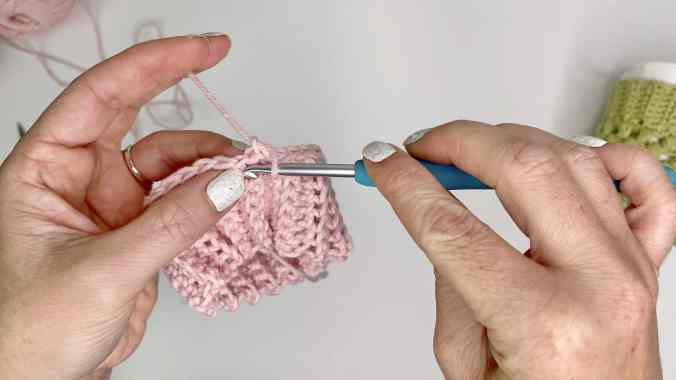
After finishing row 32, still do your CH and turn as normal. Fold the band in half, with the RS facing together.
Working through both loops on each end of the band, SL ST to join.
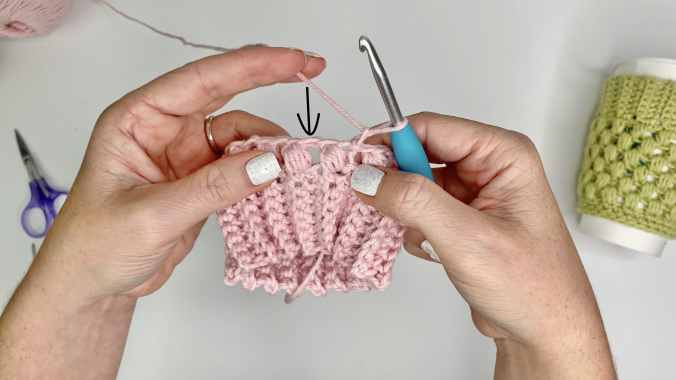
CH 1, turn the band right side out and turn your work 90 degrees to start working on the cozy body. (7 SL STs, CH 1)
Now flip your brim inside out so that your join you just completed is on the inside of the cozy. This is the “good side” of your work. You never turn your work from here on out.
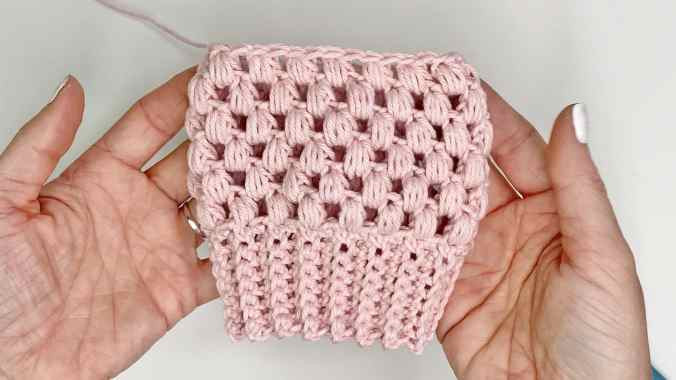
Body:
1st row: SC 32 stitches around the brim by evenly spacing them out. Since you are working along the side of your brim, you will need to make your own places to put your stitches. Join back into your first SC, then CH 1.
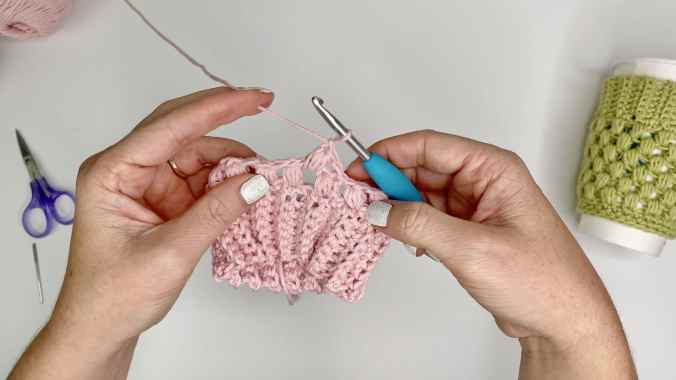
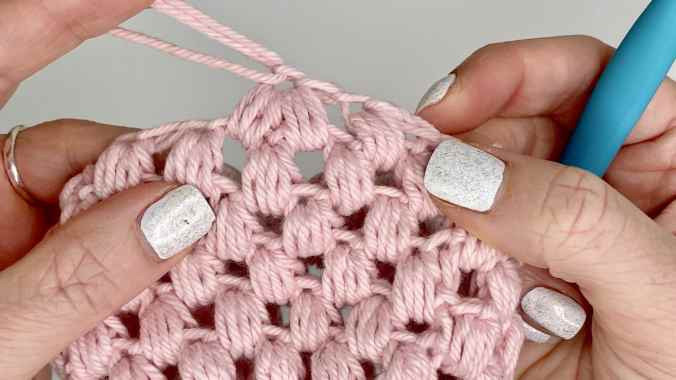
2nd row: PS in the same space as the CH 1 (Don’t forget the CH for securing your puff stitch after you complete each one). Skip the next stitch, PS in the next stitch. Continue around until you have 16 PS total. Join into the top of your first PS and CH 1.
3rd row: PS in the first CH 1 space that was created after securing your PS in Row 2. Continue putting a PS in the CH 1 space from Row 2 until you have 16 PS. Join into the top of your first PS. CH 1.
4th row: PS around starting in the space RIGHT next to your CH 1. Join back into your first PS, CH 1. (16)
5th-6th rows: Alternate Row 3 and Row 4 until you have 5 total rows of PS. (16)
7th row: PS in the first CH 1 space that was created after securing your PS in Row 6.
PSDEC over the next 2 CH 1 spaces.
Continue placing 1 PS in each CH 1 space from row 6 all the way around, this time giving us a total of 15 PS.
8th row: SC in the same stitch as your CH 1. SC in each stitch around. Be sure to SC into the actual stitch and not into the gaps. Join into the top of your first SC. CH 1. (30)
9th row: SC around. Join into the top of your first SC. Tie off. (30)
Sew in your tails.