How to Knit a Llama Toy


Knitting Needle Size
6 or 4 mm, Double-Pointed Knitting Needles (DPNs)
Yarn Weight
(4) Medium Weight/Worsted Weight and Aran (16-20 stitches to 4 inches)
Gauge
Gauge is not essential for this project.
Finished Size
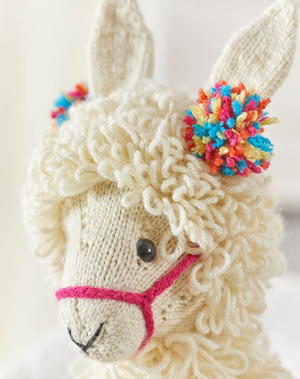
Llama toy measures about 18" [45.5 cm] tall, measured from the bottom of front feet to the top of ears. Toy measures about 13" [33 cm] long, measured from tip of muzzle to backside.
Materials List
- RED HEART® With Love® yarn: 2 skeins 1303 Aran (A) and 1 skein each of 1803 Blue Hawaii (B), 1701 Hot Pink (C), 1971 Tigerlily (D), 1201 Daffodil (E), and 1012 Black (F). Note: Only a small amount of F is needed.
- Susan Bates® Knitting Needles: 4 mm [US 6] needle(s) for working small circumferences. Choose double pointed needles, 2 short circulars or 1 long circular, whichever you prefer; 6 mm [US 10] straight or circular needle (for blanket only).
- Yarn needle
- Stitch marker
- Two 15mm safety eyes
- Stuffing
- Sharp scissors
- 1 cup of weighted stuffing (such as rice) and knee-high stocking, 6-8" [15-20.5 cm] long dowel (for reinforcing neck)
Instructions
Notes
- Llama toy is made from pieces: Head, body, 4 legs, tail, 2 ears, 2 ear pompoms, halter, and blanket.
- Llama head, body, legs, tail, and ears are knit in the round.
- Pieces are sewn together using yarn scraps, yarn tails, or sewing thread.
- Muzzle is completed with simple embroidery.
- Blanket is worked back and forth in rows, changing yarn color to form stripes.
- Halter and blanket ties are made from I-cord. Both the blanket and halter are removable.
- Safety eyes are attached before the head is complete. Do not use safety eyes if making for a child under 4 years of age.
- Gauge is not critical for this project. Work tightly so stuffing will not show between stitches.
- Use photograph as a guide for placement of pieces to be sewn together.
Special Techniques
I-Cord: Working with two double-pointed needles, knit all the sts, *do not turn work. Slide all the stitches to the opposite end of the needle. Carry yarn tightly across the back of work, and knit all the stitches; repeat from * until the desired number of rounds have been worked or I-cord measures desired length.
Special Stitches
- kfb (knit into front and back) = Knit next stitch but do not remove from needle, knit into back loop of the same stitch and remove from needle – 1 st increased.
- loop-st (loop stitch) = Insert right needle into first stitch on left needle as if to knit. Bring yarn from back to front between the crossed needles (do not allow the yarn to wrap around/over either of the needles). Wrap the yarn around your thumb forming a loop on the front of work then take the yarn to the back again between the crossed needles. Insert right needle into first stitch on left needle again and knit the stitch. This places 2 loops on the right needle. Use the tip of the left needle to lift the 2nd loop over the first loop and off the right needle (as if to bind off).
Pattern Stitch
Fur Stitch
Note: In all rounds take care to keep loops of previous rounds on the right side of the piece. Do not allow them to become entangled in other stitches.
- Round 1: Loop-st in each st around.
- Round 2: Knit.
- Repeat Rounds 1 and 2 for Fur Stitch pattern.
Head
Beginning at muzzle with smaller needle(s) and A, cast on 12 sts. Place marker for beginning of the round. Taking care not to twist sts; prepare to work in rounds.
- Round 1 (right side): [K1, kfb] 6 times—18 sts.
- Round 2: [K2, kfb] 6 times—24 sts.
- Round 3: [K3, kfb] 6 times—30 sts.
- Round 4: [K4, kfb] 6 times—36 sts.
- Rounds 5–14: Knit. Weave beginning tail through cast-on edge and pull to close hole at the top of the head. Weave in and trim beginning tail.
- Round 15: [K5, kfb] 6 times—42 sts.
- Round 16: [K6, kfb] 6 times—48 sts.
- Rounds 17 and 18: Knit.
- Round 19: [K7, kfb] 6 times—54 sts.
- Round 20: Knit. Round 21: [K8, kfb] 6 times—60 sts.
- Rounds 22–25: Knit.
- Rounds 26–36: Beginning with Round 1 of pattern, work in Fur Stitch for 11 rounds, ending with a Round 1 of the pattern.
Note: In all following rounds, take care to keep loops of previous rounds on the right side of the piece.
- Round 37: [K8, k2tog] 6 times—54 sts.
- Round 38: Work Round 1 of Fur Stitch pattern.
- Round 39: [K7, k2tog] 6 times—48 sts.
- Round 40: Work Round 1 of Fur Stitch pattern.
- Round 41: [K6, k2tog] 6 times—42 sts.
- Round 42: Work Round 1 of Fur Stitch pattern.
- Round 43: [K5, k2tog] 6 times—36 sts.
- Attach safety eyes at or near Round 18 or 19 and about 12 stitches apart, making sure that the eyes are spaced evenly relative to sides of the head.
- Note: Do not snap washer onto post until satisfied with placement.
- Round 44: Work Round 1 of the Fur Stitch pattern. Begin stuffing piece firmly and continue stuffing as work progresses.
- Round 45: [K4, k2tog] 6 times—30 sts.
- Round 46: Work Round 1 of Fur Stitch pattern.
- Round 47: [K3, k2tog] 6 times—24 sts.
- Round 48: Work Round 1 of Fur Stitch pattern.
- Round 49: [K2, k2tog] 6 times—18 sts.
- Round 50: Work Round 1 of Fur Stitch pattern.
- Round 51: [K2tog] 9 times—9 sts. Finish stuffing piece.
- Cut yarn, leaving a long tail. Thread ending tail through stitches of the last round and pull to close the opening. Weave in and trim tail.
Body
Beginning at front of chest with smaller needle(s) and A, cast on 12 sts. Place marker for the beginning of the round. Taking care not to twist sts; prepare to work in rounds.
- Round 1 (right side): Work Round 1 of Fur Stitch pattern.
- Round 2: [K1, kfb] 6 times—18 sts.
- Round 3: Work Round 1 of Fur Stitch pattern.
- Round 4: [K2, kfb] 6 times—24 sts.
- Round 5: Work Round 1 of Fur Stitch pattern.
- Round 6: [K3, kfb] 6 times—30 sts.
- Round 7: Work Round 1 of Fur Stitch pattern.
- Round 8: [K4, kfb] 6 times—36 sts.
- Round 9: Work Round 1 of Fur Stitch pattern.
- Round 10: [K5, kfb] 6 times—42 sts.
- Round 11: Work Round 1 of Fur Stitch pattern.
- Round 12: [K6, kfb] 6 times—48 sts.
- If needed, weave beginning tail through cast-on edge and pull to close the hole at the front of the chest. Weave in and trim beginning tail.
- Round 13: Work Round 1 of Fur Stitch pattern.
- Round 14: [K7, kfb] 6 times—54 sts.
- Round 15: Work Round 1 of Fur Stitch pattern.
- Round 16: [K8, kfb] 6 times—60 sts.
- Round 17: Work Round 1 of Fur Stitch pattern.
Make Opening for Neck
Notes: A neck opening is created by working 11 sts onto scrap yarn, then knitting them again with the working yarn. Later the scrap yarn is removed and the released stitches are placed on needles to begin the neck. This technique is often used in knitting a sock heel and is known as the "afterthought heel" technique.
- Drop but do not cut the working yarn.
- Cut a length of scrap yarn of the same weight but a different color than the working yarn.
- Round 18: With the scrap yarn, k11; slip the 11 sts just made back onto left needle, drop the scrap yarn; pick up the working yarn again and with the working yarn, knit the same 11 sts then knit the remaining sts around.
- Round 19: Work Round 1 of Fur Stitch pattern.
- Round 20: Knit.
- Rounds 21–42: Repeat Rounds 19 and 20 for 11 more times.
- Round 43: Work Round 1 of Fur Stitch pattern.
- Round 44: [K8, k2tog] 6 times—54 sts.
- Round 45: Work Round 1 of Fur Stitch pattern.
- Round 46: [K7, k2tog] 6 times—48 sts.
- Rounds 47 and 48: Repeat Rounds 19 and 20.
- Round 49: Work Round 1 of Fur Stitch pattern.
- Round 50: [K6, k2tog] 6 times—42 sts.
- Rounds 51–53: Beginning with Round 1 of the pattern, work in Fur Stitch for 3 rounds, ending with a Round 1 of the pattern.
- Round 54: [K5, k2tog] 6 times—36 sts.
- Stuff piece firmly, about two-thirds full. If desired, insert knee-high stocking filled with weighted stuffing. Weighted stuffing should be placed in the back half of the body to counterbalance the weight of the head at the front.
- Round 55: Work Round 1 of Fur Stitch pattern.
- Round 56: [K4, k2tog] 6 times—30 sts.
- Continue stuffing piece as work progresses.
- Round 57: Work Round 1 of Fur Stitch pattern.
- Round 58: [K3, k2tog] 6 times—24 sts.
- Round 59: Work Round 1 of Fur Stitch pattern.
- Round 60: [K2, k2tog] 6 times—18 sts.
- Round 61: Work Round 1 of Fur Stitch pattern.
- Round 62: [K2tog] 9 times—9 sts.
- Finish stuffing piece. Cut yarn, leaving a long tail. Thread the ending tail through stitches of the last round and pull to close the opening. Weave in and trim tail.
Neck
With the right side facing, carefully remove the scrap yarn for the neck opening and place the 22 released sts on needle(s), distributing them evenly.
- Round 1 (right side): Join A to the first st along the bottom row of neck opening, k11, pick up 1 st in the corner of the opening, k11, pick up 1 st in the corner of the opening—24 sts. Place a marker for the beginning of the round and prepare to work in rounds.
- Rounds 2–20: Beginning with Round 1 of the pattern, work in Fur Stitch for 19 rounds, ending with a Round 1 of the pattern. Stuff neck as work progresses.
- Bind off, leaving a long tail for sewing the head to the neck. Finish stuffing the piece. If the neck needs reinforcement, insert the dowel into the neck opening.
Legs (Make 4)
Note: When changing yarn color, twist the working and non-working yarns around each other to prevent holes.
Beginning at foot with smaller needle(s) and A, cast on 6 sts. Place marker for the beginning of the round. Taking care not to twist sts; prepare to work in rounds.
- Round 1 (right side): [Kfb] 6 times—12 sts.
- Round 2: [K1, kfb] 6 times—18 sts.
- Round 3: [K2, kfb] 6 times—24 sts.
- Rounds 4–11: Knit.
- Cut A, leaving a long tail for weaving in later. Add each new yarn color as needed but do not cut until instructed.
- Round 12: With D, knit.
- Round 13: With C, knit.
- Round 14: With B, knit.
- Round 15: With E, knit.
- Rounds 16-23: Repeat Rounds 12–15 two more times.
- Rounds 24-26: Repeat Rounds 12–14.
- Cut B, C, and D, leaving long tails for weaving in later. With E, bind off.
- Cut E, leaving a long tail for sewing leg to body.
- Weave beginning tail through the cast-on edge and pull to close the hole at the bottom of the foot. Weave in and trim the beginning tail. Weave in and trim A, B, C, and D yarn tails from the striped section.
- Note: Yarn tails from the striped section can be left inside legs without trimming, provided they do not show from the outside.
Tail
Beginning at the base of the tail with smaller needle(s) and A, leaving a long beginning tail, cast on 16 sts. Place marker for the beginning of the round. Taking care not to twist sts; prepare to work in rounds.
- Rounds 1–20: Knit.
- Round 21: [K2tog, k6] twice—14 sts.
- Round 22: [K2tog, k5] twice—12 sts.
- Round 23: [K2tog, k4] twice—10 sts.
- Round 24: [K2tog, k3] twice—8 sts. Cut yarn, leaving a long tail.
- Thread the ending tail through stitches of the last round and pull to close the opening. Weave in and trim the ending tail. Do not weave in the beginning tail; it can be used later to sew tail to the backside of the body.
Ears (Make 2)
Beginning at the base of the ear with smaller needle(s) and A, leaving a long beginning tail, cast on 18 sts. Place marker for the beginning of the round. Taking care not to twist sts; prepare to work in rounds.
- Rounds 1–20: Knit.
- Round 21: [K1, k2tog, k6] twice—16 sts.
- Round 22: Knit.
- Round 23: [K1, k2tog, k5] twice—14 sts.
- Round 24: Knit.
- Round 25: [K1, k2tog, k4] twice—12 sts.
- Round 26: Knit.
- Round 27: [K1, k2tog, k3] twice—10 sts.
- Round 28: Knit.
- Round 29: [K1, k2tog, k2] twice—8 sts.
- Cut yarn, leaving a long tail. Thread the ending tail through stitches of the last round and pull to close the opening. Weave in and trim the ending tail.
- With the beginning tail, sew the edges of the base of the ear together. Then thread the beginning tail through the base edge and pull tightly to pucker the ear into shape along the base. Do not trim the beginning tail; it can be used later to sew the ear to the head.
Ear Pom Poms (Make 2)
Note: A pompom maker can be used to make pompoms, if desired.
Holding 1 strand each of B, C, D, and E together, wrap yarn around three outstretched fingers a total of 10 times. Carefully slip wraps off fingers. Tie a 10” [25.5 cm] length of coordinating scrap yarn tightly around the center of the wraps. Tie the knot securely (for extra security, wrap the tie around a second time, knotting securely and glueing the knot with craft glue for extra hold). Do not trim yarn ends from ties. Grasp the yarn ties and carefully cut through the wrap loops using sharp scissors. Shake the pompom to fluff and trim the ends to create a uniform sphere.
Halter
With smaller needle(s) and C, leaving a long beginning tail, cast on 2 sts. Using I-Cord technique, knit an I-cord about 18" [45.5 cm] long. Remove the I-cord from needles and place the remaining 2 stitches on a stitch marker or pin to hold, so that the length can be adjusted later as needed.
Blanket
Notes
Blanket is worked back and forth in rows of Garter stitch (knit every row). Each yarn color is cut at the end of each row, leaving yarn ends for decorative fringe.
- With larger needle(s) and B, leaving a 4–5" [10–12.5 cm] beginning tail, cast on 26 sts. Cut B, leaving a 4–5" [10–12.5 cm] tail.
- Row 1: Leaving a 4–5" beginning tail, with C, knit. Cut C, leaving a 4–5" [10–12.5 cm] tail.
- Continue to leave 4–5" [10–12.5 cm] beginning and ending tails on all rows. These tails are used for decorative fringe.
- Row 2: With D, knit. Cut D.
- Row 3: With E, knit. Cut E.
- Row 4: With B, knit. Cut B.
- Row 5: With C, knit. Cut C.
- Rows 6–37: Repeat Rows 2–5 for 8 more times.
- With B, bind off.
- Lay blanket flat and comb out fringe with your fingers. With sharp scissors, carefully trim fringe evenly across to about 2" [5 cm].
Blanket Ties (Make 2)
With smaller needle(s) and B, cast on 3 sts. Using I-Cord technique, knit an I-cord about 9½" [24 cm] long. Cut yarn, leaving a long tail. Thread the tail through the remaining 3 stitches. Do not trim the ending tail; it can be used later to sew the tie to the blanket. Weave in and trim the beginning tail. Complete both ties before proceeding. Using yarn tails, sew ties to the top edge (long edge) of the blanket, about 8 stitches from each corner. Weave in and trim tails.
Finishing
Sew Legs to Body
Stuff legs firmly. With yarn tails, sew legs to the body as follows:
- Sew front legs to the bottom of the body directly under the would-be shoulders of the llama (about Round 22 of body).
- Sew back legs to the bottom of the body at the imaginary hip area, before the decrease rounds.
- Push the Fur Stitch rounds out of the way to access the smooth knit rounds. Sew legs onto smooth knit rounds.
Sew Head to Body
With the yarn tail attached to the neck opening, sew the head to the body as follows:
- Position the head facing forwards relative to the body.
- Sew the head to the neck in the area just under the rounded portion of the head (the area past the muzzle where the head takes on a rounded shape).
- Use small stitches to secure, and knot securely.
- Repeat sewing stitches around to add extra strength to the head/neck join.
Sew Tail to Body
Do not stuff the tail. With yarn needle and long beginning yarn tail, gather and sew the beginning end closed then sew to the upper hind end. Thread the same yarn tail from the base of the tail to the tail tip and back up to the base. Pull tightly on the yarn tail to curl the tail under. Knot, weave in and trim ends.
Sew Ears to Head
With yarn needle and long yarn tail, sew ears to the top of the head about 2" [5 cm] apart at or near Round 37 of the head.
Note: Push the Fur Stitch rounds out of the way to access smooth knit rounds. Sew ears onto smooth knit rounds.
Embroider Muzzle
With yarn needle and F, using long straight stitches, embroider a "Y" shape over Rounds 1–5 at the tip of the muzzle.
Attach Halter
Use photograph as a guide to placement while attaching the halter.
Note: Try wrapping I-cord all the way around the head for the halter (as instructed) before sewing any parts of the halter in place.
- Beginning at the cast-on end of I-cord and at one side of the llama's muzzle, wrap I-cord around the lower muzzle of the llama, for the muzzle loop. Pull tightly to keep the muzzle loop from slipping off the end of the muzzle. With the beginning tail, sew the muzzle loop in place.
- Pull the remaining part of the I-cord across the side of the face (for first face strap), up and around the back of the ears and down the opposite side of the face (for the second face strap), pulling tightly for a snug fit. There may be too many inches left after this fitting. Adjustments can be made by releasing the 2 held stitches and unraveling the I-cord, as needed. When proper fit is obtained, weave the yarn tail through the live stitches and use the same yarn tail to sew the end of the second face strap to the muzzle loop, making certain to place it even with the end of the first face strap.
- Tie blanket around the neck. Tie or sew pompoms around the base of the ears.
- Weave in and trim any remaining ends.
Abbreviations
- A, B, C, D, E, and F - Color A, B, C, D, E, and F
- k - knit
- k2tog - knit next 2 sts together
- st(s) - stitch(es)
- [ ] - work directions in brackets the number of times specified
- * - repeat whatever follows the * as indicated


