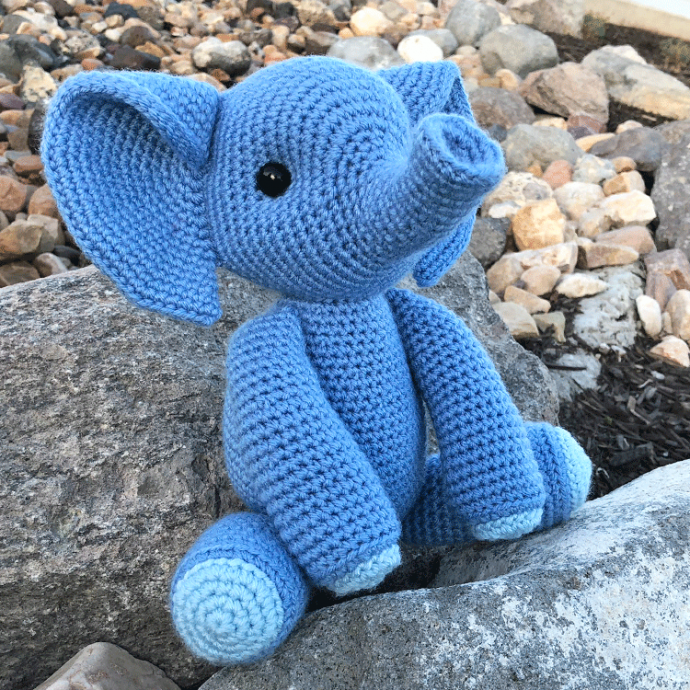
Create Your Own Crocheted Blue Creature


You’ll Need:
3.5mm (E) hook;
15mm safety eyes;
Yarn needle;
Fiber fill;
Yarn (acrylic, weight 4);
Medium Blue (I Love This Yarn! – Medium Blue);
Light Blue (I Love This Yarn! – Soft Blue).
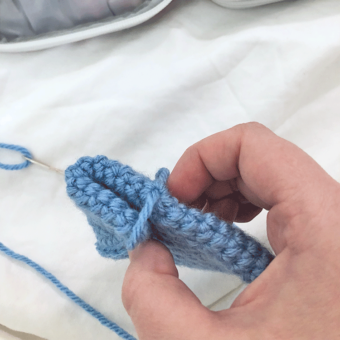
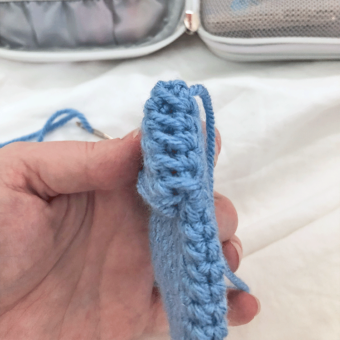
The Trunk
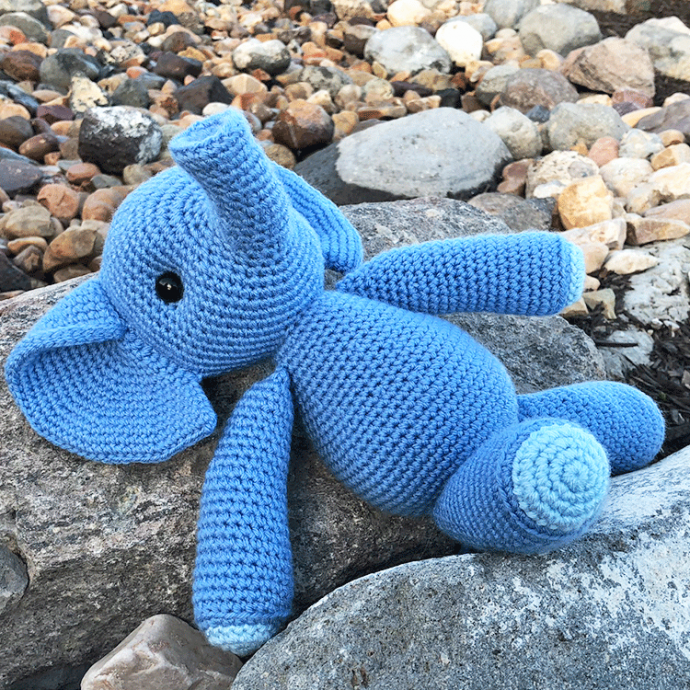
You may need to twist the trunk a bit to get it straight on the face – this is normal.
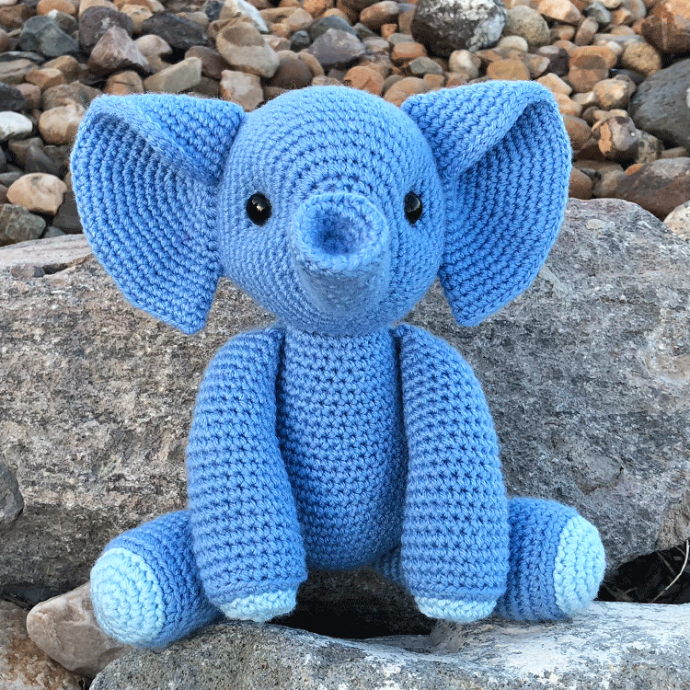
How to Indent the Eyes
Step 1 – Cut a strand of yarn approximately 18" long. Tie a large, secure knot in one end and thread the other end through your yarn needle.
Step 2 – Insert your needle through the back opening of the head and sew between the two spots where you'll be placing your safety eyes (marked with your color 1 stitch markers).
Step 3 – Pull your strand of yarn taut, which will create indents.
Step 4 – Fasten off with a knot and hide your yarn tail inside the head.
The Ears
Step 1 – Fold in half and slip stitch closed – your ear will now be shaped like a taco.
Step 2 – Fold the top point of your "taco" to touch the starting magic ring.
Step 3 – Begin securing together by stitching through the magic ring.
Step 4 – Stitch all the way up, then tighten up your stitches.
Instructions
Trunk & Head
With medium blue yarn:
- 01. Start 6 sc into a magic ring [6]
- 02. *sc, inc* [9]
- 03. sc, inc, *sc 2, inc* 2 times, sc [12]
- 04. *sc 3, inc* [15]
- 05. sc 2, inc, *sc 4, inc* 2 times, sc 2 [18]
- 06. BLO: sc in each st around [18]
- 07. sc in each st around [18]
- 08. *sc 2, dec* 3 times, *sc, inc* 3 times [18]
- 09. sc 17, inc [19]
- 10. *sc 2, dec* 3 times, sc, *sc, inc* 3 times [19]
- 11. sc in each st around [19]
- 12. *sc 2, dec* 3 times, sc, *sc, inc* 3 times [19]
- 13. sc 9, inc, sc 9 [20]
- 14. *sc 2, dec* 3 times, sc, *sc, inc* 3 times, sc [20]
- 15. sc 19, inc [21]
- 16. *sc 2, dec* 3 times, inc, *sc, inc* 3 times, sc 2 [22]
- 17. sc 21, inc [23]
- 18. *sc 2, dec* 3 times, *sc, inc, sc* 3 times, inc, sc [24]
- 19. *sc* 12 times, *inc* 12 times [36]
- 20. *sc 5, inc* [42]
- 21. sc 3, inc, *sc 6, inc* 5 times, sc 3 [48]
- 22. *sc 7, inc* [54]
- 23. sc 4, inc, *sc 8, inc* 5 times, sc 4 [60]
- 24. sc in each st around [60]
- 25. sc 26, insert marker color 1 into next sc (27th st from start of round), sc 29, insert marker color 1 into next sc (57th st from start of round), sc 3 [60]
- 26 - 30. sc in each st around [60]
- 31. sc 35, insert marker color 2 into next sc (36th st from start of round), sc 13, insert marker color 2 into next sc (50th st from start of round), sc 10 [60]
- 32 - 34. sc in each st around [60]
- 35. sc 4, dec, *sc 8, dec* 5 times, sc 4 [54]
- 36. *sc 7, dec* [48]
- 37. sc 3, dec, *sc 6, dec* 5 times, sc 3 [42]
- 38. *sc 5, dec* [36]
- 39. sc 2, dec, *sc 4, dec* 5 times, sc 2 [30]
- 40. *sc 3, dec* [24]
- 41. sc, dec, *sc 2, dec* 5 times, sc [18]
- 42. *sc, dec* [12]
Finish stuffing. Push the tip of the trunk inside the rest of the trunk so it's indented like the photos. Sew between the two spots marked with your color 1 markers to create indents for the eyes (see instructions at the bottom of the pattern). The markers are where you will place the eyes. Insert eyes and secure backings.
Close with an ultimate finish.
Ears (Make 2)
With medium blue yarn:
- 01. Start 6 sc into a magic ring [6]
- 02. inc in each st around [12]
- 03. *sc, inc* [18]
- 04. sc, inc, *sc 2, inc* 5 times, sc [24]
- 05. *sc 3, inc* [30]
- 06. sc 2, inc, *sc 4, inc* 5 times, sc 2 [36]
- 07. *sc 5, inc* [42]
- 08. sc 3, inc, *sc 6, inc* 5 times, sc 3 [48]
- 09. *sc 7, inc* [54]
- 10. sc 4, inc, *sc 8, inc* 5 times, sc 4 [60]
- 11. *sc 9, inc* [66]
- 12. sc 5, inc, *sc 10, inc* 5 times, sc 5 [72]
- 13. *sc 11, inc* [78]
- 14. sc 6, inc, *sc 12, inc* 5 times, sc 6 [84]
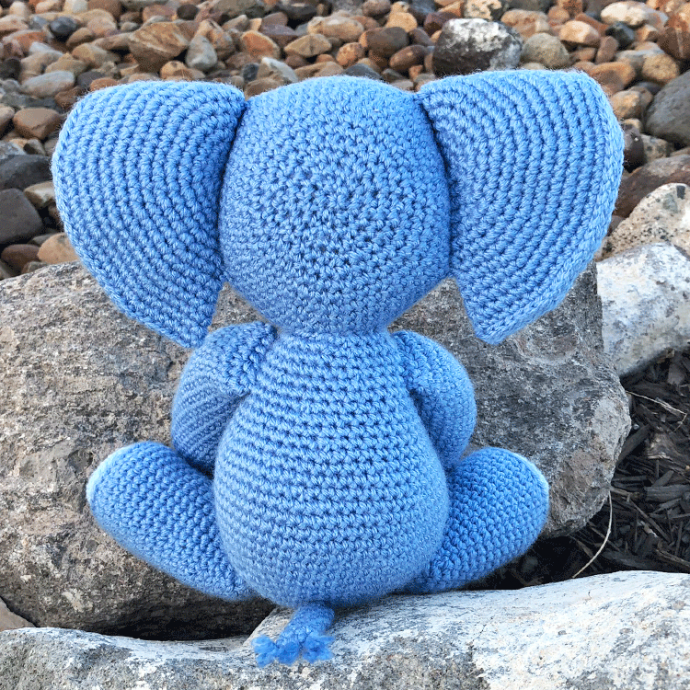
Fasten off and leave a very long tail for sewing. See the "notes" section for instructions on how to fold and secure the ears.
Attach the left ear starting in the left stitch marked with color 2, and each of the next 14 stitches down the round (down the left side of the head).
Attach the right ear starting in the right stitch marked with color 2, and each of the next 14 stitches up the round (down the right side of the head).
Body
With medium blue yarn:
- 01. Start 6 sc into a magic ring [6]
- 02. inc in each st around [12]
- 03. *sc, inc* [18]
- 04. sc, inc, *sc 2, inc* 5 times, sc [24]
- 05. *sc 3, inc* [30]
- 06. sc 2, inc, *sc 4, inc* 5 times, sc 2 [36]
- 07. *sc 5, inc* [42]
- 08. sc 3, inc, *sc 6, inc* 5 times, sc 3 [48]
- 09. *sc 7, inc* [54]
- 10. sc 4, inc, *sc 8, inc* 5 times, sc 4 [60]
- 11 - 17. sc in each st around [60]
- 18. sc 4, dec, *sc 8, dec* 5 times, sc 4 [54]
- 19. sc in each st around [54]
- 20. *sc 7, dec* [48]
- 21. sc in each st around [48]
- 22. sc 3, dec, *sc 6, dec* 5 times, sc 3 [42]
- 23 - 24. sc in each st around [42]
- 25. *sc 5, dec* [36]
- 26 - 27. sc in each st around [36]
- 28. sc 2, dec, *sc 4, dec* 5 times, sc 2 [30]
- 29 - 30. sc in each st around [30]
- 31. *sc 3, dec* [24]
Fasten off and leave a long tail for sewing. Stuff firmly with fiber fill.
Arms (Make 2)
With medium blue yarn:
- 01. Start 6 sc into a magic ring [6]
- 02. inc in each st around [12]
- 03. *sc, inc* [18]
- 04. sc, inc, *sc 2, inc* 5 times, sc [24]
- 05. BLO: sc in each st around [24]
- 06 - 08. sc in each st around [24]
- 09. sc 11, dec, sc 11 [23]
- 10. sc in each st around [23]
- 11. sc 21, dec [22]
- 12. sc in each st around [22]
- 13. sc 10, dec, sc 10 [21]
- 14. sc in each st around [21]
- 15. sc 19, dec [20]
- 16. sc in each st around [20]
- 17. sc 9, dec, sc 9 [19]
- 18. sc in each st around [19]
- 19. sc 17, dec [18]
- 20. sc in each st around [18]
- 21. sc 8, dec, sc 8 [17]
- 22. sc in each st around [17]
- 23. sc 15, dec [16]
- 24 - 25. sc in each st around [16]
- 26. *sc 2, dec* [12]
Fasten off and leave a long tail for sewing. Stuff firmly with fiber fill. Fold the top opening in half and slip stitch closed.
Arm Pads (Make 2)
With light blue yarn:
- 01. Start 6 sc into a magic ring [6]
- 02. inc in each st around [12]
- 03. *sc, inc* [18]
Fasten off and leave a long tail for sewing.
Legs (Make 2)
With medium blue yarn:
- 01. Start 6 sc into a magic ring [6]
- 02. inc in each st around [12]
- 03. *sc, inc* [18]
- 04. sc, inc, *sc 2, inc* 5 times, sc [24]
- 05. *sc 3, inc* [30]
- 06. BLO: sc in each st around [30]
- 07 - 09. sc in each st around [30]
- 10. sc 14, dec, sc 14 [29]
- 11. sc 27, dec [28]
- 12. sc 13, dec, sc 13 [27]
- 13. sc 25, dec [26]
- 14. sc 12, dec, sc 12 [25]
- 15. sc 23, dec [24]
- 16. sc 11, dec, sc 11 [23]
- 17. sc 21, dec [22]
- 18. sc 10, dec, sc 10 [21]
- 19. sc 19, dec [20]
- 20. sc 9, dec, sc 9 [19]
- 21. sc 17, dec [18]
- 22. *sc 7, dec* [16]
- 23. *sc 2, dec* [12]
Fasten off and leave a long tail for sewing. Stuff firmly with fiber fill. Fold the top opening in half and slip stitch closed.
Leg Pads (Make 2)
With light blue yarn:
- 01. Start 6 sc into a magic ring [6]
- 02. inc in each st around [12]
- 03. *sc, inc* [18]
- 04. *sc 2, inc* [24]
Fasten off and leave a long tail for sewing.
Tail
Cut 12 strands of medium blue yarn, approx. 10” long.
With medium blue yarn:
- 01. Start 6 sc into a magic ring [6]
- 02 - 08. sc around [6]
Fasten off and leave a long tail for sewing. Fold the top opening in half and slip stitch closed. Root in strands of medium blue yarn to flat end, secure and trim as desired.