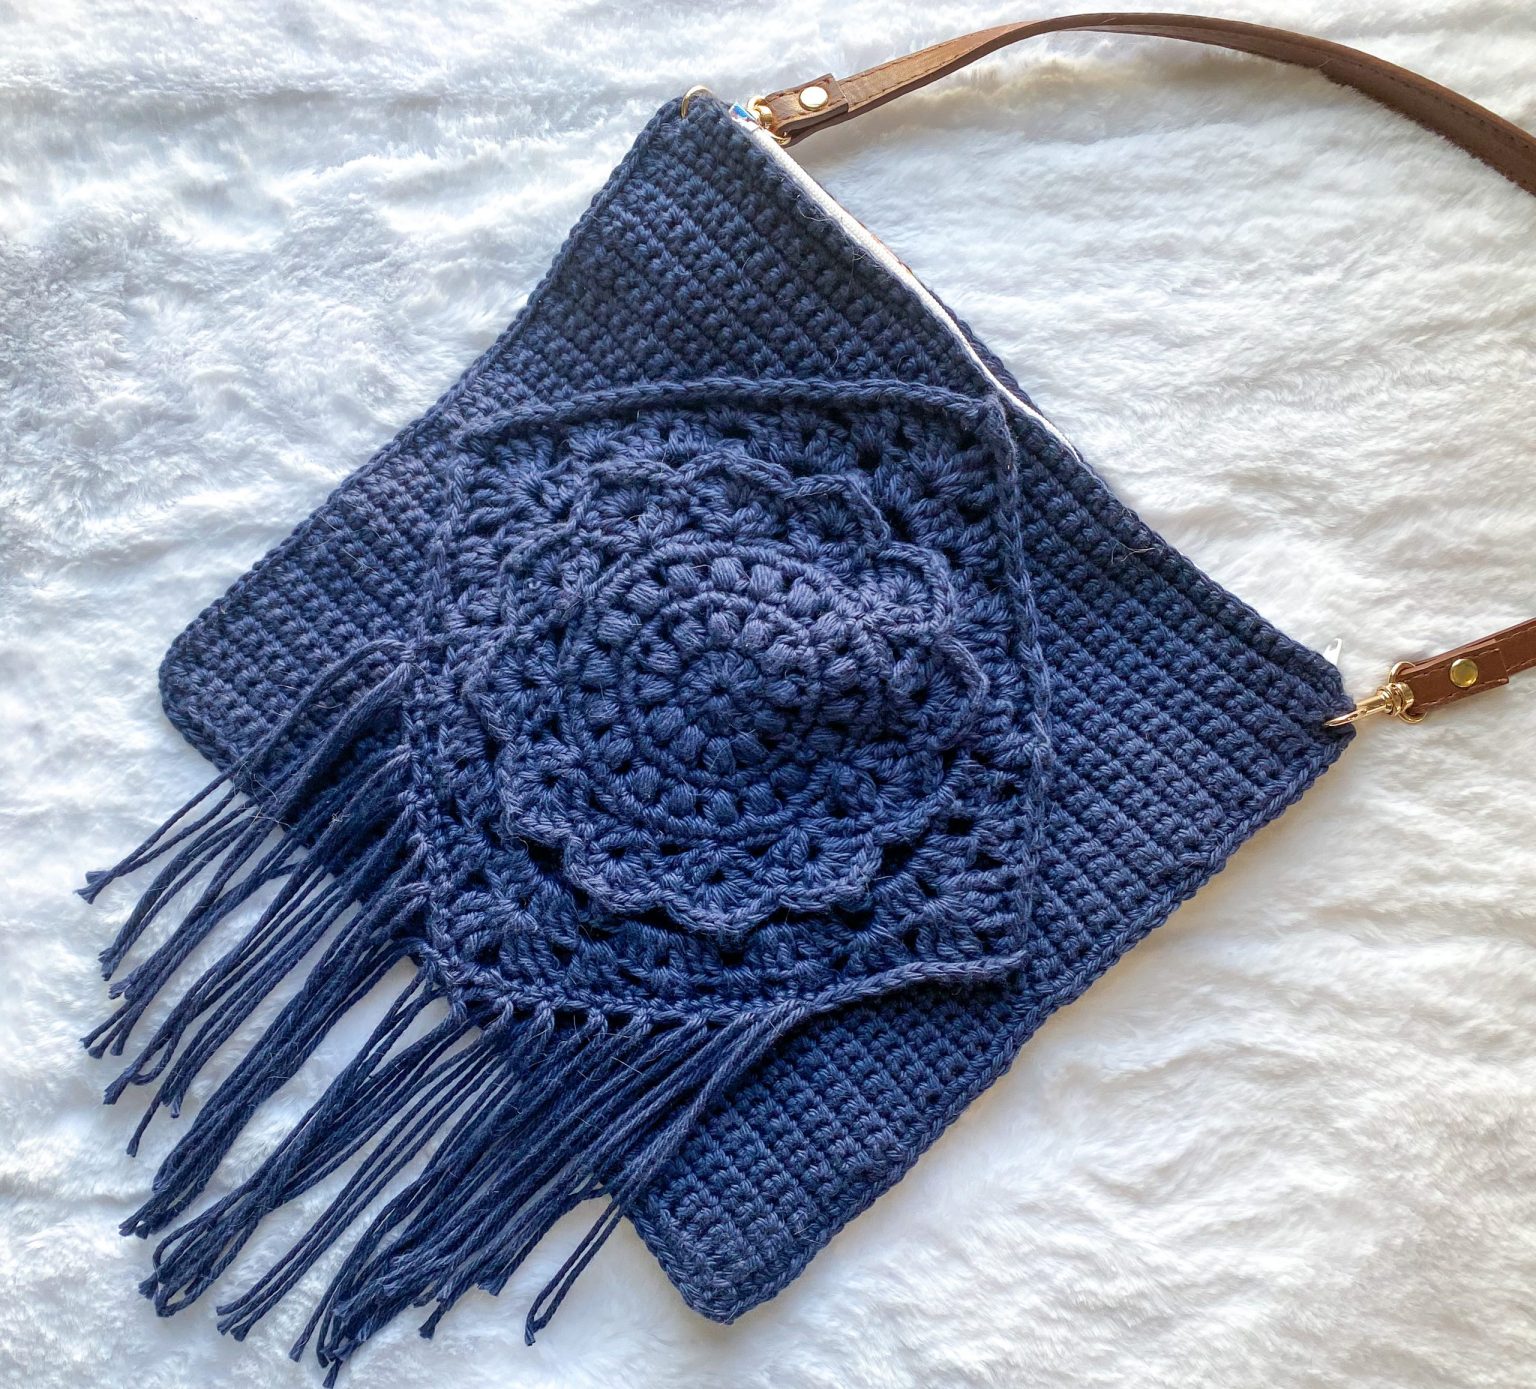
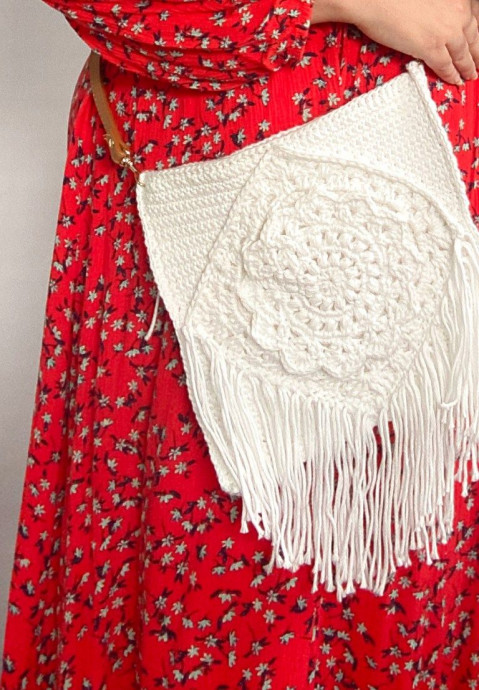
Crochet Spring Mandala Crossbody Bag

Materials
- 2 skeins of I Love This Cotton yarn
- 3.75mm hook
- Yarn needle
- Straight pins
- Blocking mat, or a surface to block the mandala on
- Sew on snaps
- Color matching thread
- Hand needle
- Crossbody strap with clasp - I used the one below
Stitches Used
- Chain (CH)
- Foundation single crochet (FDC)
- Single crochet (SC)
- Double crochet (DC)
- Half double crochet (HDC)
- Treble crochet (TRBL)
- Slip stitch (Sl St)
Pattern
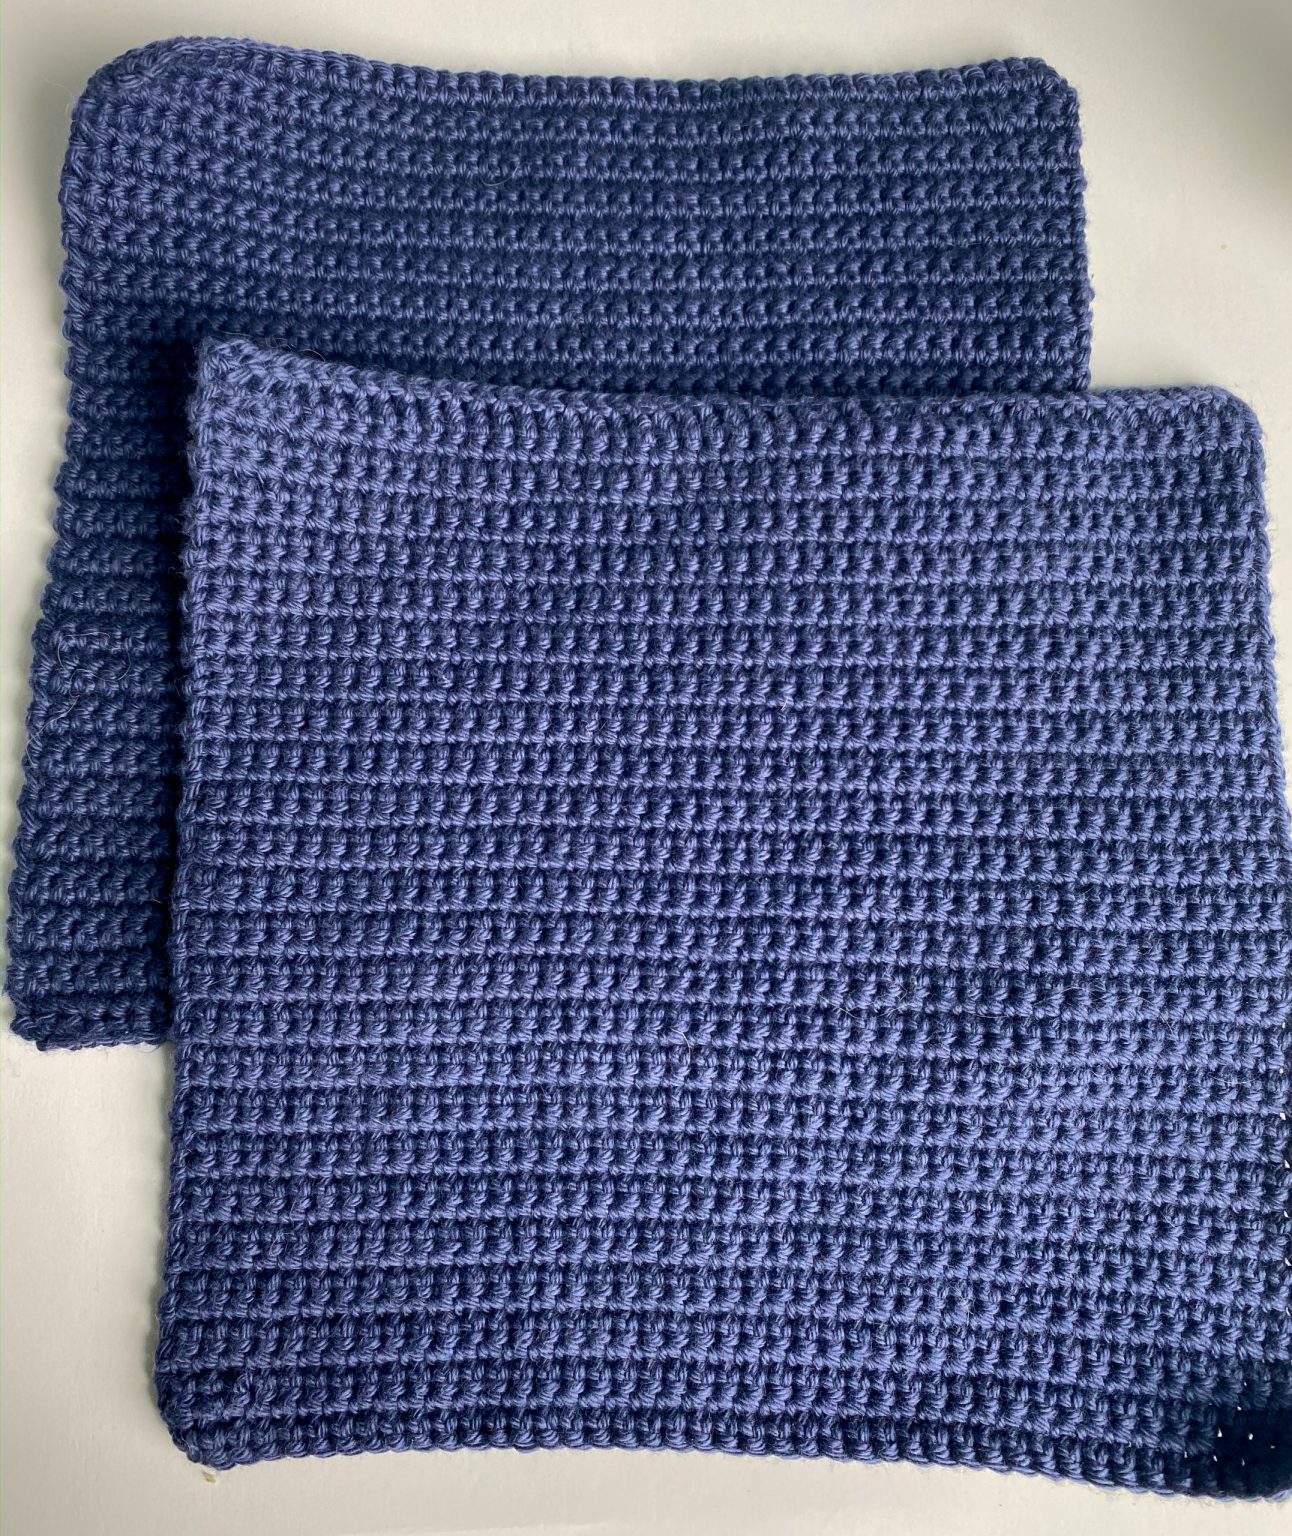
Crochet Panel
(make 2)
Row 1: FDC x 44. CH 1. (44 SC)
With 3.75 hook.
Rows 2-48: SC in each stitch across the row. CH 1.
After Row 48, tie off, leaving a 5” tail and weave in.
Mandala
With 3.75 Hook.
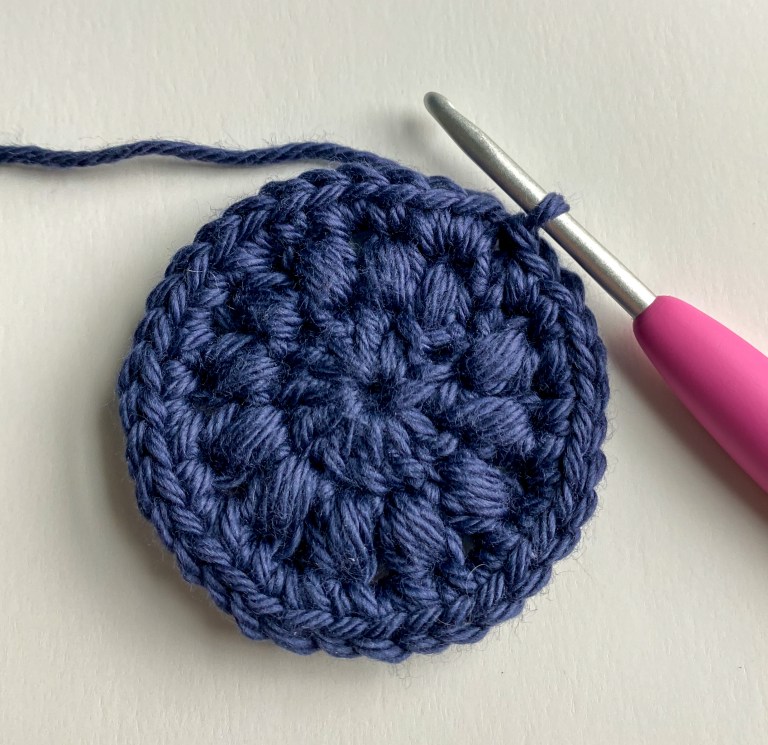
Round 1: CH 4. This will count as the first DC. 11 DC in the first CH. Sl St into the CH3. (12 DC)
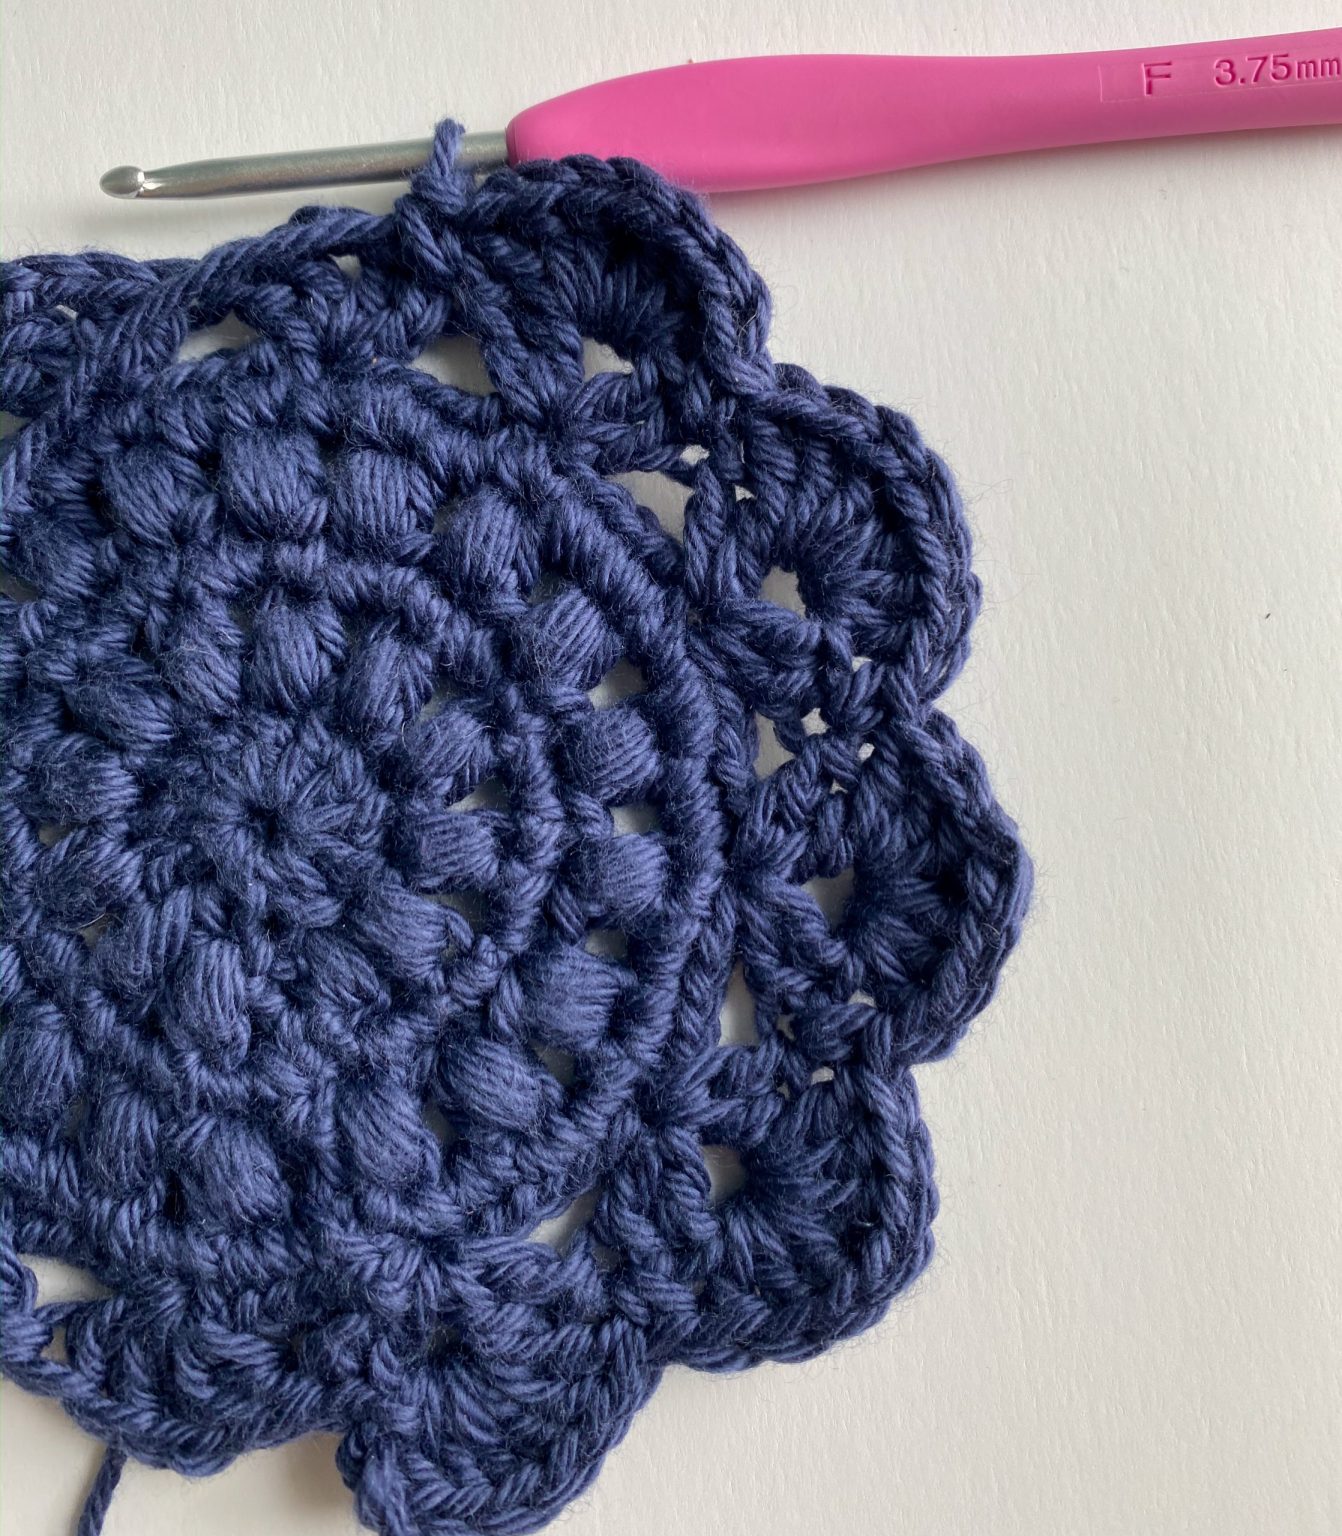
Round 2: CH 1. Puff stitch, CH 1, in each stitch around. Sl St. (12 puffs) See photo below.
Round 3: CH 1. SC in puff st, 2SC in CH 1 space. Sl St. (36 SC)
Round 4: CH 1. Puff st, CH 1, Skip st, Puff St, CH 1, repeat around. Sl St. (18 puffs)
Round 5: CH 1. 2 SC in each st and CH space. Sl St. (72 SC)

Round 6: CH 3. This will count as a DC. DC in the same stitch. CH 2, 2 DC in same stitch. You will be working the flower petals part into the CH 2 space. Skip the next five stitches. In the 6th stitch, work 2 DC, CH 2, and work another 2 DC in the same stitch. Repeat around. Sl st. (12 clusters)
Round 7: Sl in the next 2 st, working in the CH 2 space of the first cluster, CH 3 (counts as DC), 2 DC, 1 TRBL, 3 DC. This should create a pointed petal look. SC in last DC of the cluster. 3 DC in the next cluster, 1 TRBL, 3 DC in the same CH 2 space of the cluster. SC in last DC of the cluster.
Repeat around the round, for a total of 12 flower petals. After the last SC, Sl St in the first DC (the CH 3) of the first petal. (12 petals)
Round 8: Sl St in the next two stitches, until you reach the TRBL in the first petal. SC in the third loop of TRBL. CH 6. SC in the back loop of the next petal’s TRBL. CH 6. Repeat around the round. An alternative is to complete a normal SC in the TRBL, but the flower petals won’t be as pronounced as they would if you back post SC. Sl St into the first SC.
Round 9: Sl St into the first CH 6 space. CH 3 (this will count as your first DC) 2 DC in the CH 6 space. CH 1. In the same CH 6 space, add 3 DC. CH 1. In the next CH 6 space, 3 DC. CH 1. 3DC in the same CH space. Repeat around the round. Sl St in the CH 3. (24 3DC clusters) See photo right.
Round 10: Sl St to the first CH 1 space in between the 3DC clusters. CH 3 (this will count as a DC) 2 DC in the same CH 1 space. CH 1. In the next CH 1 space, 3 HDC. CH 1. In the next CH 1 space, 3 HDC. CH 1. In the next CH 1 space, 3 DC. CH 1. Now we’ll be making the corner of the mandala.
In the next CH 1 space, 3 TRBL, CH 2. 3 TRBL, CH 1. See pictured below.
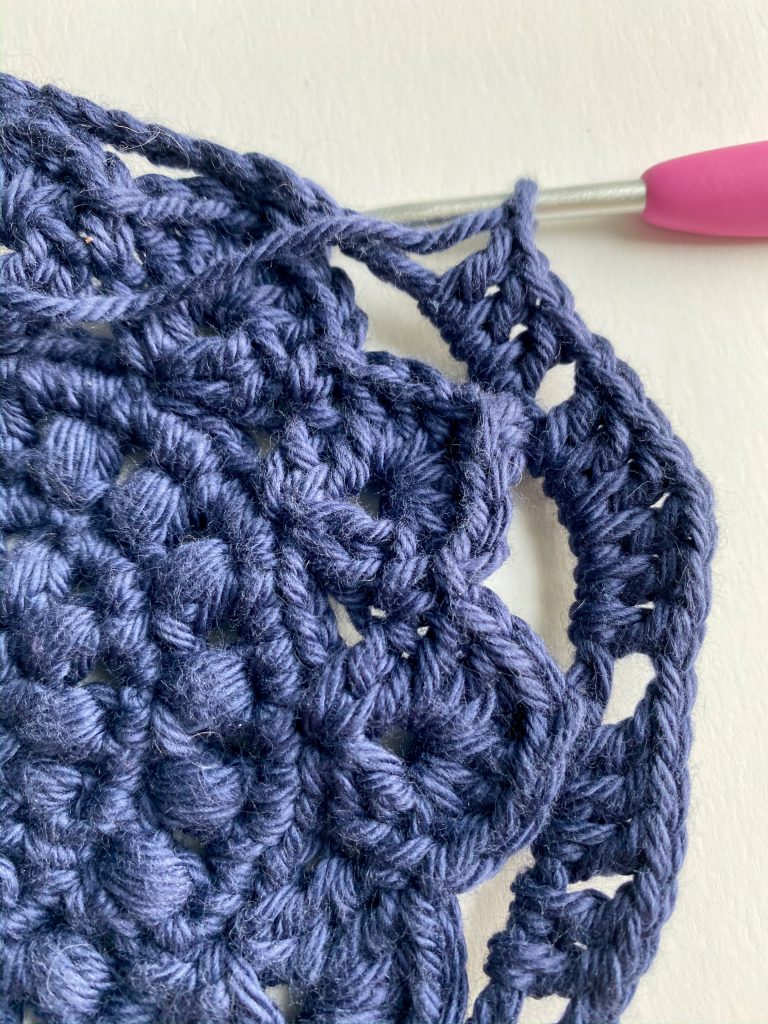
In the next CH 1 space, 3 DC. CH 1. In the next CH 1 space, 3 DC. CH 1. In the next CH 1 space, 3 HDC. CH 1. In the next CH 1 space, 3 HDC. CH 1. In the next CH 1 space, 3 HDC. CH 1. In the next CH 1 space, 3 DC. CH 1. In the next CH 1 space, 3 TRBL, CH 2. 3 TRBL, CH 1. Repeat this around until you have 4 corners. Do not Sl St in the first CH.
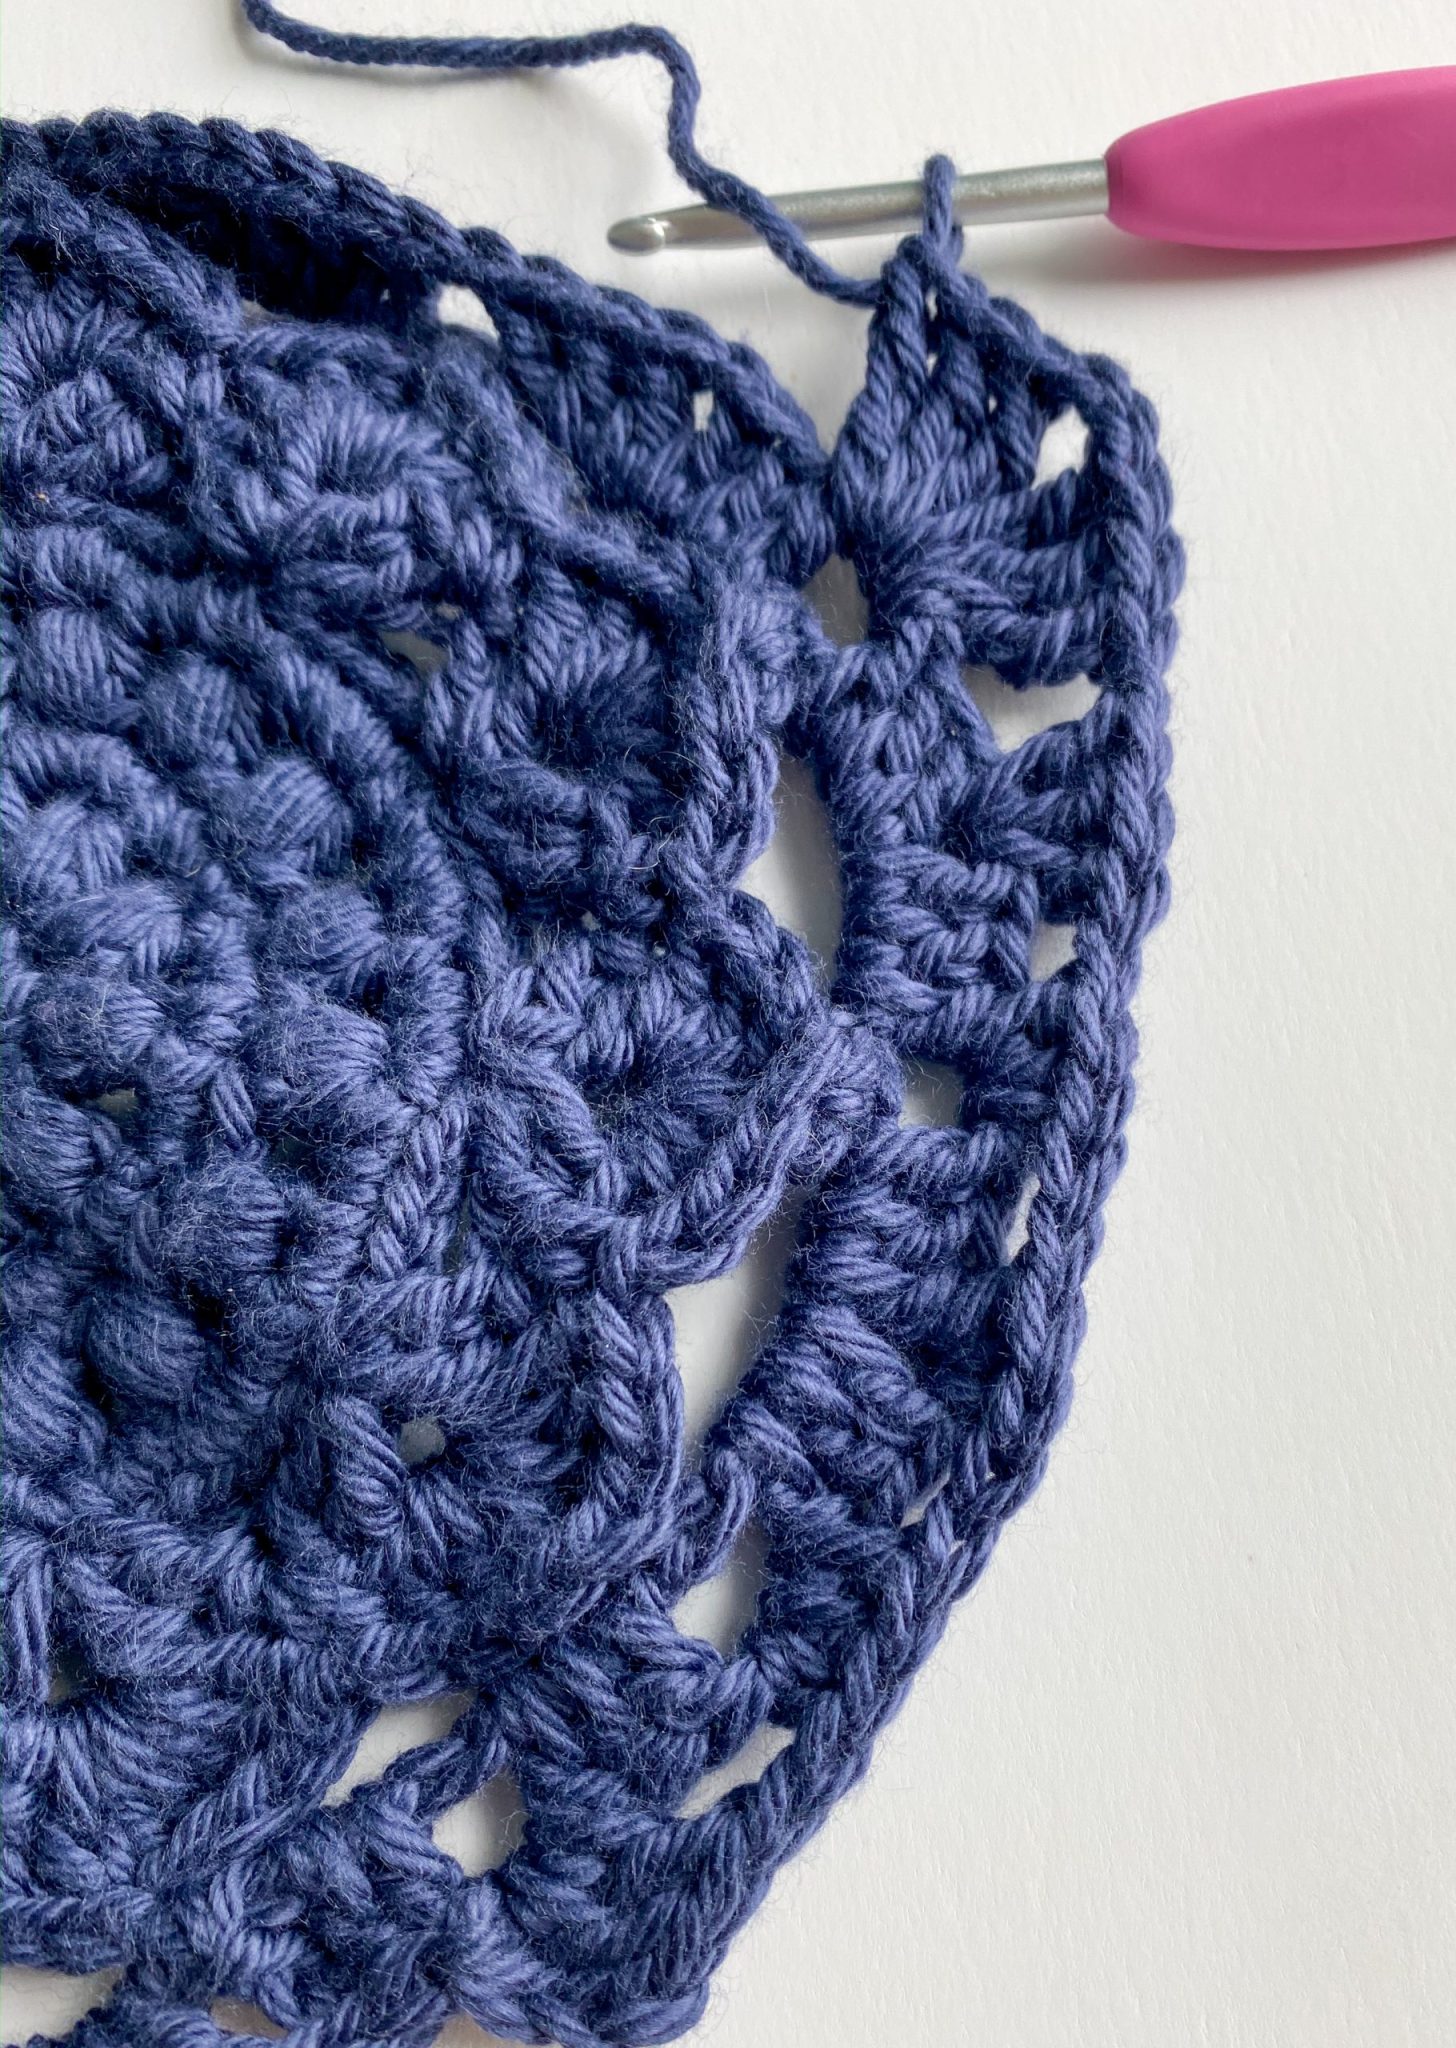
Round 11: SC in the front loops only across the first 3 DC. Skip the CH 1. SC in the front loops only across the next 3 HDC. Skip the CH 1. Repeat until reaching the TRBL corners.
SC in front loops only.
SC in the front loops only of the 3 TRBL. In the CH 2 space, SC, CH 2, and SC in the same CH 2 space. This creates a defined corner for the square.
SC in the front loops only across the next 3 TRBL crochet. Repeat this across the round. Sl St in the first SC.
Tie off, leaving a 5” tail and weave in.
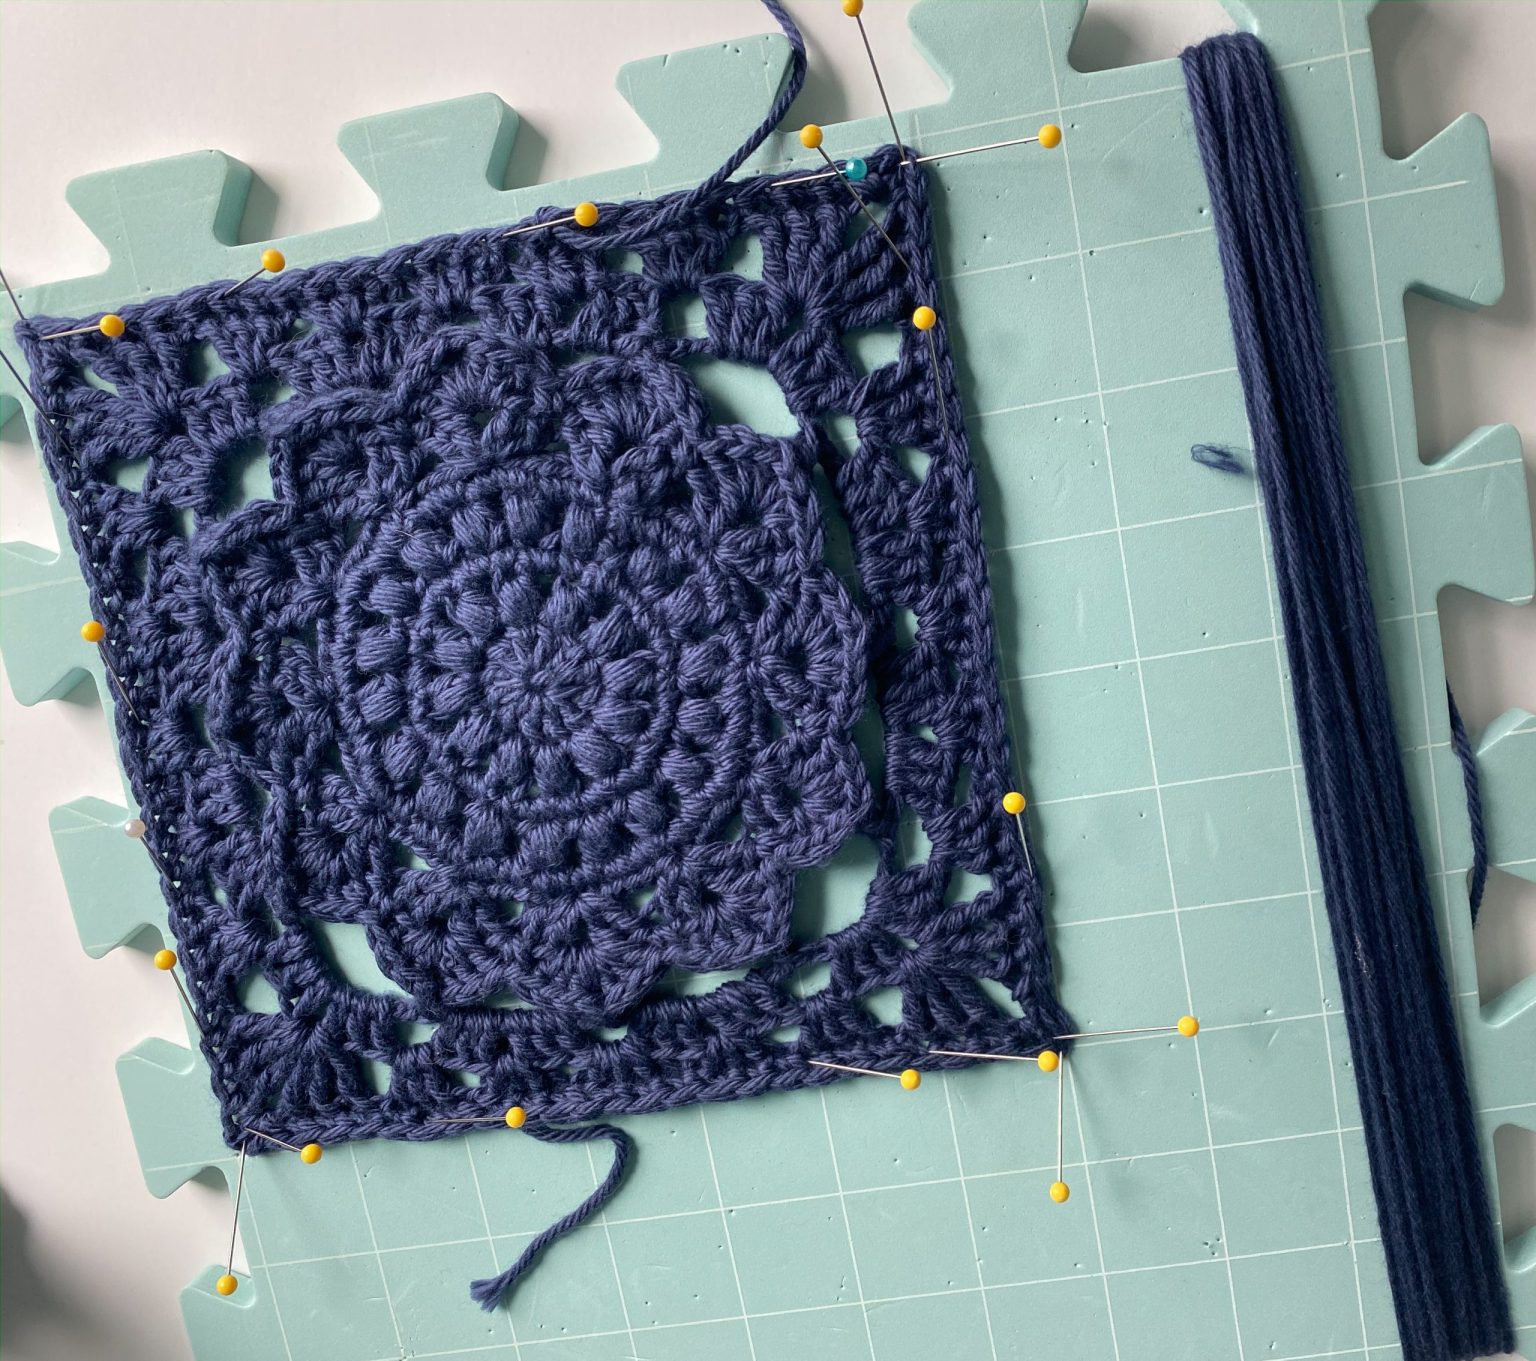
For best results, I always block my mandala. Pictured below is a 12” by 12” blocking mat from Michaels.
Pin your Mandala, so it creates a 7” by 7” square. With water, lightly spray the mandala for the best effect and let it sit for 24 hours. Or, you could set the blow dryer setting on low, until mandala is dry.
Assembling The Crossbody
Since you crocheted Round 11 in the front loops only, the back loops will have a distinct edge on the back of your mandala. This will be extremely important when sewing the mandala onto a crochet panel.
First, place the mandala to create almost a diamond shape onto the panel. Be sure the placement is even. I would recommend straight pinning the mandala onto the panel, so it doesn’t move.
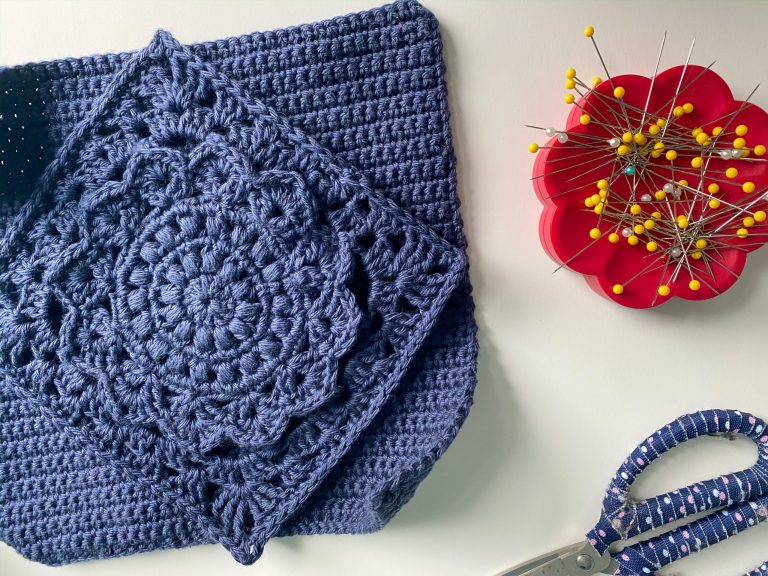
With a yarn needle, sew the mandala using the back loops only onto the crochet panel.
Once the mandala is sewn on to the crochet panel, tie off and weave in the tail.
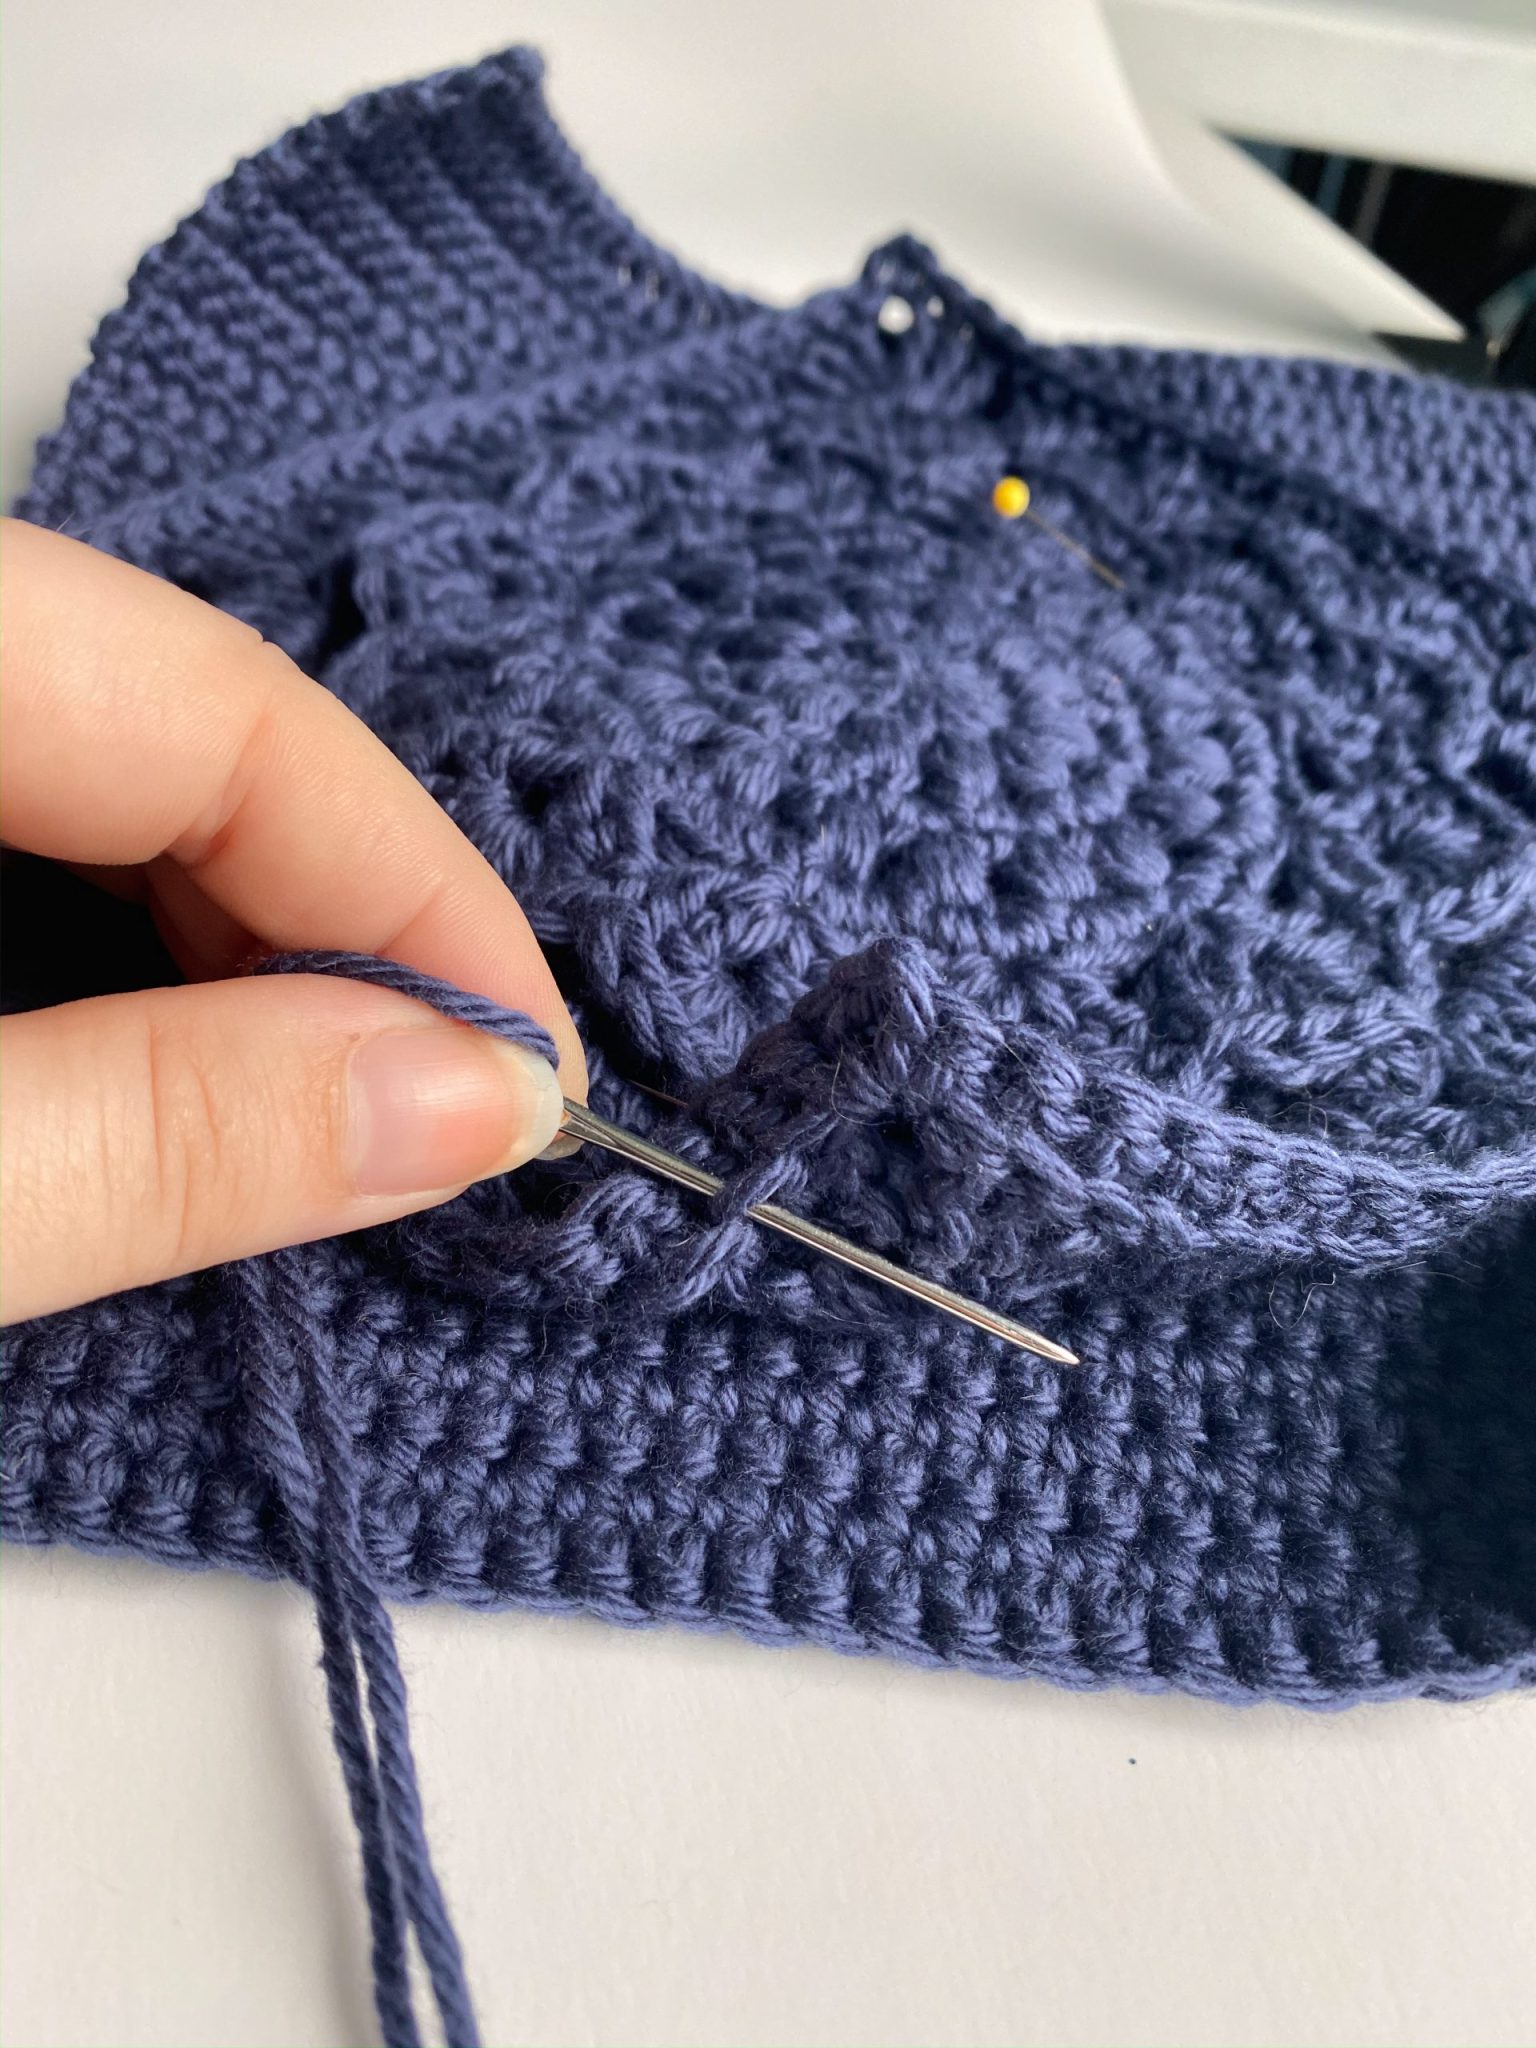
Place the two crochet panels together. With the mandala facing the front, insert 3.75 hook in the top left corner.
SL ST and CH 1.
SC the two sides together down the side. When you reach the bottom corner, add 2 CHs before SC across the bottom of the bag. Repeat in the other corner.
SC the two panels together up the right side of the bag.
Tie off, leaving a 5″ tail. Weave in.
For the closing of the bag, with hand needle, line up on opposite sides. With matching thread, sew on snaps. My recommendation is to sew one or two pairs of snaps, spaced evenly across the mouth of the bag.
The snaps to the right are what I use!
Once you are finished, add as much or as little fringe as you want!