Crochet Floral Mandala: Step-By-Step Tutorial

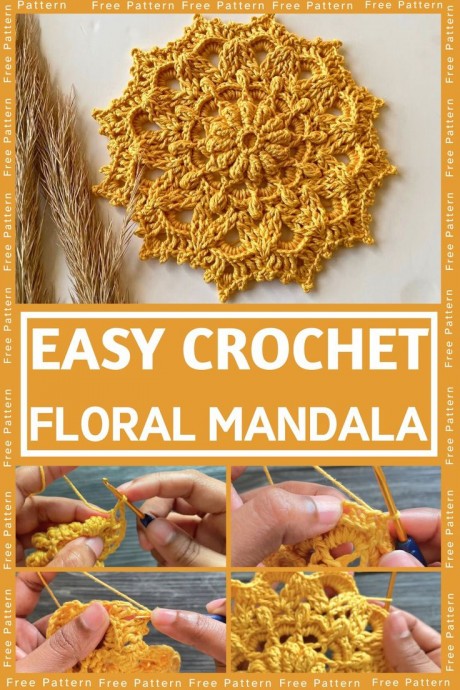
Crochet Floral Mandalas are a delightful fusion of creativity and relaxation. As you dive into the intricate patterns and vibrant colors, you'll find yourself lost in a world of beauty and tranquility. These charming creations not only serve as stunning decor pieces but also as a soothing and meditative activity. Whether you're a seasoned crocheter or just starting out, making a Crochet Floral Mandala is a heartwarming journey filled with joy and artistic fulfillment. Embrace the therapeutic nature of crocheting as you weave together each petal and stitch, creating a masterpiece that radiates positivity and warmth.
Materials and Preparation
To create this stunning floral mandala, gather the following materials:
- Yarn: Cotton yarn (such as Nature Cotton); feel free to substitute with any yarn of your choice, keeping in mind the hook size.
- Crochet Hook: 2.5 mm crochet hook (or as recommended for your chosen yarn).
- Optional Tools: Scissors, tapestry needle (for weaving in ends), stitch markers (optional for tracking rounds).
Abbreviations and Notes
Abbreviations:
- CH: Chain
- SC: Single Crochet
- HDC: Half Double Crochet
- DC: Double Crochet
- TR: Treble Crochet
- SL ST: Slip Stitch
- BPSC: Back Post Single Crochet
- BPDC: Back Post Double Crochet
- FPDC: Front Post Double Crochet
- FPTC: Front Post Treble Crochet
- POP: Popcorn Stitch
- P: Picot
Notes:
This pattern is worked in rounds, not rows. Each round ends with a slip stitch to join to the starting chain.
Familiarity with front post/back post stitches and popcorn stitch is recommended.
Adjust tension to maintain even stitches.
The mandala is worked from the center outward, creating a floral motif.
Gauge, Approximate Size, and Pattern Notes
- Gauge: Gauge is not critical for this project. Adjust your hook size if you want a tighter or looser design.
- Approximate Size: The finished mandala measures approximately 10–12 inches across, depending on your yarn and tension.
- Special Techniques: Learn or review techniques like the Magic Ring, Popcorn Stitch, and Picots if you are unfamiliar.
- Creating a swatch is optional since this is a decorative piece rather than a size-dependent one.
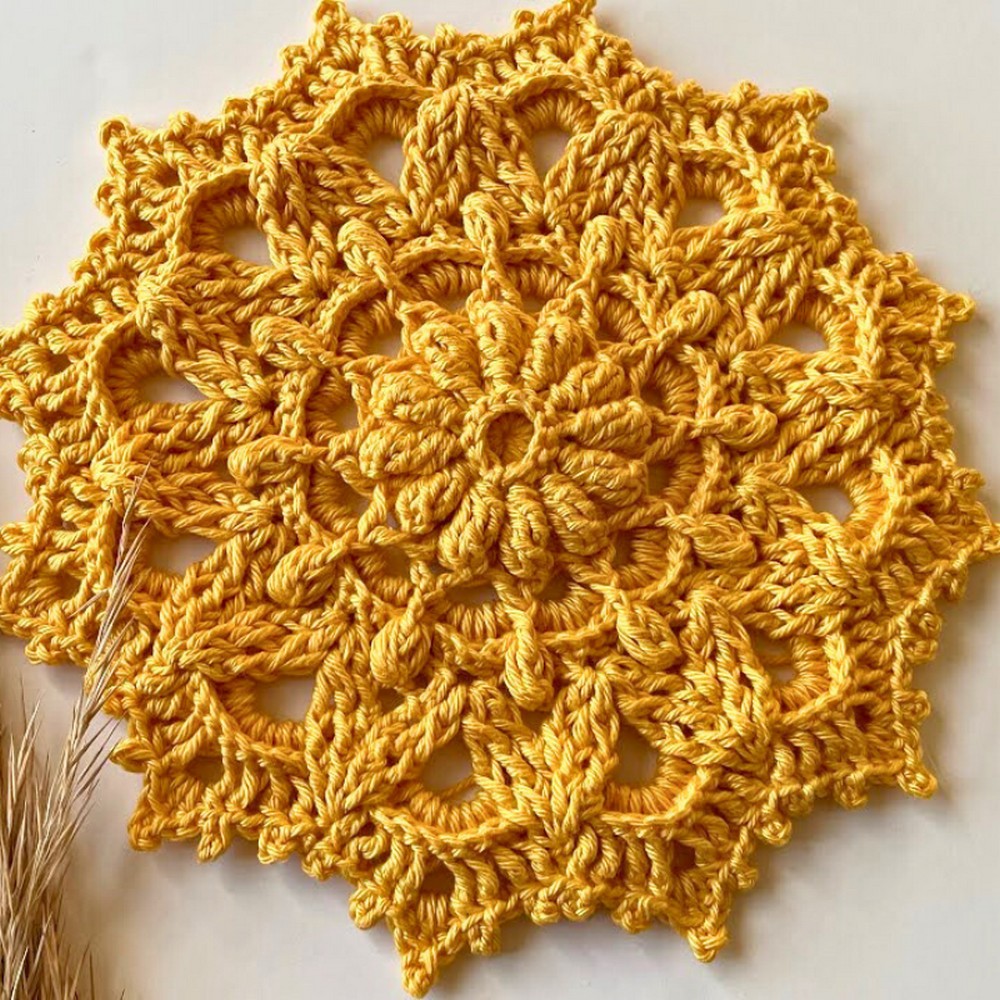
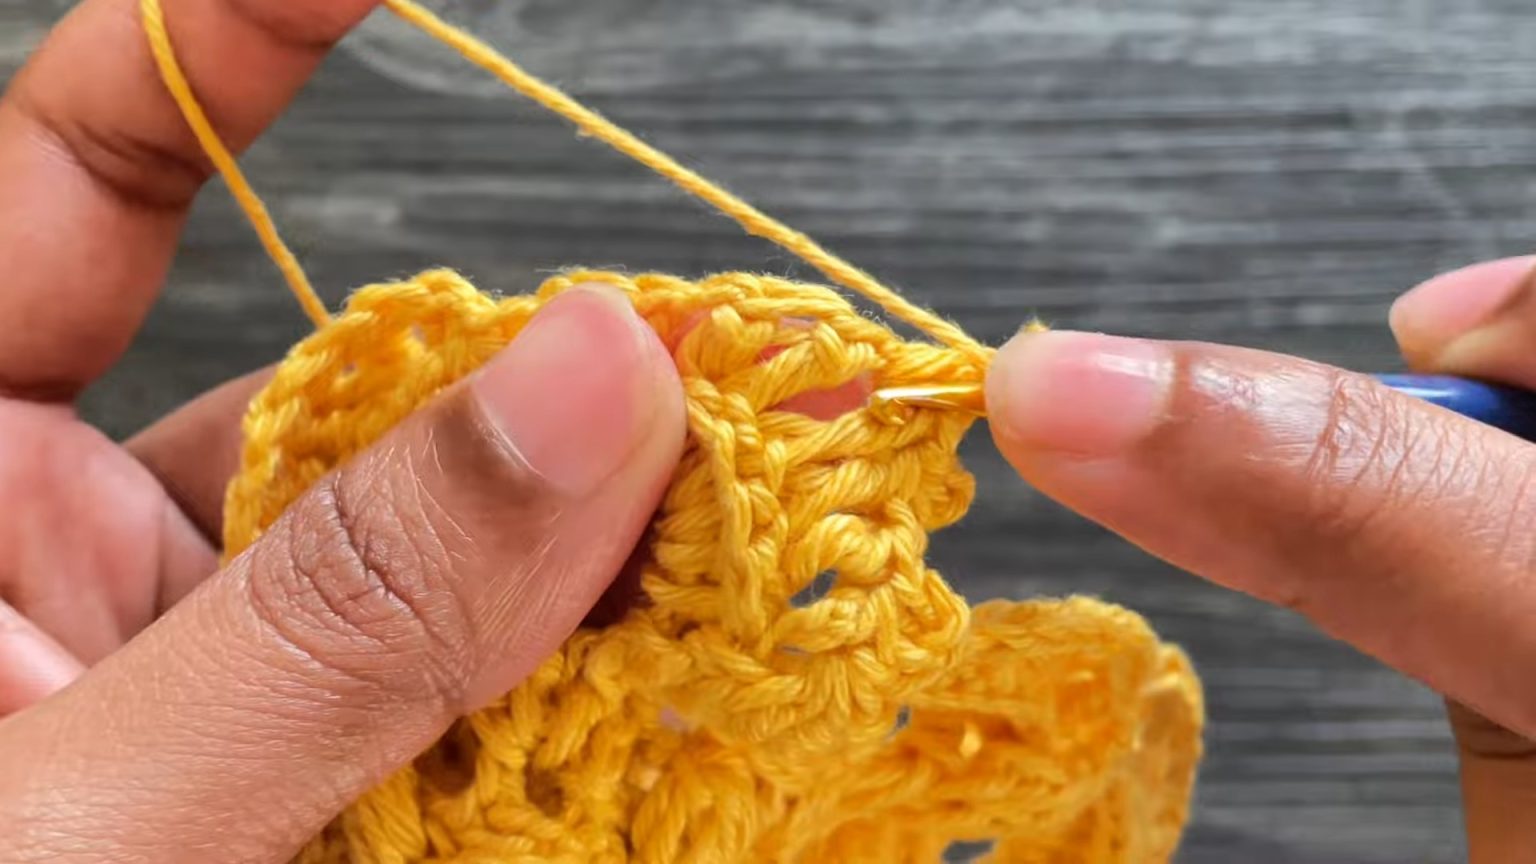
Step-by-Step Pattern
Round 1: Foundation
Create a Magic Ring.
CH 1 to secure the ring, then CH 2 more (counts as the first DC).
Work 11 DC into the ring. (Total: 12 DC including the CH-3 at the beginning.)
Pull the magic ring tight, then SL ST to the 3rd CH of the beginning CH-3 to close the round.
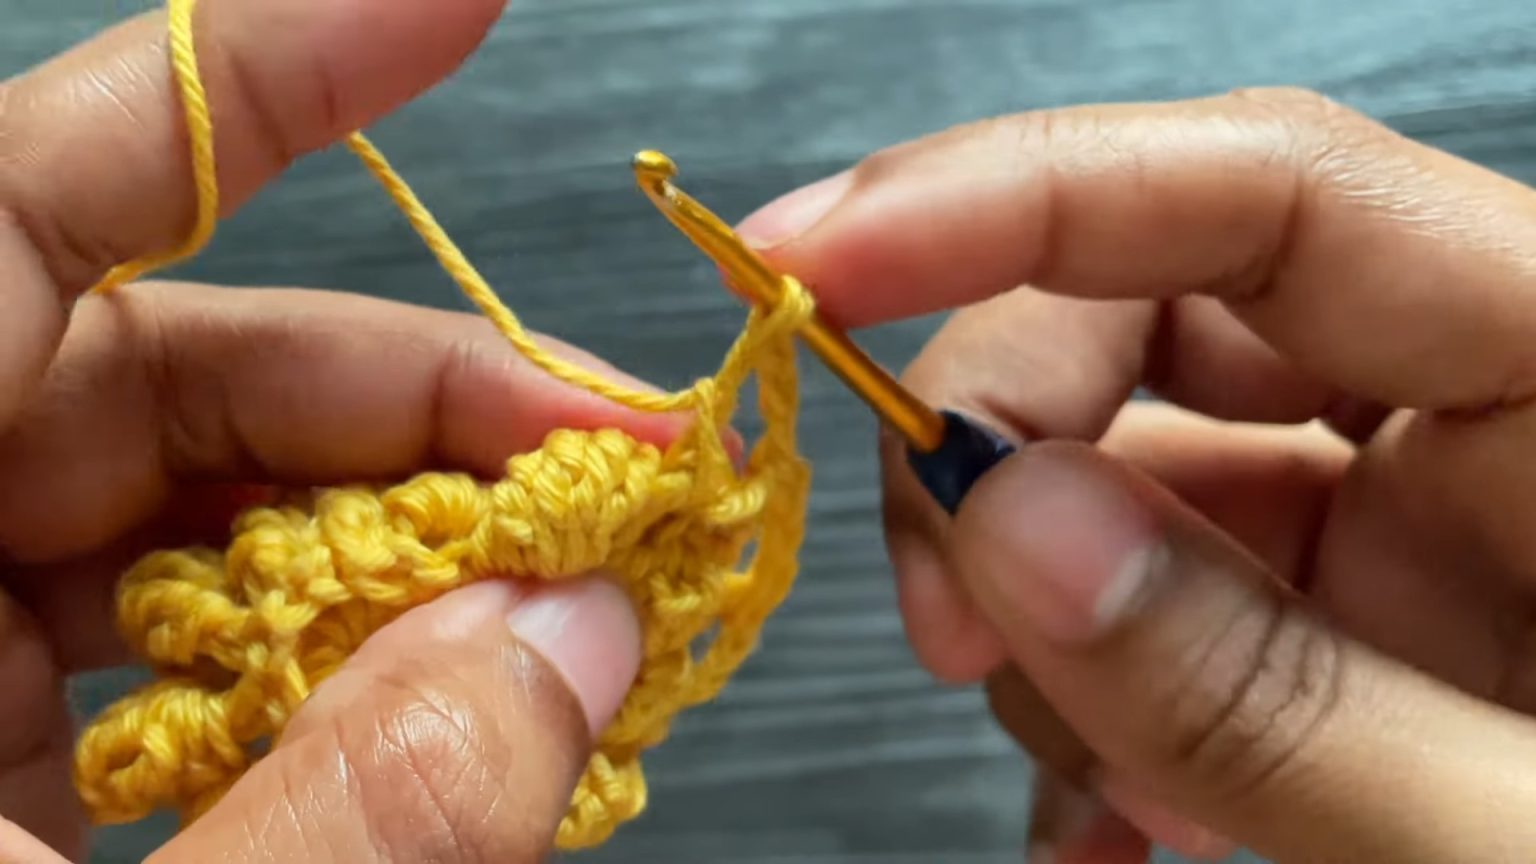
Round 2: Back Post Double Crochet with Chain Spaces
Work a Back Post Slip Stitch (BPSS) into the first CH-3 from the previous round.
CH 4 (counts as a BPDC and CH-1).
Work a Back Post Double Crochet (BPDC) around the next DC, CH 1. Repeat around. (Total: 12 BPDC + 12 CH-1 spaces.)
SL ST to the 3rd CH of the initial CH-4.
Round 3: Popcorn and Double Crochet
SL ST into the first CH-1 space.
CH 4 (counts as a TR). Work 4 TR into the same space.
Create a Popcorn Stitch (POP): Drop the loop from the hook, insert the hook into the top of the 5th TR, grab the dropped loop, and pull through.
CH 1, then work a DC into the next CH-1 space.
CH 1, work 5 TR into the next CH-1 space, make a POP, CH 1, DC in the next CH-1 space. Repeat around.
After completing 12 POPs, SL ST into the 3rd CH of the starting CH-4 to close the round.
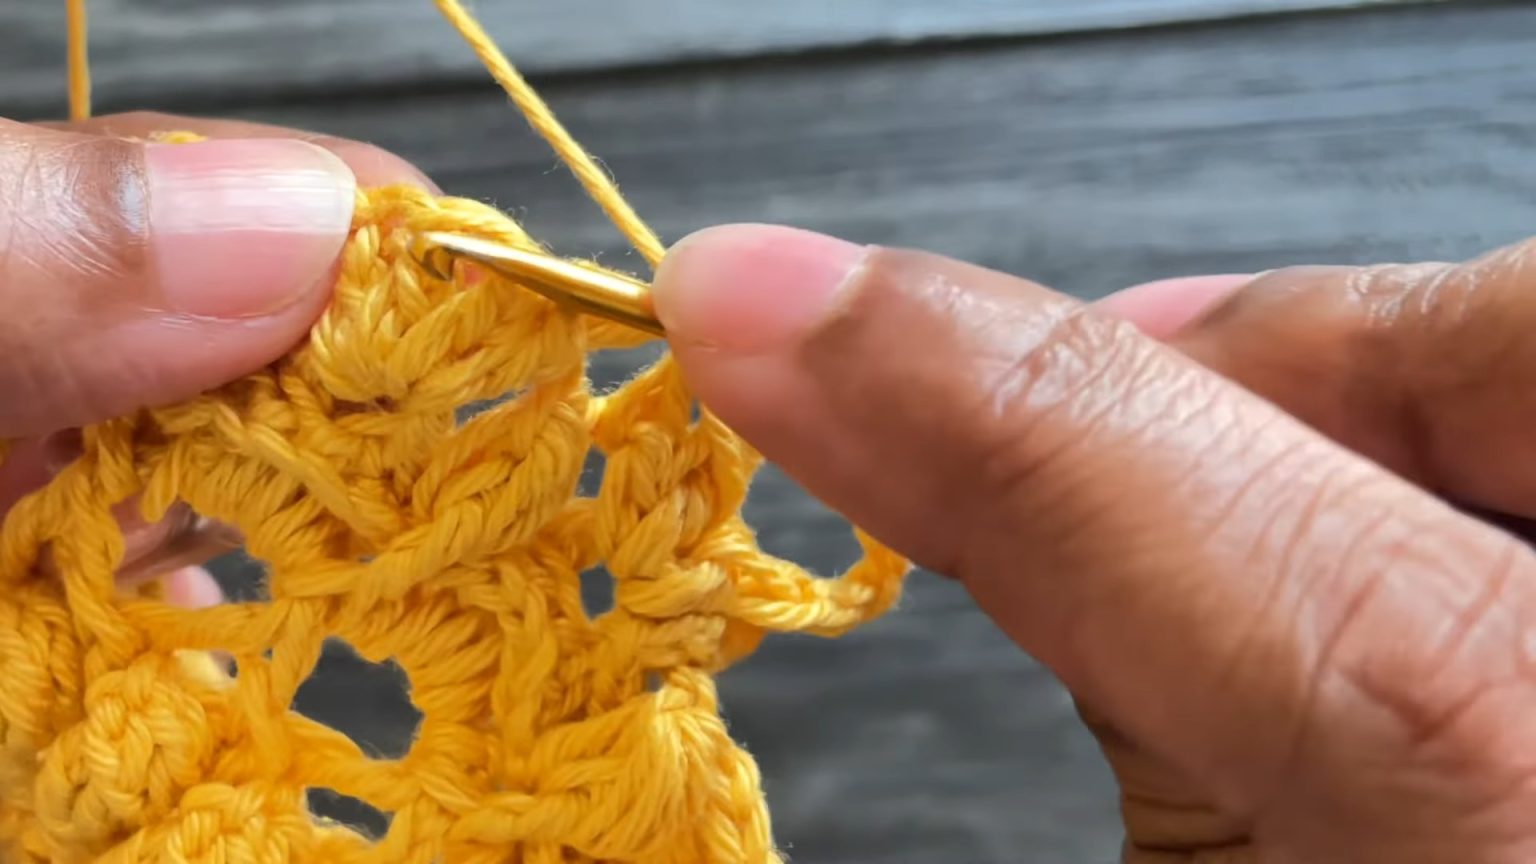
Round 4: Front Post Double Crochet Clusters
SL ST into the next CH-1 space.
CH 3 (counts as the first DC cluster). Work a DC cluster across the next two DCs by starting a FPDC on each but not completing them before pulling through all loops together.
CH 4. Work another FPDC cluster into the same spaces.
CH 4, work FPDC clusters into the same and next DCs. Repeat around.
End with SL ST into the 3rd CH of the initial CH-3.
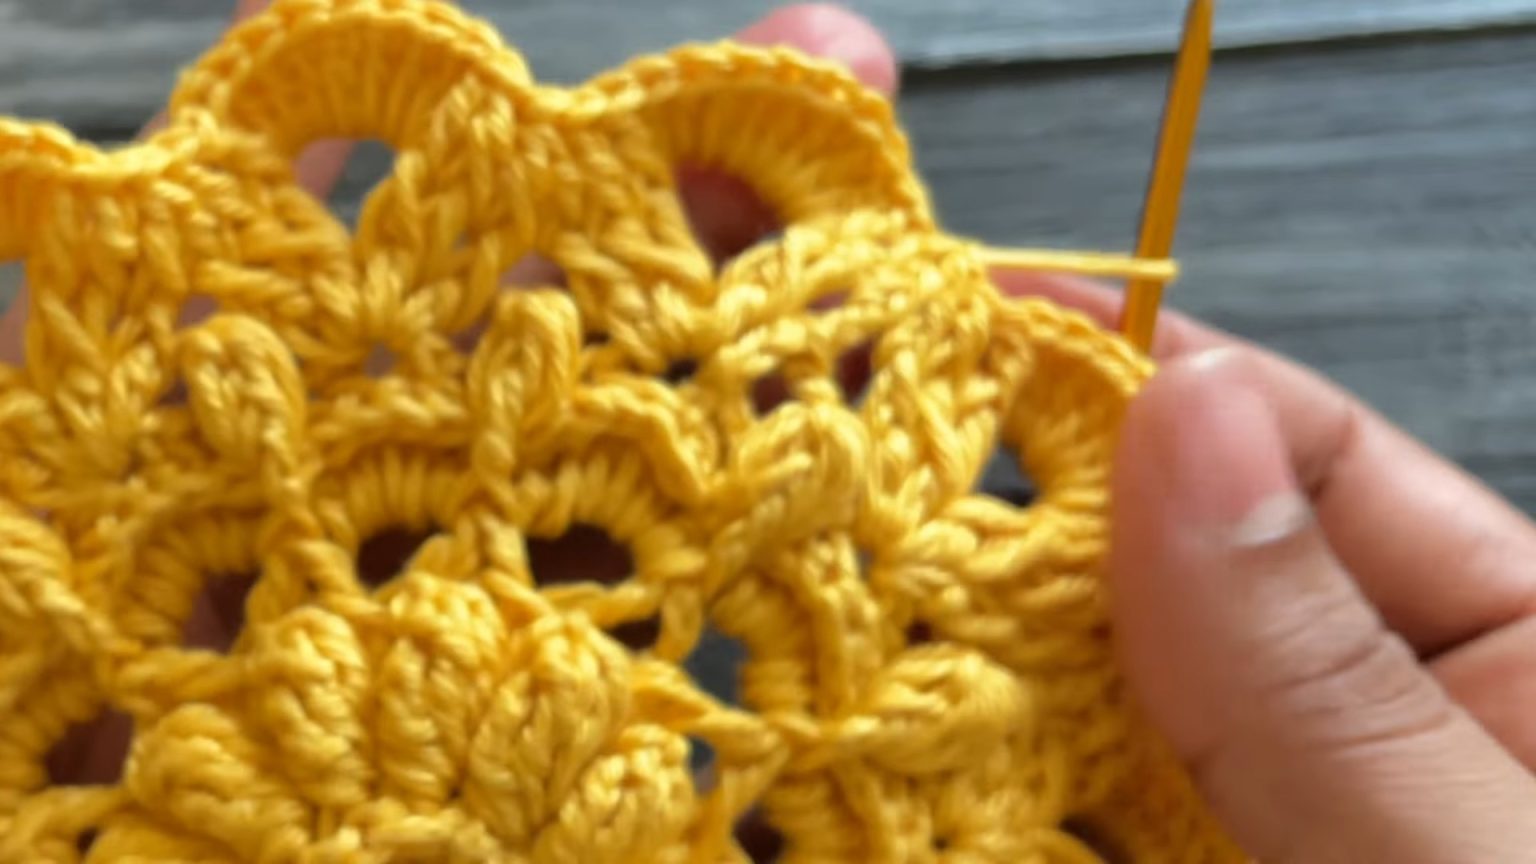
Round 5: Rows of Six Double Crochets
SL ST into the CH-4 space.
CH 3 (counts as a DC) and work 5 DC into the same space. (Total: 6 DC in each CH-4 space.)
Work 6 DC in the next CH-4 space. Repeat around.
SL ST into the 3rd CH of the starting CH-3.
Round 6: Creating Treble Crochet Accents
Work Back Post Single Crochets (BPSC) into the stitches from the previous round, separated by CH-2.
Work a Front Post Treble Crochet (FPTC) into the DC clusters from Round 4 to create accent points.
Continue this pattern around.
Round 7: Adding Puff Stitches
CH 3 (counts as a DC). Work 3 more DC into the CH-2 spaces from the previous row.
Work a Puff Stitch over FPTC points from the previous row. Secure with CH-2 between puffs.
Continue this pattern around.
Round 8: Final Decorative Edging
Work Front Post Single Crochets (FPSC) into previous row stitches for a raised effect.
Create Picots (P) along the edging for a decorative scallop. For every 4th stitch, work a half-circle shape by creating a combination of HDCs and DCs with a single Picot at the top.
Final Steps
Slip stitch into the first stitch to close the mandala.
CH 1 and fasten off yarn. Use the tapestry needle to weave in ends.