Crochet Mouse Amigurumi Guide

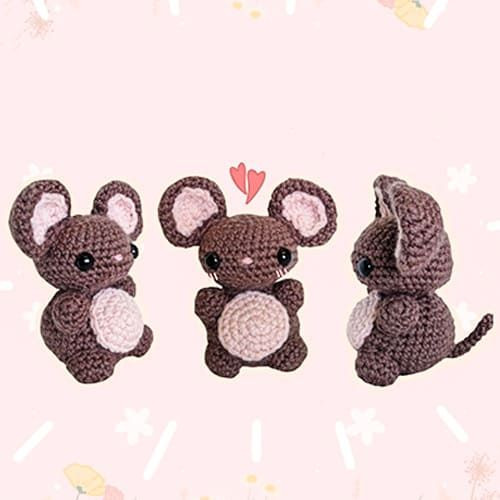
Crafting a little Crochet Mouse Amigurumi can bring so much joy to your day! These adorable creations are not just handmade toys; they are tiny, cuddly companions waiting to brighten up your space. Crocheting a Mouse Amigurumi allows you to unleash your creativity and add a personal touch to your crafts. With their charming details and sweet expressions, these little mice are sure to make everyone smile. So grab your crochet hook and colorful yarn, and get ready to create your own lovable Crochet Mouse Amigurumi that will bring warmth and cuteness to your home!
Materials
- Yarn size 4
- Crochet hook size: E/4-3.5 mm
- Stuffing
- Darning/yarning/tapestry needle
- 12 mm safety eyes
Abbreviations
- Mr: Magic ring
- Sc: Single crochet
- Inc: Increase
- Dec: Decrease
- Dc: Double crochet
Head
- Rnd 1: 8 sc in MR (8)
- Rnd 2: 8 inc (16)
- Rnd 3: (sc, inc)*8 (24)
- Rnd 4: (2sc, inc)*8 (32)
- Rnd 5-7: sc in each st (32)
- Rnd 8: (sc3, inc)*8 (40)
- Rnd 9: sc in each st (40)
- Rnd 10: (4sc, inc)*8 (48)
- Rnd 11: (4sc, dec)*8 (40)
- Rnd 12: (3sc, dec)*8 (32)
- Rnd 13: (2sc, dec)*8 (24)
- Rnd 14: (1sc, dec)*8 (16)
Fasten off. There is no need to close. Place safety eyes between rnd 9-10 with 8 sts apart.
Embroider nose between rounds 9-10. Stuff the head.
Body
- Rnd 1: 6 sc in MR (6)
- Rnd 2: 6 inc (12)
- Rnd 3: (sc, inc)*6 (18)
- Rnd 4: (2sc, inc)*6 (24)
- Rnd 5: (3sc, inc)*6 (30)
- Rnd 6: (4sc, inc)*6 (36)
- Rnd 7: (5sc, inc)*6 (42)
- Rnd 8-12: sc in each st (42)
- Rnd 13: (5sc, dec)*6 (36)
- Rnd 14: (4sc, dec)*6 (30)
- Rnd 15: (3sc, dec)*6 (24)
- Rnd 16: (2sc, dec)*6 (18)
- Rnd 17-18: sc in each st (18)
Stuff and fasten off, leaving a long tail for sewing.
Ears (Make 2)
- Rnd 1: 6 sc in MR (6)
- Rnd 2: inc in each st (12)
- Rnd 3: sc, inc *6 (18)
- Rnd 4: 2sc, inc *6 (24)
- Rnd 5: 3sc, inc *6 (30)
- Rnd 6-7: sc in each st (30)
- Rnd 8: 3sc, dec (24)
- Rnd 9: 2sc, dec (18)
- Rnd 10: sc, dec (12)
Fasten off leaving a long tail for sewing. There is no need to stuff or close.
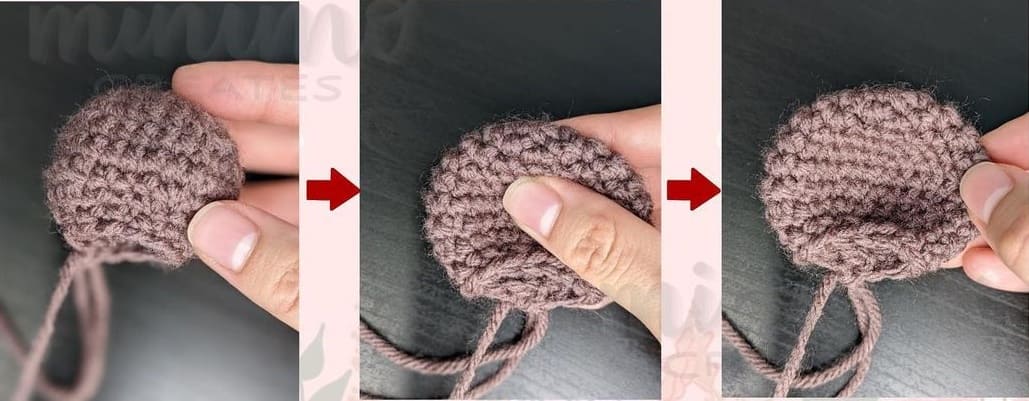
When flattening the ears for assembly, please follow the photos below.
Inner Ear (Make 2)
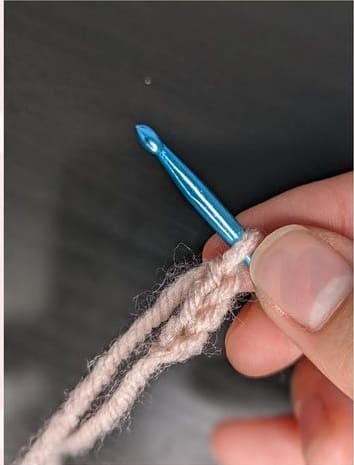
Start with a skip knot.
- Ch 3 (this ch 3 counts as a dc) and in the 3rd ch from the hook, dc 8 into the same st (9)
- Turn your work, sc 9 (9)
Fasten off and leave a long tail for sewing.
After dc 8 into 3rd ch. Turn your work around. String from the slip knot should be on this side. After sc 9.
Arms (Make 2)
- Rnd 1: sc 6 in MR (6)
- Rnd 2: 6 inc (12)
- Rnd 3-4: sc in each st (12)
Fasten off and leave a long tail for sewing. Stuff it before you sew it onto the body.
Legs (Make 2)
- Rnd 1: 8 sc in MR (8)
- Rnd 2: inc in each st (16)
- Rnd 3-4: sc in each st (16)
Fasten off and leave a long tail for sewing. Stuff it before you sew it onto the body.
Belly
- Rnd 1: 6 sc in MR (6)
- Rnd 2: 6 inc (12)
- Rnd 3: (sc, inc)*6 (18)
- Rnd 4: (2sc, inc)*6 (24)
Fasten off and leave a long tail for sewing.
Tail
- Rnd 1: 4 sc in MR (4)
- Rnd 2-10: sc in each st (4)
Fasten off and leave a long tail for sewing. There is no need to stuff.
Assembly
Use the photos given as a guide for where you should sew each piece. Sew the inner ear to the middle of the ear as shown in the pictures. Then sew the ears onto the head, starting from rnd 3 and ending at rnd 8. Sew the arms between rnd 11 and 15, legs between rnd 3 and 7, and belly between the legs and arms roughly between rnd 7 and 15.
Then sew the tail onto the back of the body between rnd 6 and 7.